
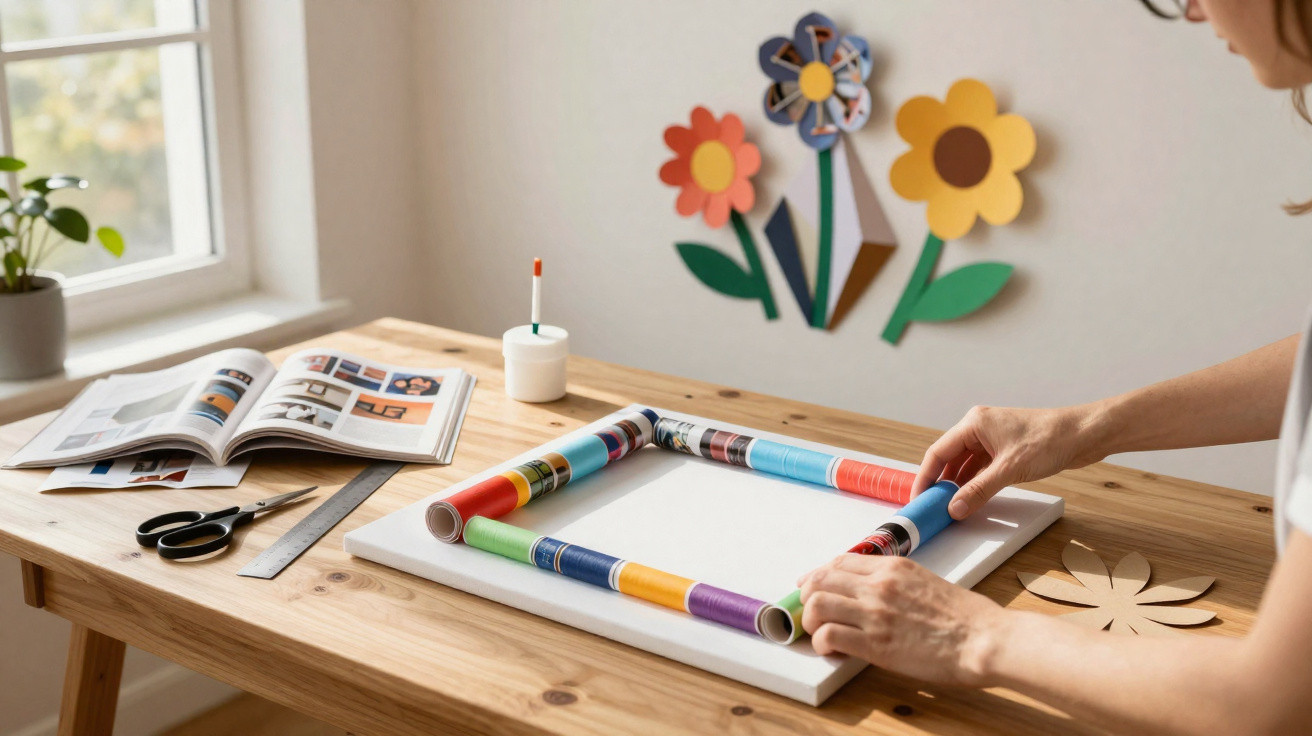
That stack of old magazines taking up room on a shelf, or waiting to go out with the paper recycling, can serve a far more interesting purpose before it is discarded. Using straightforward paper rolling and folding techniques, you can make contemporary geometric wall art and three-dimensional flowers that suit almost any wall, without spending anything beyond the materials already at home.
The environmental value behind a simple craft project
Printed magazines are made from paper treated with industrial inks. When thrown away in large volumes, they add to the amount of municipal solid waste that must be processed, and they do not always reach the proper recycling stream. Creatively repurposing these pages before disposal is a practical way to extend the useful life of the material and lessen the environmental impact of everyday consumption.
The visual effect is equally surprising for anyone unfamiliar with this method. Once rolled and cut into accurate sections, the paper tubes create textured, dimensional geometric patterns reminiscent of handmade pieces sold at design fairs. The key difference is that the base material costs nothing.
- Colourful old magazines: Pages with rich colours and high-quality printing provide greater contrast and depth in the finished piece.
- A pencil as a guide: This is essential for rolling the sheets into evenly sized tubes, ensuring the geometric pattern remains regular.
- Cardboard for the base: A sturdy support for gluing the sections in place, which can be reused from boxes or packaging and cut to the preferred size.
- White glue or hot glue: White glue is best for attaching the tubes to the base without staining them; hot glue speeds up the process for those wanting a quicker result.
- Acrylic varnish: Optional, but advisable in humid spaces, as it protects the paper in the finished pieces and greatly improves the decoration's durability.
How to make geometric wall art with magazine tubes
Choose colourful pages with strong colour saturation. Place a pencil along the edge of a sheet and roll the paper tightly around it to make a narrow tube. Secure the end with a small amount of glue so it stays closed, then remove the pencil. Repeat the process until you have enough tubes for the arrangement you have in mind. A medium-sized piece will require at least 50 to 80 tubes.
Using scissors and a ruler, trim the tubes into equal-length sections. Consistency is what keeps the geometric design properly aligned. Start attaching the sections to the cardboard base, arranging them into squares, diamonds, hexagons or whichever shape appeals to you. Pairing pages from different colour palettes produces contrast and visual depth that substantially enhances the finished effect.
How to make three-dimensional flowers for wall decoration
For the flowers, cut circles in several sizes from the most vividly coloured pages. Fold each circle in half, then fold it in half once more to give the petals dimension. Begin by gluing the largest circles in overlapping layers, working down from large to small to build the flower shape. Add a very small rolled paper tube in the middle to form the centre.
Arrangements combining geometric wall art and flowers
Combining both techniques in one piece enhances the overall result.
One particularly effective approach is to cover a cardboard background with geometric paper tubes as a frame, then place the three-dimensional flowers in the centre or at the corners. The contrast between the tubes' geometric texture and the flowers' organic volume creates a sophisticated visual effect that works equally well in a living room, bedroom or home office.
To hang the piece, glue two wooden sticks or a strip of thick cardboard to the back of the artwork, then thread through string or jute twine. Fix a nail to the wall and the piece is ready to display. The final result hardly suggests its original material, especially when the selected pages follow a clearly defined colour palette.
Flowers can be attached straight to the wall with double-sided tape or arranged on a cardboard picture base. Compositions using flowers of different sizes create displays that echo the botanical panels popular in contemporary interiors, but at virtually no cost and with a sustainable focus.
Details that make a difference to the finish
Always work on clean, dry surfaces so that glue does not mark the pages before it has dried. If the decoration will be placed in a particularly humid room, such as a bathroom or utility room, a finishing coat of clear acrylic varnish will protect the paper and extend the piece's life for months or even years. In dry rooms, varnish is optional, although it adds a sheen that brings out the colours.
Selecting the pages is part of the creative process. Pages that are mainly green produce a natural, organic palette. Pages featuring black typography on a white background create a more editorial, contemporary look. Landscape or fashion photographs cut into tubes become an abstract mosaic that retains a connection to the original content, adding a layer of personal meaning that no ready-made product can offer.
Who this project is best suited to
This technique is especially suitable for people wishing to refresh their décor on a limited budget, for teachers and educators exploring creativity and sustainability with pupils, and for anyone with accumulated magazines who does not know what to do with them before disposal. The difficulty level is low, and a small piece can be completed in an afternoon.
Attractive decoration and mindful consumption rarely come together so directly. In this case, the best raw material is already at home, simply waiting for a second life. Share this idea with anyone else who has stacks of unused magazines and would enjoy discovering what can be made from them.

Comments
No comments yet. Be the first to comment!
Leave a Comment