
A cold drink sits forgotten on a wooden table while everyone is laughing in the next room. Thirty minutes later, you pick it up and find a pale ring already imprinted on the surface, like a silent reproach. You wipe it, rub at it and tilt your head beneath the light. The circle stays put.
Suddenly, the table feels like far more than a piece of furniture. It is the item you saved for, discovered on Facebook Marketplace or inherited from your grandparents. Now it carries the mark of one drink set down without a coaster. Your thoughts immediately turn to costly treatments, elaborate DIY fixes or the dreaded prospect of simply living with it.
But what if the answer is already in your kitchen cupboard, beside the salt and flour, waiting quietly to save your wood?
Why water stains on wood happen (and why they feel so personal)
Water stains on wood have a habit of appearing at exactly the wrong moment. Friends are visiting, you have just finished cleaning and the room looks just right - then a stark white ring emerges in the centre of your beautiful oak table. It makes no fuss; it simply sits there, interrupting the look of the entire room.
Those cloudy pale circles are not random. They are small pockets of moisture caught immediately beneath the wood's finish. Although the surface is sealed, it is not indestructible. Hot mugs, damp glasses and dripping vases can all force water through that fragile upper layer. The resulting mark may be small, but it is visible from the doorway every day.
Online, it may be described as “a minor cosmetic issue”. At home, though, it is on the table where you drink Sunday coffee, work from home or eat with your family. That small blemish can begin to feel like a bruise.
A London furniture restorer told me that she regularly encounters the same situation: a customer turns up with photographs of one white ring and an apologetic expression. It may be on a 30-year-old dining table or a new sideboard delivered only the previous week. The feeling behind it is identical. It feels like you’ve failed the furniture somehow.
Practically speaking, the explanation is straightforward. White marks generally indicate moisture trapped in the finish rather than deep within the timber fibres. Dark marks frequently point to older damage, with water having passed beneath the finish and reacted with the wood or metal components below. This distinction is important because it determines whether cupboard remedies are likely to help.
There is some reassurance in knowing this happens to almost everyone. One US household survey suggested that water marks rank among the three “most annoying” imperfections in the home, alongside chipped paint and unexplained scuffs on walls. Put another way, plenty of people are concealing one or two rings beneath a strategically placed plant.
Technically, wooden furniture is in constant exchange with the surrounding air. Wood breathes, humidity rises and falls, and finishes expand and contract on a microscopic level. When a cold glass or hot mug remains in one place, the abrupt change in temperature and trapped condensation can push moisture into the topcoat. That is what creates the cloudy appearance.
The encouraging part is that, when a white stain is relatively fresh, the process can often be reversed. Mild heat, gentle abrasion or an absorbent paste may draw the moisture back out. This is where ordinary cupboard ingredients become useful: they are already designed to absorb, dissolve or polish in the kitchen. Applied thoughtfully to wood, they can act like a miniature spa treatment for your table.
There is also a particular satisfaction in dealing with a furniture emergency without rushing out to the shops. A teaspoon of one ingredient and a pinch of another can bring you closer to a result that resembles professional care rather than blind panic.
Pantry-based methods that actually work on water rings
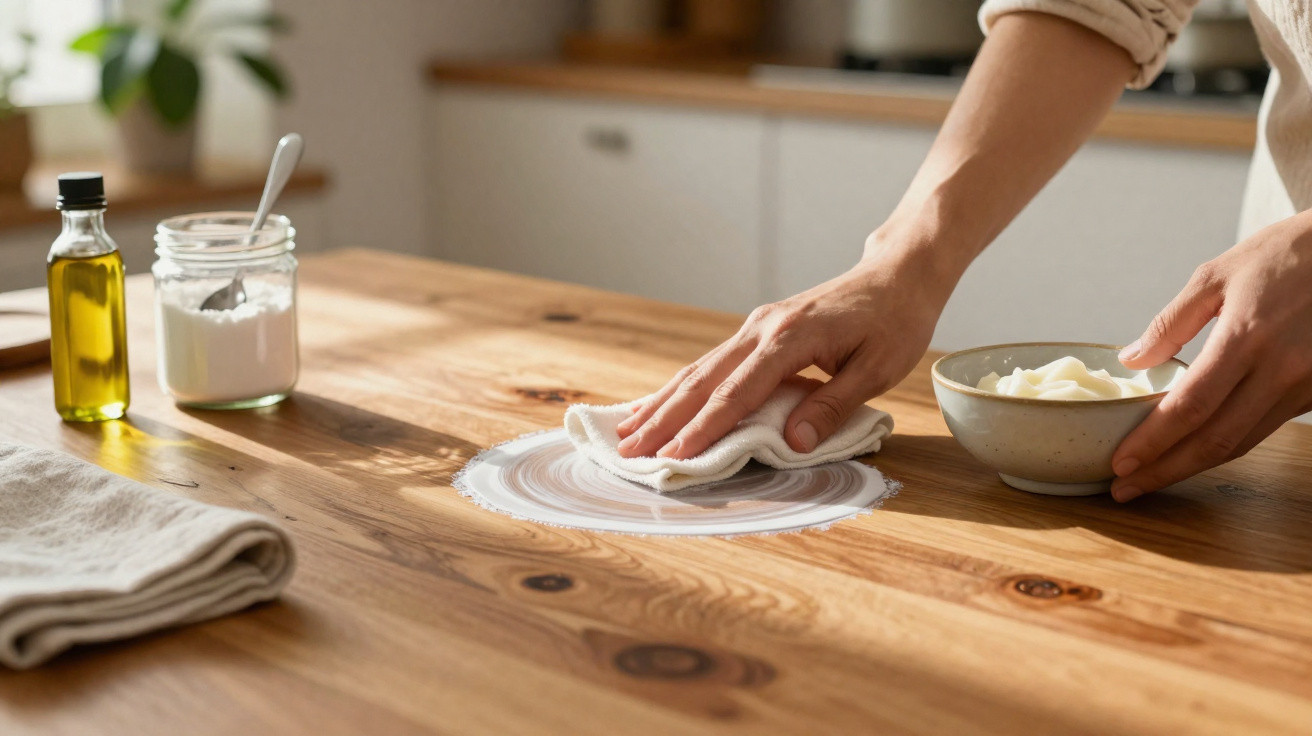
One of the easiest approaches uses two things found in most kitchens: mayonnaise and a soft cloth. It sounds absurd until you watch it work. The fat in mayonnaise can help pull moisture from the finish, while its slight acidity may help the surface relax. Apply a small dab directly to the white ring, spread it gently and leave it alone for a couple of hours.
Afterwards, wipe it away carefully and buff the area using a clean, dry cloth. In many cases, the ring will have faded considerably or disappeared altogether. A further brief application may help if it remains visible. It is not a miracle cure, and it will not restore a table that has sat beneath a leaking window, but it can be remarkably effective for a single glass mark left after dinner the night before.
If the idea of putting mayonnaise on furniture is too much, olive oil mixed with fine salt can offer a similar option. The salt provides light abrasion, while the oil helps to condition the surface.
Bicarbonate of soda and water make another unexpected pairing. When combined into a soft paste, they can lightly polish away pale surface marks without damaging the finish. Put a little paste on the corner of a cloth, then work over the ring in tiny circular movements. Do not scrub or try to win a battle with pressure. Instead, use patient circles and check frequently in the light.
A homeowner in Manchester used this method after a guest left a bottle covered in condensation on her walnut coffee table. Having searched online, she had worked herself into a panic and was convinced the table was permanently ruined. After two minutes of circular rubbing with bicarbonate of soda, the mark began to blur. At five minutes, she stopped, cleaned the area with a damp cloth and looked closely. The stain had not vanished completely, but it had softened enough that only she knew where it was.
Another unexpectedly effective option is ordinary white toothpaste combined with a little bicarbonate of soda. Use a non-gel, non-whitening toothpaste: it is gentle enough to lift haze from the finish without stripping it completely. Apply a very small amount to the ring, rub softly with a cloth for 30–60 seconds, wipe it off and dry the surface thoroughly. It is very easy to overdo this, so using less really is better.
For many people, heat is the method that makes the biggest difference. Place a dry tea towel over the stain, then move a warm - not steaming - iron gently in circles over it for a few seconds. Lift the cloth, inspect the area and repeat only in very short bursts. Some people also use a hairdryer on a low setting, sweeping it gently across the ring from a distance. The purpose is to warm the finish, not to cook it.
With these techniques, reassurance matters as much as the method itself. Standing over a piece of furniture you value with an iron or a bicarbonate paste, it is understandable to worry about making things worse. That is why small steps and repeated checks are essential. Begin by testing a concealed area. Choose the softest cloth available. Keep one clean, slightly damp cloth ready to remove residue and another dry cloth for finishing.
Let's be honest: no one really does this every day. Most of us discover these techniques only when a disastrous ring appears and Google becomes our closest companion at 11 pm. The purpose is not to make you a furniture conservator. It is to give you several safe, cupboard-based options, so that you feel less helpless when it happens.
The most common errors are scrubbing furiously in frustration, reaching for harsh scouring powders or trying too many remedies together. If mayonnaise has not worked, do not immediately follow it with toothpaste, heat and vinegar within the same hour. Wood finishes do not respond well to emotional chaos. Pause between attempts, allow the surface to settle and remember that a faint trace of a ring is often preferable to a patch of bare, overworked wood.
“People panic and attack the stain,” a restorer told me. “But wood responds best when you treat it like skin: gentle, layered care, not a chemical assault.”
It is also worth remembering this simple checklist whenever you turn to the cupboard:
- Begin with the gentlest option, such as mayonnaise or an oil-based treatment, before moving on to abrasives including bicarbonate of soda or toothpaste.
- Test any mixture on an inconspicuous section first, such as the underside of the table or the back of a leg.
- Choose soft, uncoloured cloths to prevent scratches and colour transfer.
- Work in small circles with light pressure and short sessions.
- Finish with a little furniture polish or a drop of oil to make the sheen more even.
This is the quiet, unglamorous part of looking after a home: small tests, a little patience and the occasional unexpected triumph on a Sunday afternoon.
Living with wood means living with stories, not perfection
After spending an evening carefully working mayonnaise or toothpaste into a stubborn white ring, the way you view your furniture can change. The table no longer seems like a flawless showroom piece; it becomes a lived-in surface once more. Laptops rest on it, mugs are put down on it and wine glasses gather in small clusters. It is where life takes place, and life is rarely free from stains.
Naturally, these cupboard methods are practical. They can save money, avoid unnecessary chemicals and provide an immediate feeling of “I’ve got this” when a guest forgets a coaster. Yet they also offer something subtler. They encourage a different relationship with the things you own: repair rather than throw away, experiment rather than panic, and recognise that a slightly uneven sheen after an attempted repair is still far preferable to hiding a table beneath a permanent tablecloth.
Everyone has experienced the moment when one mark feels like a small crisis: a fresh scratch in the floor, a dent in the fridge door or a water ring on the table you promised to protect. When it happens again, remember that the answer may not be at the DIY shop. It could be waiting quietly in the cupboard, between the olive oil and bicarbonate of soda, ready to help reshape the story of that minor domestic mishap.
| Key point | Detail | Why it matters to the reader |
|---|---|---|
| Identify the stain type | White = moisture in the finish; dark = damage to the wood | Helps you judge whether cupboard remedies may work |
| Start with gentle methods | Mayonnaise, oil and salt, or mild heat before abrasives | Reduces the risk of irreversible damage |
| Work slowly and in stages | Small areas, light pressure and discreet tests first | Keeps you in control and confident during the repair |
FAQ:
- Will these pantry methods remove every type of water stain? They are most effective on fresh, white water rings in the finish. Deep, dark stains generally require sanding or professional assistance because the moisture has reached the wood itself.
- Is mayonnaise safe on all wood finishes? It is usually gentle on varnished and sealed surfaces, but always test a tiny hidden area first. Use less on raw or oiled wood, and wipe it away thoroughly after a short period.
- How long should I leave mayo or oil on the stain? Begin with 1–2 hours, then wipe and inspect the mark. For stubborn rings, you may repeat the treatment or leave it overnight, but avoid keeping thick layers in place for days.
- Can I combine baking soda and toothpaste for tougher marks? Yes, although you should use a very small amount and extremely light pressure. Both ingredients are abrasive, so excessive use can dull or thin the finish.
- What if the stain looks worse after my first attempt? Stop and clean the area with a slightly damp cloth, then dry it. Leave the wood for a few hours, as the haze will often settle. If it still appears poor, try a gentler method or seek advice from a professional.



Comments
No comments yet. Be the first to comment!
Leave a Comment