
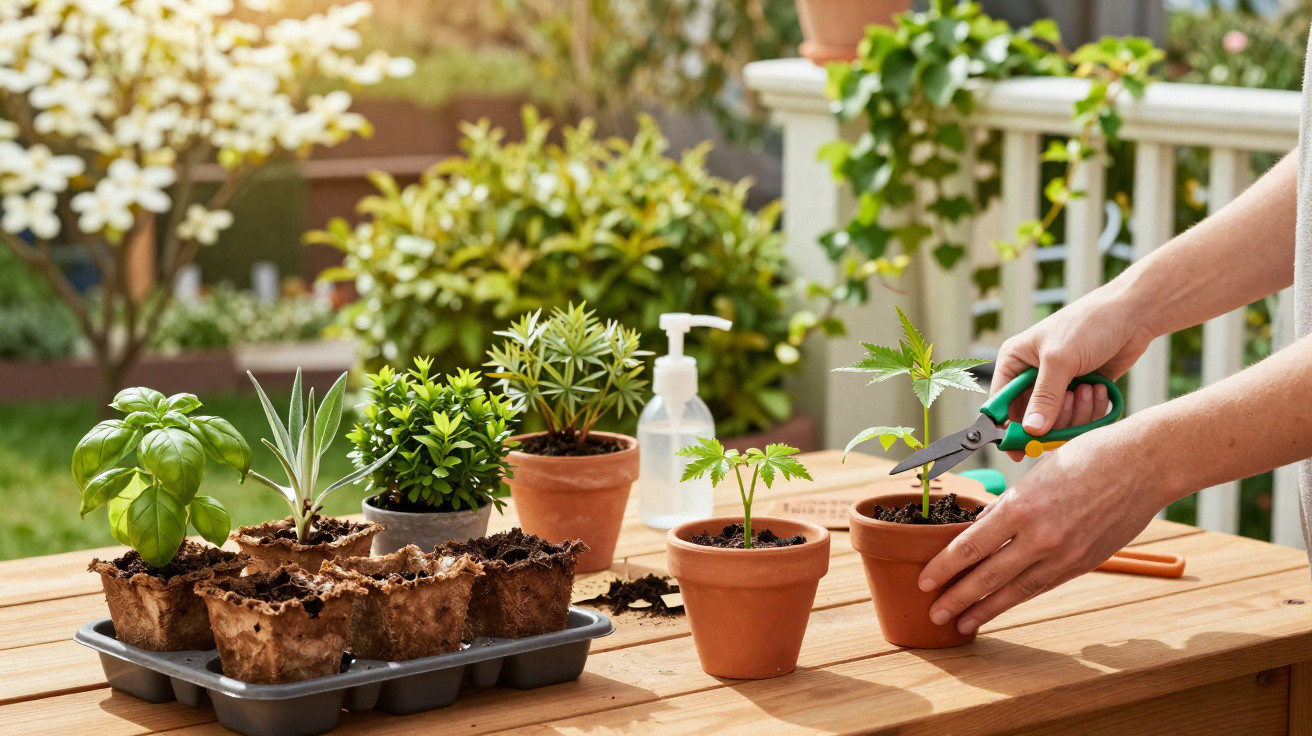
If you want to fill beds, containers and window boxes without wincing at the garden centre till, now is the time to pay attention. April gives amateur gardeners a window in which many popular ornamental and edible plants can be multiplied from cuttings with very little effort – cheaply, quickly and with a remarkably high success rate.
Why April is so valuable for cuttings
In April, the garden visibly shifts into growth mode. Sap begins to rise, daylight hours increase and many plants produce fresh, soft shoots. These young, not-yet-woody pieces are exactly what make ideal cuttings.
“Soft spring wood roots considerably faster than older, hard summer shoots.”
The combination of fresh plant tissue and moderate temperatures offers several advantages:
- Rapid wound healing: Cut surfaces seal quickly, giving germs fewer opportunities.
- Plenty of energy in the shoots: The plant is directing its strength into growth, which is ideal for forming roots.
- Less moisture loss: The air is not yet as hot or dry as it is in high summer.
- A gentle beginning: New roots have weeks to establish before hot weather arrives.
Gardeners who start taking cuttings now will usually have strong young plants by early summer. That is precisely when many other people are only beginning to buy expensive young plants from retailers.
These 7 plants should definitely be propagated in April
The following selection covers almost the entire garden: from balcony planting and aromatic herbs to hedges and a Japanese-style corner. All of them can be propagated very successfully from cuttings in April.
1. Geraniums: a classic for balconies and windowsills
Geraniums – more accurately, pelargoniums – are among the most rewarding plants to grow from cuttings. A single overwintered parent plant can quickly provide dozens of new young plants in spring.
Here is how:
- Cut non-flowering shoots around 8–12 cm long.
- Remove the lower leaves, leaving only a few at the top.
- Allow the cut end to dry for 1–2 hours.
- Insert them into loose, free-draining potting compost and keep it only slightly moist.
After a few weeks, fresh leaves will appear. This shows that the roots are developing and the plant is ready for window boxes and hanging baskets.
2. Japanese maple: delicate specimen plants for shade
Japanese maple is often expensive to buy. Anyone who already has a tree in the garden, or access to one, can try propagating it from cuttings in April.
Points to keep in mind:
- Choose young, freshly leafed shoots measuring 10–15 cm.
- Take off the lower leaves so that nothing rots in the compost.
- Place them in sterile, free-draining potting compost, ideally with a little sand or perlite.
- Keep them in a bright but shaded spot beneath a cover, such as a mini greenhouse or plastic sheet.
Not every cutting will root, but every successful one can save a considerable amount of money, especially with unusual varieties.
3. Basil: turning a kitchen bunch into a long-lasting plant
There is no need to keep buying basil afresh. A few cuttings can turn a supermarket bunch into a whole collection of pots.
It could hardly be simpler:
- Snip off a healthy shoot tip just below a leaf node.
- Put that node into a glass of water.
- Change the water regularly, and keep it somewhere bright but out of scorching sunshine.
Fine roots can appear after roughly a week. The cutting can then be moved into small pots of low-nutrient compost and placed somewhere warm – perfect for a windowsill or sheltered balcony.
4. Red-twig dogwood: free winter colour for the garden
Red-twig dogwood stands out in winter because of its vivid stems. If you would like this burst of colour along your own garden boundary, April is the time to begin with cuttings.
For good results:
- Cut young shoots and remove all the lower leaves.
- Insert them into pots filled with moist, free-draining compost.
- Cover with clear plastic to maintain high humidity.
Allow the young plants to grow on in pots initially, before moving them to their final positions along the boundary or in a herbaceous border.
5. Ornamental sweet potato: cascading foliage from one shoot
Ornamental forms of sweet potato create impressive cascades of leaves in window boxes and hanging baskets during summer. One shoot can soon produce several new plants.
A brief guide:
- Cut off a section of shoot and remove its lower leaves.
- Leave one node sitting in water until roots form.
- Then pot it up and place it in a bright position.
This approach is particularly worthwhile for lush window boxes: rather than buying numerous individual plants, one parent plant in March or April is enough to get started.
6. Ornamental sage: more flowers for bees and borders
Ornamental sage fills herbaceous borders with dense clouds of purple flowers and acts as a magnet for insects. April cuttings can quickly turn one plant into a small group.
The key points are:
- Select sturdy basal shoots growing close to the ground.
- Plant them in a very free-draining mix and avoid waterlogging at all costs.
- Keep them only lightly moist; misting is preferable to watering.
This produces extra plants for sunny parts of the border, making the garden more appealing to solitary bees and bumblebees.
7. Box: an affordable alternative to bought edging
Box hedges and low edging can easily cost several hundred pounds to buy. Cuttings will create the same effect, albeit with a little patience.
To get started:
- Cut a short shoot from the current year’s growth.
- Remove leaves from the lower section.
- Insert it into a sandy, very free-draining mixture.
- Choose a partially shaded position and maintain even moisture.
Box takes its time to root, but in return it provides adaptable, evergreen structure in the garden for years to come.
What you really need for successful spring cuttings
A simple basic kit is enough to begin; expensive specialist sets are unnecessary.
“Clean cutting tools and airy potting compost are often more important than any rooting hormone.”
Basic equipment:
- Sharp, disinfected secateurs or a sharp knife
- Several small pots with drainage holes
- Light potting compost mixed with sand or perlite
- A spray bottle for gentle watering
- A clear cover, freezer bag or mini greenhouse
- Labels showing the plant name and date
A feel for moisture and temperature matters more than costly products: cuttings prefer consistently slightly moist, rather than sodden, conditions, and temperatures of 15–22°C rather than oppressive heat.
The most common mistakes when growing cuttings
The same propagation setbacks occur repeatedly in gardens. Knowing these pitfalls substantially improves your success rate.
Typical stumbling blocks include:
- Taking flowering shoots: The plant directs its energy into flowers rather than roots.
- Using compost that is too heavy and wet: A lack of oxygen causes the base to rot quickly.
- Placing cuttings in full sun beneath plastic: The shoots overheat and the leaves can effectively burn.
- Checking too often: Cuttings are pulled up out of impatience, tearing off their roots.
Choosing partially shaded positions, airy compost and restrained watering instead will prevent plenty of frustration – and mean far fewer lost plants.
How long the April window really remains open
The opportunity to take soft spring cuttings is limited. It varies somewhat according to region and weather, but as a broad guide, conditions are favourable from early April until around early May.
After that, many shoots become more woody and temperatures rise noticeably. Cuttings from harder wood can still work, but they need different techniques and significantly more patience. Anyone wanting to expand their garden quickly and economically should therefore make the most of these spring weeks.
Practical tips for everyday gardening and planning
Even with limited time, the process can be organised effectively. For example, inspect and label the parent plants one evening, take the cuttings the following day, then add labels on the third day and plan their locations in the garden or on the balcony.
It can also help to make a short list of where each plant is intended to go:
| Plant | Suitable position | Typical use |
|---|---|---|
| Geranium | Sun to partial shade | Window boxes, hanging baskets |
| Basil | Warm, sheltered from wind | Kitchen windowsill, herb bed |
| Ornamental sage | Sunny, free-draining soil | Herbaceous border, insect magnet |
| Box | Partial shade, humus-rich soil | Edging, small hedges |
This keeps everything clear and helps you place new young plants purposefully later, rather than scattering them randomly around the garden.
Anyone who has seen a whole stock of sturdy plants grow from just a few cut shoots will look at their garden differently. Suddenly, every healthy shoot becomes a kind of “green start-up capital”, and the garden bed becomes a small plant workshop – without an empty wallet after visiting the garden centre.





Comments
No comments yet. Be the first to comment!
Leave a Comment