
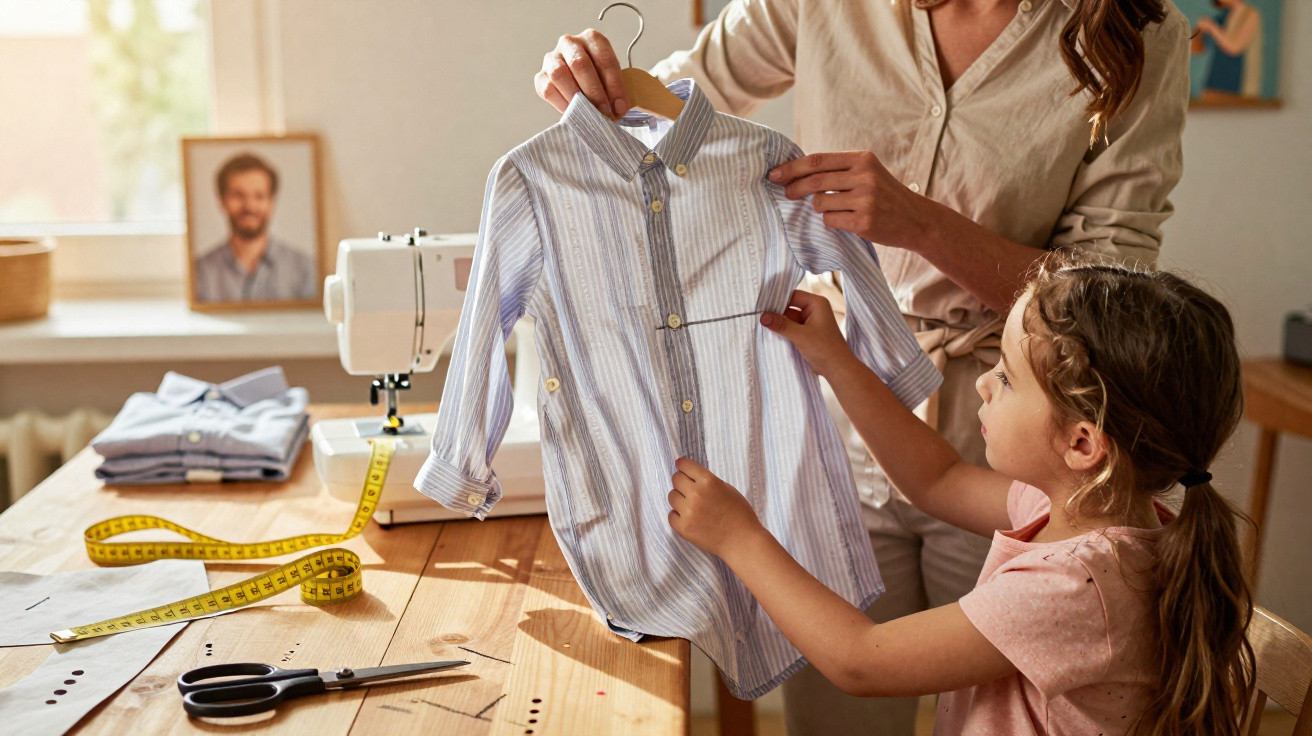
That stretched office shirt still hanging in the wardrobe may look as though it belongs in the textile recycling bin. Not so fast: it could become your child’s new favourite dress, requiring no newly bought fabric, just plenty of creativity and a genuinely practical approach to sustainability.
Why a men’s shirt is an ideal starting point for a children’s dress
A standard men’s shirt in size L or XL provides roughly 1.5 to 2 square metres of fabric. At a haberdashery, comparable-quality cotton could easily cost £15 to £25 per metre. Yet this “luxury fabric” is often left unused in a wardrobe – which is precisely where this idea begins.
Cotton fabrics including poplin, Oxford and chambray are closely woven, kind to skin and hard-wearing. They cope with everyday childhood, slides, climbing frames and repeated machine washing without complaint. There is another benefit too: the shirt has already been washed many times, so the fabric has settled and is unlikely to shrink further. Any excess dye will also have washed out long ago.
An old men’s shirt provides free, durable and soft fabric – perfect for children’s dresses made for play.
Upcycling a shirt also makes environmental sense. The textile industry is among the world’s most resource-intensive sectors: water, chemicals and energy have all already gone into that shirt. Continuing to use the garment can measurably reduce the environmental impact of a family wardrobe.
Preparation: what to do before making the first stitch
Before reaching for the scissors, inspect the shirt carefully. Minor flaws are not an issue, but planning the cuts strategically is important.
Checklist for the perfect “upcycled shirt”
- Wash it freshly and press it thoroughly – accurate cutting is only possible on smooth fabric.
- Check for wear: the inside of the collar and the cuffs are usually the affected areas.
- Count the buttons and inspect their condition – they may later be used as decorative details.
- Choose the size carefully: L or XL makes positioning the pattern pieces far easier.
- Examine the fabric type: cotton or a firm linen blend works particularly well.
The button placket is an especially useful feature of the shirt. It is already neatly finished, removing one of the more fiddly sewing tasks: attaching buttonholes accurately. Keeping this section intact saves both time and frustration.
Turning a shirt into a children’s dress: the basic process
For children aged around two to six, one men’s shirt will usually be enough. The back of the shirt offers fabric for the skirt, while the sleeves can be transformed into the bodice.
A broad step-by-step guide
- Lay the shirt flat, fasten the buttons and press it once more.
- Remove the collar and cuffs, cutting close to the seams.
- Carefully unpick the side seams to create one large piece of fabric.
- Place a well-fitting child’s dress or tunic on top to use as a template.
- Trace around it with tailor’s chalk, generously avoiding stains and worn areas.
- Cut out the bodice and skirt separately.
- Sew the bodice shoulder seams, then close the side seams.
- Attach the skirt to the bodice with gentle pleats or gathers.
One smart shortcut saves additional time: use the existing hem at the bottom of the shirt as the finished dress hem. Rather than pressing and stitching a new hem, simply retain that edge. It creates an even curve and saves around 20 minutes of sewing time.
Using the original hem makes you look like a professional – without any extra work.
Design choices: from office shirt to a true one-off
This transformation is not merely a technical task; it is also an opportunity for creativity. Plain office clothing can become a dress full of character.
Button placket at the front or back?
The button placket can remain at the front for a classic look reminiscent of a shirt dress. Alternatively, cut the bodice so that the placket sits at the back. This can make dressing and undressing easier, particularly for younger children.
The curved side splits found on some shirts can create a flowing skirt shape. Pleats look especially lively and cheerful in stripes or checks. Even a pattern that originally seemed “tacky” can often look charming when scaled down for a child.
Small additions with a big impact
Fabric offcuts can quickly be turned into extra details:
- narrow ties for a waist that can adjust as the child grows
- small bows at the shoulders
- short frills at the hem or sleeves
- a matching hairband or Alice band made from the remaining fabric
- a miniature dress for a favourite doll, made from the same scraps
If you preserve the breast pocket while cutting, it can be repositioned on the children’s dress later. It is not only sweet-looking but practical too, holding a tissue or a small treasure found at the playground.
Common questions: fabric, tools and sewing ability
Many people shy away from projects like this because they do not consider themselves “sewing people”. However, a closer look is worthwhile: the transformation is less complicated than it sounds.
Which fabric works best?
Firmly woven cotton is the easiest material to work with. Lightweight poplin, Oxford and chambray cut neatly, fray very little and do not slip as much as drapey blouse fabrics. Linen that is not too loosely woven also works, although it will crease more quickly.
Fine stripes, checks and small all-over prints are ideal because they visually disguise marks and minor inaccuracies. Large prints or bold patterns stand out more and require greater care when positioning the pattern pieces.
Can it be made without a sewing machine?
A sewing machine makes the job considerably faster, but the transformation can certainly be done by hand. You will need closely spaced running stitches and strong thread. Anyone wishing to test the technique first can practise their first seams on an old, unimportant shirt.
| Option | Advantage | Disadvantage |
|---|---|---|
| Sewing machine | quick, even seams, very durable | requires a machine and some practice guiding the fabric |
| Hand sewing | flexible, can be done anywhere, quiet | time-consuming; requires patience and neat stitches |
Emotional value: when the dress smells of Dad
The appeal of this project is about more than rescuing fabric. Many children love the idea of wearing “Dad’s shirt”, simply in a different form. It quickly becomes a small family story that can be retold each time they get dressed.
Something that was almost thrown away becomes a keepsake with an everyday purpose.
If they are keen, involve the child in choosing the shirt and allow them to make small decisions about buttons, bows or pockets. This makes it a shared project and creates a natural opportunity to talk about how clothing and resources are used.
Practical tips for longer wear and more variations
To make the effort worthwhile, the dress should fit for as long as possible. Gathered or gently flared designs are a simple solution, giving extra room across the width. Side ties allow the dress to grow with the child for one or two seasons: first as a dress, then as a tunic over leggings.
Once you feel more confident after the first attempt, be bolder with the next shirt: use short straps instead of sleeves, add inset pockets in the side seams, or create small flutter sleeves from the former cuffs. Every project builds confidence, and each unsuccessful stitch teaches you something quickly.
It becomes particularly interesting when several shirts are involved. Two contrasting fabrics can produce striped skirts, two-tone bodices or patchwork details. In this way, a box of old textiles gradually turns into a personal children’s collection – far removed from mass-produced clothing, with a story behind every garment.

Comments
No comments yet. Be the first to comment!
Leave a Comment