
Many people discard clothes or bags far too soon when a zip starts misbehaving. Yet the fault is often confined to one tiny component that can be fixed at home with a simple technique – without a needle, thread or a replacement zip track.
Why zips so often come undone “by themselves”
A conventional zip has two rows of teeth and a slider, also called a zip pull. The slider works rather like a small vice: it presses the teeth tightly together so that they mesh correctly.
Over time, it is this slider that becomes loose. Repeated pulling, snagging or excessive strain can cause its sides to spread slightly. A difference of well below one millimetre is enough to stop the teeth locking firmly together.
The most common cause of “broken” zips is not the tooth track, but a worn slider.
Common signs of this wear include:
- The zip appears to close, but opens again from the bottom shortly afterwards.
- The slider feels loose, wobbles or moves unusually easily.
- The two sides meet unevenly, leaving gaps in certain places.
Tailors and alteration services report that an estimated more than half of all “faulty” zips can be made functional again simply by readjusting the slider. This is where the grandmother’s method comes in.
The grandmother’s zip trick: readjust the slider with pliers
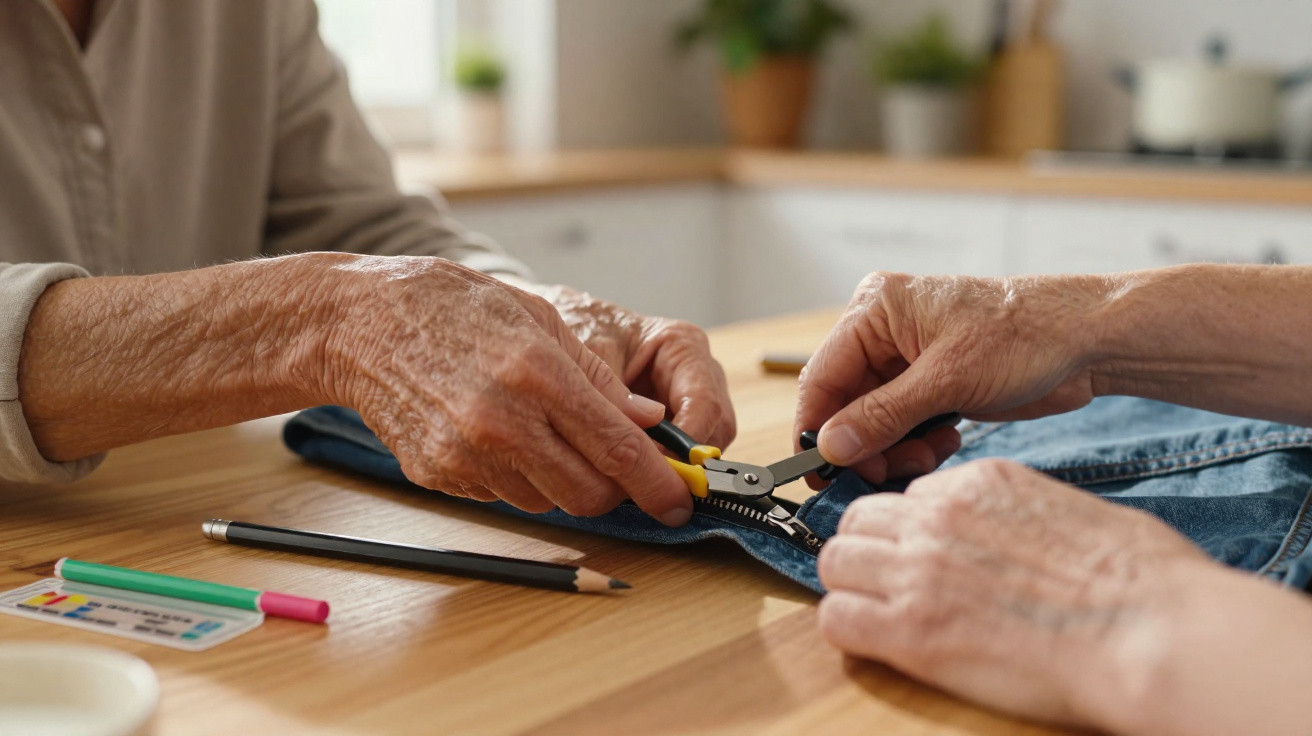
Rather than replacing the whole zip, you carefully narrow the slider itself. All you need is a small pair of flat-nose pliers – a standard tool that many households already keep in a drawer.
Step-by-step instructions for a no-sew repair
Open the zip fully
Pull the slider as far down as possible. Check that no lining fabric or loose thread is trapped between the teeth.Grip the slider in the right place
Position the flat-nose pliers on the slider’s broad side faces – left and right, rather than at the top or bottom. These sides control how firmly the rows of teeth are pressed together.Use only minimal pressure
Squeeze the pliers very gently, working in several tiny adjustments instead of making one forceful squeeze. The aim is to make the slider slightly narrower, not to flatten it.Test it as you go
After each light squeeze, pull the slider up a few centimetres. If the zip still does not hold, repeat with a very small amount of additional pressure.Adjust gradually, never force it
After two or three attempts at most, you should be able to tell whether the teeth are closing properly and no longer springing open. If the slider becomes stiff or catches, you have probably squeezed too hard – carefully widen it again if possible, or replace the slider.
For most zips, the whole job takes no more than three minutes. This minor adjustment is often all that is needed to make coats, jackets or rucksacks suitable for everyday use again.
When the zip still catches after repair
Even a correctly adjusted slider can cause trouble if the teeth do not move smoothly. Dust, old detergent residue or slight distortions can create friction. In this case, an old household remedy found in almost every pencil pot can help.
Lubricate with pencil graphite instead of making a mess with oil
The method is to use dry graphite from a soft pencil as a lubricant. A pencil marked 2B or softer is particularly suitable.
Proceed as follows:
- Pull the slider down so that as many teeth as possible are exposed.
- Rub the pencil lead several times along both rows of teeth.
- Move the slider up and down repeatedly to distribute the graphite.
- Wipe away any excess graphite with a cloth afterwards.
Graphite creates a dry lubricating layer that does not leave a greasy residue or make textiles sticky. If you do not have a suitable pencil to hand, you can use one of these alternatives:
| Aid | How to use it | Special feature |
|---|---|---|
| Bar of soap | Rub it dry over the teeth | Quick, but may become less effective when wet |
| Candle | Run it lightly over the closed zip | Leaves a wax layer; suitable for robust fabrics |
| Glycerine | Apply a tiny amount using a cotton bud | Use very sparingly, otherwise it can look greasy |
| Petroleum jelly | Spread an extremely thin layer on individual areas of the teeth | Use only on dark fabrics, as it is slightly greasy |
Avoid thick oils from the garage or kitchen: they attract dust and fluff, making the zip worse over the long term.
If the bottom stop is missing: a drinking-straw DIY solution
One particular issue arises when the zip’s lower stop has snapped off. The slider can then simply slip off the bottom. Usually, this would mean replacing the entire zip track – an expensive job at a tailor’s.
A simple trick can create a temporary stop that holds surprisingly well:
- Cut a piece of plastic drinking straw approximately three millimetres long.
- Slice the straw open lengthways so it can be spread apart.
- Clip the piece around the zip tapes at the bottom.
- Secure it with a small drop of superglue so that it cannot move.
The tiny drinking-straw stop prevents the slider from slipping off the bottom – an unexpectedly sturdy emergency fix.
This technique is especially useful for casual clothing, rucksacks, wash bags or children’s items. For high-quality wool coats or expensive handbags, however, a professional alteration service is often worthwhile despite this DIY solution.
When a home zip repair reaches its limits
As clever as these grandmother’s tricks are, not every zip can be saved. Further DIY work is not worthwhile in the following situations:
- Several teeth are missing or bent and no longer mesh permanently.
- The fabric tape holding the teeth is torn or badly frayed.
- The slider is broken or can no longer be narrowed securely.
Many modern products have clip-on replacement sliders available. These can be fitted onto the existing tooth track without unpicking the fabric. If you have limited DIY experience, this system is often a better option than using pliers.
Why repairing a zip benefits your wallet and the environment
A new branded coat or rucksack can easily cost a three-figure sum. When its zip fails, it may seem like a total loss. The method described here can substantially extend the life of such items and keep them out of the bin.
It also reduces the need to buy replacements. That saves resources, prevents waste and lowers the carbon footprint of your wardrobe. Textile experts repeatedly point out that many garments are discarded because of minor faults – with the zip near the top of that list.
Everyday practical tips: keeping a zip in good condition for longer
A few straightforward habits can prevent the slider from becoming so loose in the first place:
- Do not put jackets under tension when closing them; briefly pull in your stomach or take the strain off the garment.
- Avoid overloading rucksacks and bags, so the zip is not constantly under tension.
- Close zips before washing to prevent them catching on other textiles.
- Remove debris such as sand or crumbs from the teeth using a soft brush.
Anyone who follows these simple rules and confidently reaches for pliers when needed can avoid many trips to the tailor’s – and save more favourite items than they might first expect.



Comments
No comments yet. Be the first to comment!
Leave a Comment