
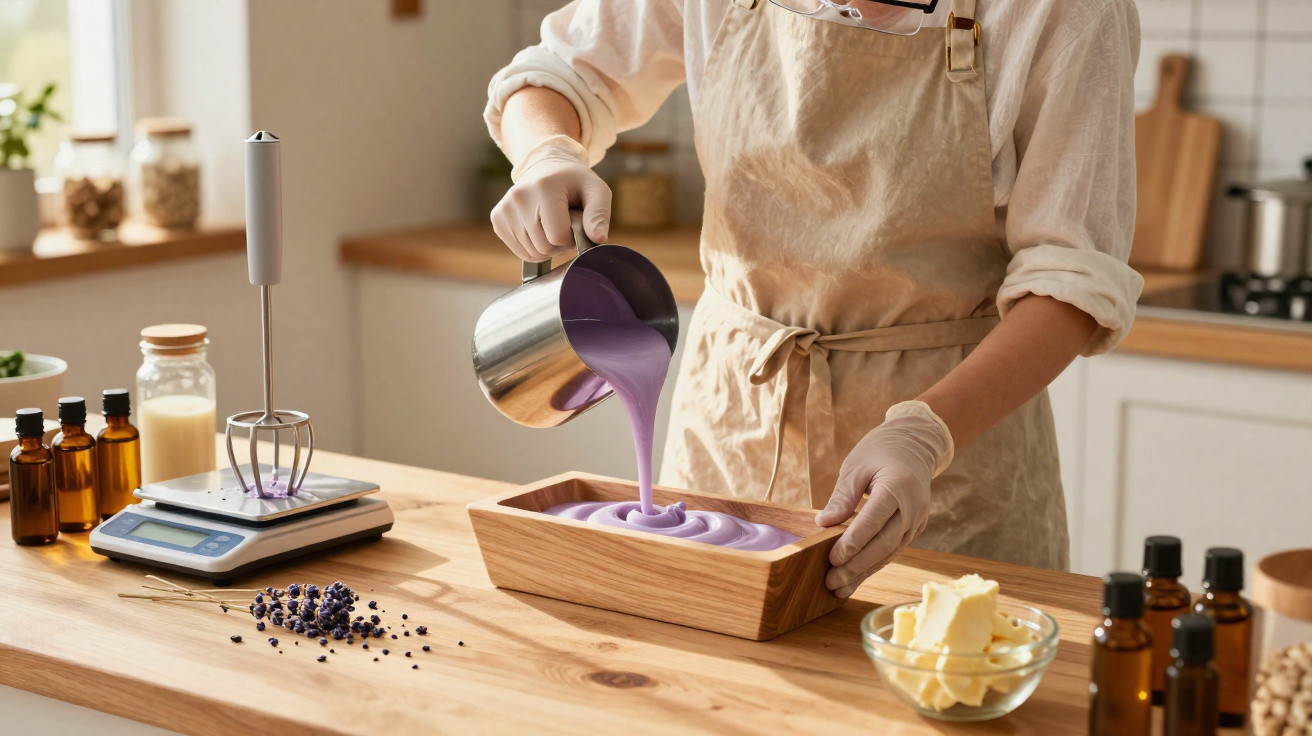
Last Tuesday evening, I was in the soap aisle of the supermarket, looking at a $12 bar of “artisanal” shea butter and lavender soap. I winced at the price, particularly as I knew it would probably last only three weeks. Then I had a thought: why was I spending premium money on something I could make so easily at home? The ingredient list was hardly complicated, and I remembered watching my grandmother make soap as a child. She used lye, of course, which we regarded as a form of dangerous magic at the time. Perhaps it was time to take the mystery out of this age-old craft and find out whether I could make something better than the bars sold by expensive boutiques. Sometimes the best solutions are hiding in plain sight.
The Cold Process Revolution: Why Your Kitchen Can Be a Soap Factory
Cold process soap making turns an ordinary kitchen into a small-scale soap workshop, without industrial costs. Rather than using melt-and-pour bases, this method makes soap from raw oils and lye. The science is more simple than it sounds: combine oils with sodium hydroxide, allow saponification to take place, and you have real soap.
Think about it: that $12 boutique bar likely costs under $2 to produce. One friend worked out that her homemade shea butter lavender bars cost around $1.50 each, packaging included. After making soap for two years, she estimates that she has saved more than $300, while producing bars that outlast shop-bought alternatives.
The real transformation occurs as the soap cures. Excess water gradually evaporates and the soap molecules finish forming. The result is a firmer bar that lasts longer and produces better lather than mass-produced soap. Honestly, after noticing the difference, returning to shop-bought soap is like choosing instant coffee when espresso is available.
A Step-by-Step Route to Soap Making Success
Begin with protective equipment: gloves, goggles and long sleeves are essential when handling lye. Prepare the lye solution outside or somewhere with good ventilation, and always pour lye into water, never water into lye. It will become extremely hot, so take your time. While it cools, melt the oils; coconut oil, olive oil and shea butter provide an excellent foundation.
Beginners frequently hurry the trace stage, when the oils and lye solution become as thick as pudding. Most soap makers know the feeling: nothing appears to be happening, and adding more lye becomes tempting. Do not do it. Follow the recipe quantities exactly. Mixing too little is preferable to mixing too much, as over-mixing can make soap seize before you can say “lavender essential oil.”
“The beauty of cold process soap isn’t just in the final product – it’s in understanding that you’re participating in one of humanity’s oldest crafts, creating something that nourishes both body and soul.”
Essential equipment includes:
- A digital kitchen scale (precision is important)
- An immersion blender (a major help when reaching trace)
- Silicone moulds (which release soap more easily than plastic)
- A thermometer to check temperatures
- Non-reactive containers (glass or stainless steel only)
The Art of Timing and the Science of Patience
Curing transforms a soft, caustic block into a mild and luxurious bar. The 4-6 week wait challenges every soap maker’s patience, but there is no shortcut. The bars need time for moisture to leave and for pH levels to neutralise. It is much like maturing cheese or fermenting wine: quality really does need time.
As it cures, your homemade shea butter and lavender soap develops its own character. Its fragrance softens and becomes deeper, its texture achieves the ideal firmness, and shea butter’s moisturising qualities become more noticeable. Some makers say their curing soap is “breathing”; in truth, there is something quietly meditative about inspecting the bars each week and seeing their change.
Making soap offers a connection with something elemental and fulfilling that a culture built around convenience often overlooks. Each bar is the product of your own hands: beautiful, useful and deeply personal.
| Key point | Detail | Value for the reader |
|---|---|---|
| Cost savings | $1.50 per bar vs $12 store price | 87% cost reduction per bar |
| Quality control | Select precise ingredients and quantities | No mystery chemicals or harsh additives |
| Customisation | Alter fragrance strength and oil ratios | Ideal soap matched to your skin type |
FAQ:
- Is lye dangerous to work with at home? Lye needs care and suitable safety equipment, but it is no more hazardous than oven cleaner or drain opener. Follow the safety procedures and you will be fine.
- How long does homemade soap actually last? Correctly made and cured cold process soap can keep for 12-18 months. Because of its higher oil content, it often lasts months longer than commercial bars.
- Can I substitute ingredients in soap recipes? Soap making is chemistry, so changing ingredients means recalculating the lye quantity. Use proven recipes before you start experimenting.
- Why does my soap need to cure for so long? Curing lets water evaporate and finishes saponification, resulting in a milder, harder bar that lasts longer.
- What if my soap doesn’t reach trace? Continue blending in brief bursts. Certain oil combinations need 15-20 minutes to reach trace, particularly in cooler weather.



Comments
No comments yet. Be the first to comment!
Leave a Comment