
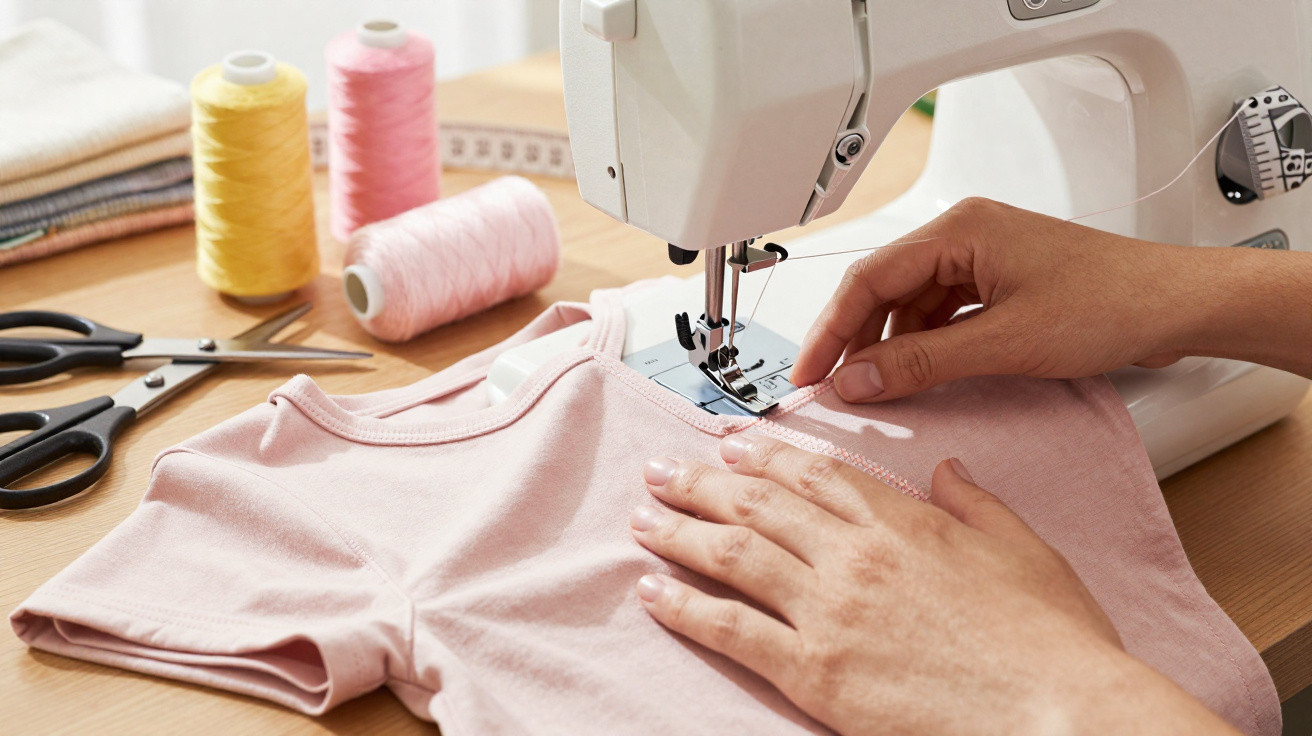
Anyone who sews jersey knows the frustration: the hem looks neat after pressing, yet it ripples after the first fitting or the thread snaps immediately. Shop-bought T-shirts, by contrast, appear flat, stretchy and professionally finished. The difference is often not sewing ability, but an overlooked feature already built into even affordable domestic machines from brands such as Singer, Brother or Pfaff.
Why T-shirt hems so often fail at home
An ordinary T-shirt made from jersey or stretch cotton needs a hem that can stretch with the fabric. A standard straight stitch does the opposite: the thread is rigid, so the seam can burst when the shirt is pulled over the head or form unattractive waves.
Commercially made T-shirts are usually finished on a dedicated machine called a coverstitch machine. It produces two or three parallel lines of stitching on the front and a broad zigzag on the reverse. The result is tidy-looking while retaining flexibility.
The surprising part is that a very similar appearance and level of stretch can be achieved using a standard sewing machine – as long as a frequently ignored accessory is finally put to use.
“The professional ready-to-wear look can be recreated with a simple additional needle that many machines support as standard.”
The overlooked feature: sewing with a twin needle
The twin-needle function uses two upper threads and just one bobbin. From the front, it creates two parallel rows of stitches, spaced roughly two to four millimetres apart. On the reverse, the bobbin thread joins both lines in a zigzag. This zigzag is precisely what gives the hem its essential stretch.
Compared with a simple straight stitch, stretch in jersey is increased considerably, by around one third to one half depending on the material. The hem can stretch without the threads breaking, while still sitting flat.
Many machines already include a concealed second spool pin for this purpose. It may be in the accessories compartment or beneath a flap in the lid. Insert this extra pin, place two spools side by side, and the machine is ready for a twin needle.
How the twin-needle stitch works technically
- Upper thread: Two spools, both guided through the same tension discs
- Bobbin thread: One standard bobbin in the bobbin case
- Front: Two even, parallel lines of stitching
- Reverse: A zigzag bobbin-thread connection between the two lines
- Effect: Mechanical stretch created by the zigzag – ideal for stretch fabrics
Setting up a twin needle for jersey: step by step
Getting started is more straightforward than many people expect. With a little preparation, the finish can look remarkably professional.
1. Choose the right twin needle
The following sizes work well for jersey T-shirts:
- Needle size: 80 or 90, depending on fabric thickness
- Needle spacing: 2.5 mm for subtle stitching, 4 mm for the classic T-shirt look
- Point: Ideally a stretch or jersey needle to prevent runs in the fabric
Important: use only a straight stitch. A zigzag stitch with a twin needle can damage the needles on many machines because the stitch width becomes too wide.
2. Prepare and thread the sewing machine
The procedure is generally similar, whichever model is on the table:
- Insert or unfold the second spool pin.
- Fit two spools of thread, preferably using identical thread.
- Guide both threads together through the usual threading path.
- Separate them immediately before the needle, then thread one through each needle eye.
- Select a straight stitch and increase the stitch length slightly, for example from 2.5 to 3.
For a flat hem, it is worth reducing the upper-thread tension slightly, for instance from setting 4 to 3. This prevents the reverse from pulling in too much and stops the fabric forming a ridge between the two rows of stitching.
3. Test on a fabric scrap
Always test on a scrap of the same fabric before sewing the actual T-shirt. Sew without pulling the material, then check the following:
- Does the front remain smooth?
- Does the hem stay flexible enough when stretched?
- Is nothing pulling together uncomfortably on the reverse?
If a “tunnel” rises between the two lines of stitching, reducing the upper-thread tension further or increasing the stitch length slightly will usually help.
Fine-tuning with specialist thread: the mousse thread trick
Anyone who regularly sews sports tops or highly stretchy materials can make the reverse even softer. Wind a so-called mousse thread onto the bobbin: this is a bulky, lightly fluffy thread. It fills out the inner zigzag more effectively, cushions the seam and improves comfort against the skin.
This type of thread is used by the textile industry for performance clothing and has been tested for the demands of stretch fabrics. It is especially useful on lightweight jerseys, where it helps prevent the hem from becoming heavily wavy after washing.
“Anyone replacing the bobbin thread with mousse thread will notice the difference most in everyday wear: the seam feels less scratchy and keeps its shape for longer.”
When a twin needle or an invisible hem is the right choice
Modern domestic sewing machines often provide another useful option: the invisible hem stitch. It consists of several straight stitches with an occasional small sideways movement. Used with a dedicated presser foot, this tiny stitch catches only one or two threads of the outer fabric.
| Application | Best stitch | Visual effect |
|---|---|---|
| T-shirts, sweatshirts, sports tops | Twin-needle straight stitch | Two visible, parallel rows of stitching; very stretchy |
| Trousers, skirts, dresses in woven fabric | Invisible hem stitch | The seam is almost completely hidden from the outside |
| Fine blouses, suits | Invisible hem stitch or hand sewing | A very subtle finish with barely visible needle marks |
For jersey, the twin needle remains the first choice. It delivers the familiar look of a ready-to-wear hem and withstands the required stretch. The invisible hem is better suited to firm, non-stretch fabrics where a visible line would be unwanted.
Practical tips to prevent rippling and tears
A few routine measures will help keep a new favourite hem looking good over time:
- Always press the hem precisely before sewing, without stretching the fabric lengthways.
- Feed jersey through the presser foot gently; do not pull or push it.
- For highly stretchy fabric, use a walking foot or a Teflon foot.
- If necessary, press narrow seam tape or stabilising tape into the hem edge.
If you have little experience, begin with an old shirt or a test piece. This lets you find your own ideal combination of stitch length, tension and needle spacing without risking a favourite garment.
Why it is worth looking beneath the sewing-machine lid
Many hobby sewists have never noticed the second spool pin, or assume it is merely a spare part. Yet it is exactly there that the feature lies which can lift home sewing from “homemade” to “looks shop-bought”.
If you already own a reliable machine, there is no need to buy a new high-tech model. Usually, a suitable twin needle, some practice on fabric scraps and the confidence to adjust settings gradually are enough. This produces T-shirt hems that come remarkably close to ready-to-wear finishes in both appearance and durability.
Once you move on to further projects – such as sports leggings, children’s clothing or lightweight long-sleeved tops – this previously forgotten function will prove useful every time. The sewing machine becomes more than an aid: it becomes a tool for genuinely wearable, practical everyday clothing.


Comments
No comments yet. Be the first to comment!
Leave a Comment