
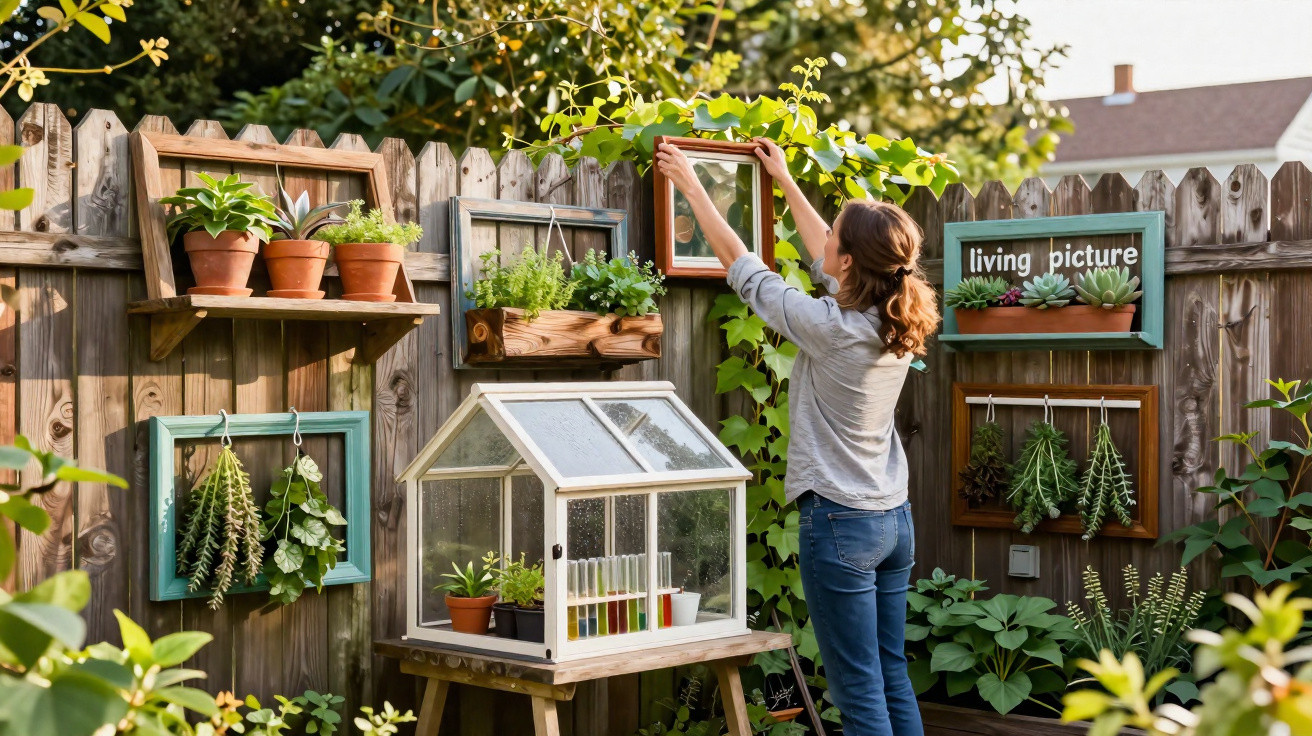
With just a few simple steps, old frames can become practical garden gold.
In many homes, unwanted frames pile up while new items are constantly bought for herbs, cuttings and decorations. Yet this very ‘clutter’ can be transformed surprisingly easily into shelves, planters, decorations and even mini greenhouses – using tools that most households already have.
Why picture frames make perfect sense in the garden
British amateur gardeners have long used old wooden frames for more than family photographs. They turn them into compact shelves, planting containers and imaginative features for fences and balconies. Their appeal is simple: these projects cost next to nothing, save resources and bring order to small spaces.
Discarded frames become building blocks for shelves, planters, mini greenhouses and herb stations – ideal for small gardens and balconies.
Wooden frames are sturdy, lightweight and often already available in useful sizes. If they no longer suit your living-room décor, they can be put to excellent use outdoors. Usually, a little sandpaper, paint, glue or a few screws are all that is needed.
Trick 1: A floating plant shelf from one frame
The easiest place to begin is with one frame made into a small hanging shelf for plants. It is especially useful for a houseplant by the window or a pot of herbs above the worktop.
- Choose a sturdy glazed frame, clean it and remove any loose parts.
- Glue or screw a thin plywood panel or leftover board to the back to form a backing.
- Secure two strong lengths of string or cord to the upper corners on the reverse.
- Hang the frame up and place a lightweight pot in the centre of the glass.
Make sure that the glass is not cracked and that the pot is not too heavy. For additional security, replace the glass with a thin wooden panel.
Trick 2: Four frames make a rustic planter
If you have several matching frames, you can use them to build a rectangular planter for herbs, pansies or succulents.
- Stand four frames upright next to one another so that they form a rectangle.
- Join the vertical edges with wood glue and hold them in place with clamps.
- Glue or screw small wooden blocks inside as corner braces to keep the structure square.
- Screw or nail a wooden panel underneath to create the base.
- Remove the glass or replace it with thin decorative panels, then paint the outside of the frame.
- Line it with plastic, add a drainage layer and compost, then plant it up.
The result is an eye-catching planter that works particularly well on a windowsill or a small balcony shelf.
Trick 3: A living succulent picture
A shallow, box-shaped frame is ideal for creating a wall-mounted ‘plant picture’. Succulents work best, as they cope well with only a small amount of compost.
Here is how to make it:
- Line and secure the back of the frame with garden fleece or landscape fabric.
- Fill the inner space with compost for succulents.
- Stretch and fix a wire or plastic mesh across the front.
- Carefully push small plants or cuttings through the mesh openings.
- Keep the frame flat at first, until the roots have established themselves.
- After a few weeks, hang it up carefully.
If succulents are not to your taste, use mosses and small ferns instead – but choose a shadier, damper position.
Trick 4: A tiny greenhouse from six frames
Six identically sized frames can be made into a small tabletop greenhouse, perfect for young plants in spring or delicate herbs.
Basic construction:
- Clean the frames thoroughly and remove old hangers and clips.
- Connect four frames as side walls using small hinges.
- Fit the remaining two frames as a roof, also using hinges.
- Seal the joins with wood filler or epoxy resin and allow it to dry.
- Paint or stain the outside, leaving interior surfaces untreated or using a safe paint.
- Refit the glass with silicone so that it cannot shift.
There is room inside for a long planter or a small seed tray. The roof can be lifted easily for ventilation.
Trick 5: A propagation station in a frame
Anyone who enjoys propagating plants can make a decorative propagation station. Instead of a picture, the front holds a glass of water for cuttings.
How to make this DIY propagation frame:
- Remove the glass and backing.
- Fit a new wooden backing, then glue or screw it into place.
- Drill two holes through the backing.
- Wrap wire around the neck of a narrow glass, feed the ends through the holes and twist them together at the back.
- Hang the frame on the wall, fill the glass with water and add the cuttings.
A simple propagation station quickly becomes a small highlight above the kitchen table or on a balcony wall.
Trick 6: A hanging herb-drying rack
Particularly if you cook regularly with home-grown herbs, two wooden frames can be converted into a useful drying rack. It also works in the kitchen or pantry.
- Remove the backs from both frames.
- Staple a piece of fine wire mesh or insect mesh onto the back of each one.
- Attach four equal lengths of string or ribbon to the corners of the upper frame.
- Suspend the second frame below it using four slightly shorter lengths of string.
- Tie a hanging loop at the top.
Herbs such as basil, sage and thyme can be spread loosely across the mesh to dry. The key is to hang the rack somewhere airy rather than pressing it directly against a damp wall.
Trick 7: Garden signs and romantic frame decorations
Empty frames can also be used solely as decoration. They give a plain fence or garden shed more character.
One option is a garden sign with lettering:
- Paint the frame with chalk paint and lightly sand it once dry.
- Glue artificial flowers, small bows or dried grasses around the frame edge.
- Attach a small sign bearing lettering such as “Herb Corner” or “Balcony Bar” in the middle using a cord.
This can turn even an understated part of the garden into a small stage.
Trick 8: A colourful frame gallery for a fence or pergola
If you own several different frames, create a colourful outdoor gallery from them – without glass, simply as decorative features.
Method:
- Clean the frames and remove the glass.
- Spray-paint each frame in a different bold colour.
- Leave them to dry fully, then secure them to a fence, gate or pergola with wire or cable ties.
- If desired, weave fairy lights or climbing plants through and around the frames.
A colourful frame wall is an easy, creative project especially for children – and the perfect starting point for an upcycling corner in the garden.
Materials, maintenance and a few safety rules
When using frame ideas outdoors, the material matters. Solid wood lasts longest when protected with weatherproof wood stain or paint. Chipboard and very thin MDF frames quickly swell outside.
| Material | Suitability outdoors | Tip |
|---|---|---|
| Solid wood | Good to very good | Treat with wood preservative and seal the edges particularly well |
| MDF / engineered wood | Limited | Keep out of direct rain; best used under cover |
| Plastic | Good | Ideal in damp areas and easy to clean |
| Metal | Good | Watch for rust and repaint occasionally |
Glass sections should always be firmly fixed, particularly in hanging constructions or where children play in the garden. If you are unsure, replace glass with Perspex or thin wooden panels.
Why upcycling picture frames is genuinely worthwhile
With a little time, old décor can become a whole collection of useful items: shelves, planters, drying racks and mini greenhouses tailored to a balcony, patio or garden. Rather than buying new plastic products, you use materials already available, reduce waste and save money.
There is also a personal element alongside the environmental benefit: no two frame projects look alike. In small urban gardens, on back-yard balconies or in front of blocks of flats, these solutions add character – and turn dusty loft finds into a real conversation starter at the next barbecue.





Comments
No comments yet. Be the first to comment!
Leave a Comment