
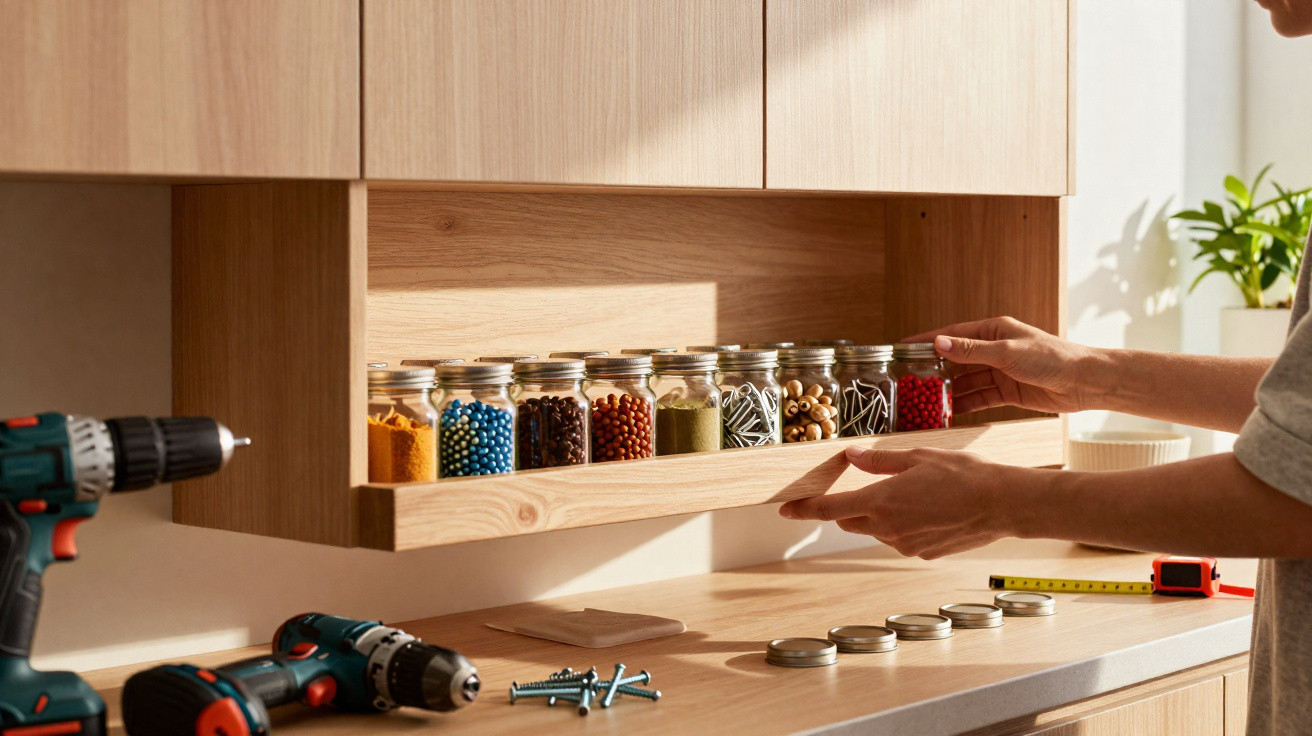
Between opened spice sachets, stray elastic bands and scattered screws, many homes have more small-item chaos than order. Every centimetre matters, especially in compact kitchens and studio flats. A clever solution using recycled small jars makes use of precisely this situation: unused space beneath cupboards becomes a rotating storage aid that frees up drawers and keeps tiny items under control for good.
How a rotating jar block turns hidden space into storage
The concept is almost too simple to seem so effective. Small screw-top jars – such as old jam or spice jars – hang upside down from a wooden block mounted between two brackets, allowing it to rotate like a miniature roller. The block can be fitted beneath a wall cupboard, a shelf or directly onto a wall.
“Rather than cramming drawers full, all those small items hang neatly sorted and remain visible above the worktop at all times.”
The jar lids are screwed onto a long wooden batten. This batten turns between two wooden side pieces that form the frame, while a continuous metal pin acts as the axle. With one movement, the block can be swung forwards or backwards to reach any jar.
Simply grip a jar from below and unscrew it. Once screwed back on, it locks securely into its lid. Nothing slips or tips, and the area beneath it – usually wasted space – suddenly becomes valuable storage.
Materials and tools for the rotating jar storage trick
Building this suspended organising system requires only a modest collection of materials, available from a DIY shop or, in some cases, already around the home:
- small glass screw-top jars, for example jam, mustard or spice jars
- a rectangular wooden batten for the rotating block
- two additional pieces of wood for the side brackets
- wood screws for the lids and mounting
- a sturdy metal pin or coach bolt to serve as the axle
- a drill with suitable drill bits
- sandpaper or a sanding block
- wood stain or paint, optional for appearance and protection
The side brackets need to be slightly longer than the jars are tall. This ensures that the block can swing freely without striking the surface below. Choose the wooden batten so that it accommodates a multiple of four jars; 12, 16 or 20 jars are common options. It should be just wider than the lids, giving them stable support while leaving enough room for your fingers.
Step by step: building the pivoting jar shelf
Preparing and protecting the wood
Start by sanding every wooden surface thoroughly. Slightly soften sharp edges so that nobody catches themselves on them or gets splinters later. If you wish, coat the wood with stain or paint; visually, this lets the system suit a kitchen, workshop or office. Once dry, the finish also makes the wood more resistant to grease, dust and moisture.
Positioning and securing the lids
Place the wooden batten in front of you and use a pencil to mark where each lid will go. Keeping the spacing even is important:
- Leave sufficient space for fingers to fit between two jars.
- Allow enough clearance at the edges so that the lids do not overhang.
Screw a lid into place at every mark. One central screw will usually do, although two small screws are safer for thin lids. Each lid must be firmly fixed; otherwise, the jar may turn without unscrewing later.
Installing the rotating axle
Next, drill an axle hole through both side brackets. The holes in the brackets should be very slightly wider than the pin so the block turns smoothly. Drill a corresponding hole in the wooden batten too, but here the pin should fit as precisely as possible.
Pass the pin through the first bracket, then through the batten and finally through the second bracket. Fit nuts and, if needed, washers on both sides. Tighten the nut at the batten firmly, while adjusting the outer nuts so the block moves freely without excessive play.
Mounting beneath a cupboard or shelf
Before filling the jars, test the complete construction while it is empty. If the block rotates easily and stays in position, screw the brackets to the underside of a wall cupboard, beneath a shelf or directly onto the wall.
Use strong screws and suitable wall plugs for plasterboard. Remember the weight of filled jars and opt for a sturdier fixing if in doubt. Only fill the jars and screw them into their lids once everything is securely mounted.
Uses for the small jars: far more than spices
Kitchen organisation
In the kitchen, the most obvious location is directly above the work area. Each jar can hold a spice blend, herbs, cake decorations or dry ingredients such as sesame seeds, chia seeds or stock powder. A small turning movement gives you a clear view of everything, without having to rummage through the back corner of a drawer.
A practical touch is to label the jar bases with a permanent marker or small stickers, so you can immediately read the contents from below.
Craft corner and hobby room
Anyone who sews, makes scrapbooks or creates jewellery will know the endless tubs of beads, sequins and buttons. The jars offer a useful way to divide up this abundance of small materials:
- beads sorted by colour
- buttons arranged by size or material
- sequins, studs, eyelets and small decorative stones
The worktable remains uncluttered while the jars become an attractive decorative feature. Because they are transparent, you can instantly see how much material is left.
Home office and children’s room
Suspended jars bring order to an office too: paper clips, elastic bands, drawing pins, erasers and USB sticks no longer disappear into a chaotic odds-and-ends drawer. Installed above the desk, they put exactly the item you need within easy reach.
In a child’s bedroom, they can store small collectible figures, marbles or parts for model-making and magnetic games. Colour can be particularly useful here: for instance, give each category its own jar block.
Workshop, cellar and garage
This system is especially useful in these areas, where small items are otherwise difficult to organise:
- screws sorted by length and head type
- wall plugs sorted by diameter
- nuts, washers, nails and specialist parts
The jars hang above the workbench or on a wall-mounted shelf, keeping everything close at hand and protected from dust on the floor. Anyone who regularly works on projects can save a surprising amount of time searching for parts.
Practical tips, safety and advanced variations
Despite its simplicity, there are a few points worth considering. Glass is heavier than plastic, but it is also durable and transparent. If you have a very lightweight wall cupboard, fit a narrow additional timber beam to the wall and attach the system to that instead of screwing directly into the cupboard base.
Also, avoid filling jars right to the brim, particularly with spices or dusty contents. Otherwise, material can easily spill out when they are unscrewed and refitted. Make sure the lids and threads are clean as well, so the jars remain securely attached.
Those who enjoy technical projects can install two or more blocks side by side, or mount them slightly offset to make particular jars even easier to reach. In rooms with high ceilings, a second row behind the first can work well, turning it forwards only when required.
The principle also works with other container types: small plastic tubs with screw-on lids, or magnetic tins that adhere to a metal strip. The central idea remains unchanged: small items move upwards, valuable space on worktops and in drawers is freed up, and daily life feels noticeably less chaotic.


Comments
No comments yet. Be the first to comment!
Leave a Comment