
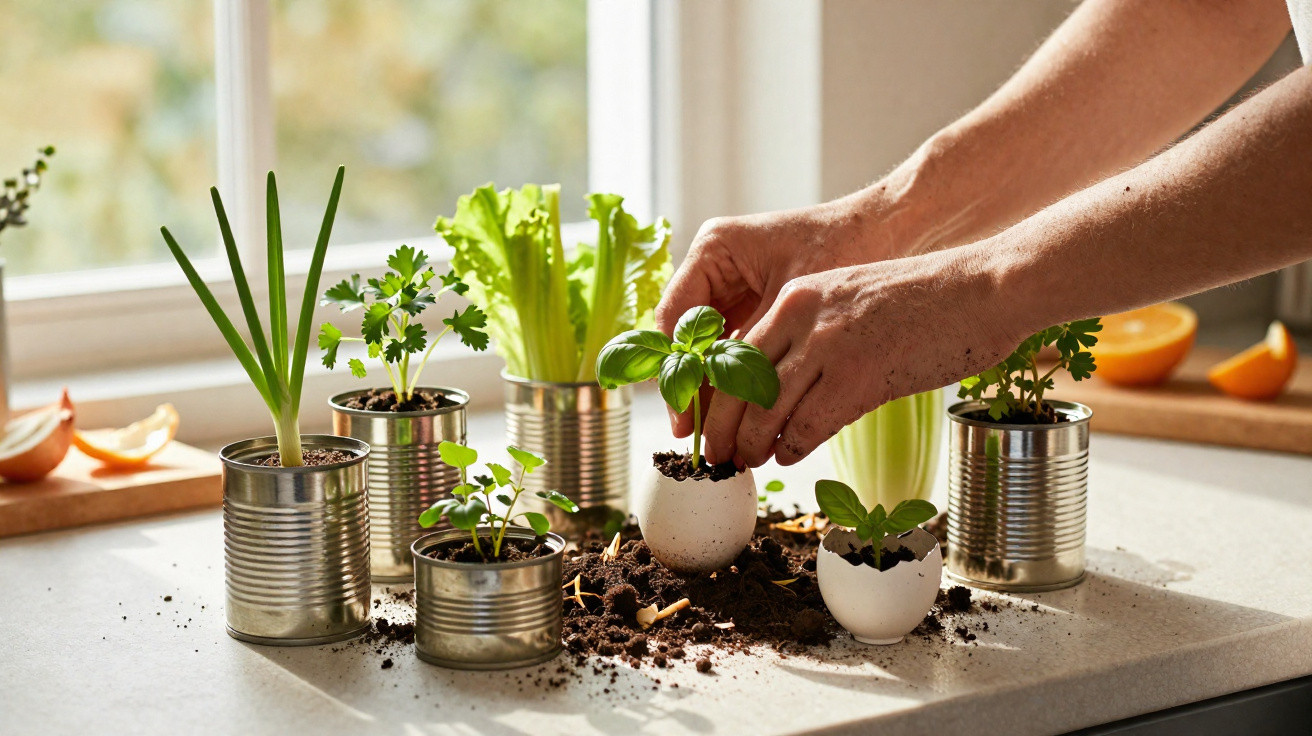
An everyday kitchen item usually ends up in the bin, yet it can turn a balcony, fence or windowsill into a fragrant miniature garden.
As the new gardening season begins, many people focus on costly pots and decorations from DIY shops. Gardeners are now pointing out that one seemingly useless piece of kitchen waste is all that is needed to grow fresh herbs just outside the door, while saving money, plastic and space.
Why empty tin cans are becoming garden stars
Empty tins of tomatoes, beans or soup normally go straight into the recycling bin or general waste. Gardening experts increasingly recommend keeping these tins instead. They make surprisingly effective planters, especially where space is limited.
Tin cans are free, sturdy, stackable and fit on narrow windowsills, fences or the tiniest balconies.
Reusing tins means there is no need to buy extra plastic plant pots. This is kinder to both the budget and the amount of waste produced. At a time of high living costs, every pound saved makes an immediate difference. Tenants with a very small balcony or only a windowsill can still create their own compact herb corner this way.
There is another benefit: a row of matching tins looks tidy and adds definition. A bare fence, bleak railing or house wall can quickly become a green strip of herbs and flowers.
Step by step: turning a tin can into a herb pot
Transforming an empty tin into an attractive herb planter is quick and requires very little equipment. Usually, a short afternoon of crafting is enough.
Preparing the tin: clean it and remove the label
Start by washing the tin thoroughly. Leftover tomato sauce or bean liquid can later go mouldy and attract insects.
- Remove the lid completely, then bend sharp edges inwards or smooth them with pliers.
- Wash the inside and outside using warm water and a little washing-up liquid.
- Peel off the paper label; oil or alcohol can remove any remaining adhesive.
- Leave the tin to dry fully so that it does not rust later.
Once the label has gone, the tin immediately looks cleaner and is easier to paint or label afterwards.
Making drainage holes: preventing drowned roots
Plants do not like having wet feet. Water needs to drain from the bottom of the tin, otherwise the roots will rot.
A large nail, an awl or a small drill bit is enough to make the holes. Depending on the width of the tin, make three to five holes in its base. If the tin is intended for hanging, add one more hole at the back, just below the rim.
Without drainage, even the most lovingly planted tin will become waterlogged – the holes are the project’s most important step.
Hanging tins with a wire hook or cord
An old wire coat hanger or strong cord works well for securing the tins to a fence or balcony. With just a few bends, the hanger can be shaped into a hook and passed through the hole at the back. The tin can then be hooked onto nails, a trellis or a balcony railing.
Those who prefer cord should drill two small holes opposite each other around the upper rim, thread the cord through them and tie it securely. This creates a simple hanging planter.
The right filling: compost, herbs and position
Once the structure is ready, it is time for the central part: planting it up. Choosing the compost and position carefully helps herbs thrive in their metal containers.
Choosing suitable compost
Gardeners recommend peat-free compost. It is more environmentally friendly and is often looser, which benefits roots in small containers. Fill the tin to around two-thirds full, add the plant, top up with compost and press it down gently.
- For most culinary herbs: use peat-free multipurpose or herb compost.
- For Mediterranean herbs such as rosemary or thyme: mix a little sand into the compost to improve drainage.
- For sowing seeds: choose a fine-textured seed compost.
Herbs that work especially well in tin cans
Many kitchen favourites cope well with restricted space, making them particularly suitable:
- Parsley: grows in partial shade or sun and needs regular moisture.
- Chives: hardy and repeatedly produces new growth after being cut back.
- Thyme: enjoys sun and dry compost, making it ideal for a hot south-facing balcony.
- Mint: grows vigorously but stays neatly contained in a tin, so it does not spread uncontrollably.
- Basil: likes warmth but not waterlogging, making tins beside a sheltered house wall ideal.
Several tins planted with different herbs create a small but highly productive kitchen garden in the smallest possible space. If desired, combine herbs with edible flowers such as nasturtiums, which will later trail over the edge.
Styling tin-can planters: from rustic to pastel
These metal containers can be adapted visually to almost any style. Some people leave the tins untreated. Bare metal gives an industrial look that works particularly well on modern balconies or privacy screens.
For a more colourful finish, use exterior spray paint or acrylic paint. Pastel shades of pink, blue or sage green suit cosy seating areas, while bold colours provide accents against otherwise grey concrete walls.
| Style | Features | Suitable colours |
|---|---|---|
| Rustic | Untreated metal, light rust marks, chunky hooks | Metal, rust brown, dark green |
| Scandinavian | Simple shapes, minimal decoration, clean lines | White, grey, light blue |
| Country cottage | Playful details, handwritten labels | Pastel pink, mint, cream |
Herb names can be written directly onto each tin with a waterproof pen. Alternatively, use small blackboard labels pushed into the compost. This makes it easy to keep track, even when growing many varieties.
More than decoration: benefits for the kitchen and environment
The appeal of these mini gardens is about more than appearance. Having fresh herbs right outside the door noticeably changes everyday cooking. Reach towards the fence and fresh leaves can go straight into a salad, soup or onto a pizza.
Growing your own herbs saves many plastic packets from the supermarket and reduces food waste, because you harvest only what you genuinely need.
At the same time, bees and other insects benefit from flowering herbs and wildflowers in the tins. Even a small balcony can become a miniature habitat. Flowering thyme varieties, chives when in bloom and mixtures containing wildflower seeds are especially attractive.
Practical tips for everyday care and maintenance
To keep a tin-can garden looking appealing for a long time, it is worth considering maintenance and durability:
- Watering: Compost dries out faster in metal containers. Check it in the morning and evening on hot days.
- Winter: Frost can distort the tins. Overwinter perennial herbs in a sheltered spot or move them into larger containers.
- Rust: A little rust is often desirable visually. To prevent it, use weatherproof paint or clear varnish on the outside.
- Safety: Check hanging tins regularly to make sure hooks and cords remain secure, particularly when storms are forecast.
Children can easily be involved too: painting tins, sowing seeds and watching plants grow turns kitchen waste into a small family project. It gives city children, in particular, a chance to see how a seed becomes a plant that they can later eat.
Using tin cans as herb pots brings together several trends at once: upcycling, urban gardening and the desire for fresh, unpackaged food. Whether attached to a balcony railing, a house wall or placed on a windowsill, a throwaway item can become a lasting and useful everyday companion with only a few simple steps.

Comments
No comments yet. Be the first to comment!
Leave a Comment