
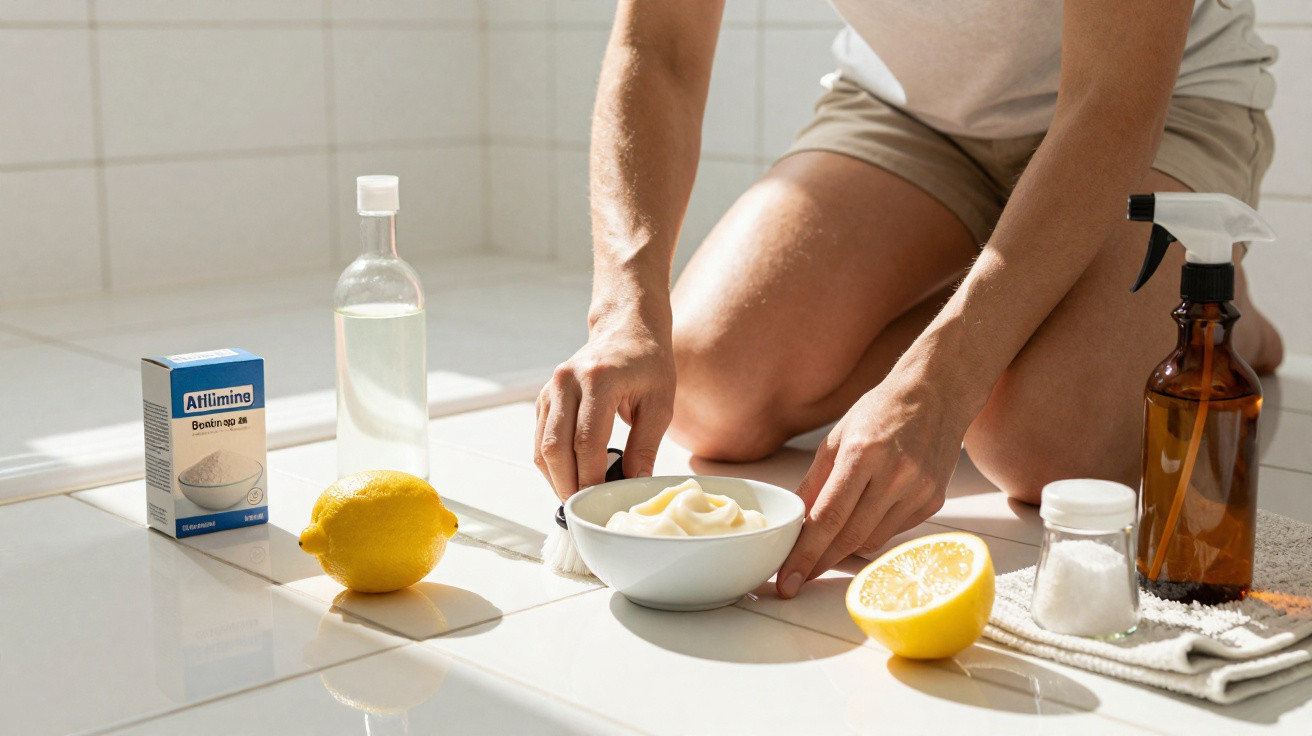
When people see mouldy or blackened grout, they often instinctively reach for harsh supermarket cleaners. These products sting the nose, can damage surfaces and are not exactly cheap. Yet in many cases, the dirt can be shifted using a simple blend of four everyday kitchen ingredients - with no chlorine and none of the typical bleach smell.
Why bathroom grout turns black so quickly
Tiles themselves can usually be wiped clean in no time. Grout is the real issue: it is porous and rough, absorbing both moisture and dirt. In a warm, humid space such as a bathroom, this creates ideal conditions for mould spores.
- Steam from the shower or bath settles in the grout.
- Soap residue, skin flakes and dust form a sticky layer.
- Where ventilation is poor, the grout rarely dries out completely.
- Mould spreads and discolours the grout from grey to black.
Many homeowners assume that only strong chemicals can help at this stage. This is precisely where the simple four-ingredient mixture comes in.
The four household ingredients that tackle black grout
The exact version may vary slightly, but most successful mixtures rely on the same four basic components:
- Bicarbonate of soda or baking powder - provides a mildly abrasive, degreasing effect.
- White vinegar or vinegar essence (diluted) - breaks down limescale and eliminates some germs.
- Liquid soap or washing-up liquid - lifts grease and dirt while making the mixture spreadable.
- Hydrogen peroxide (3%) or, alternatively, lemon juice - gently brightens surfaces and works against discolouration.
“Four simple kitchen ingredients are enough to make grout look noticeably cleaner and brighter in just 15 minutes - without chlorine or a pungent smell.”
The key benefit is that all of these ingredients are considered relatively mild for household use. When correctly proportioned, they are far less likely to damage tiles and grout than many ready-made cleaners.
How to make the grout cleaner step by step
To stop the mixture running off the brush, it needs a creamy, slightly thick texture. A small bowl is all you need.
Basic recipe for a standard bathroom
- 3 tablespoons of bicarbonate of soda or baking powder
- 1 tablespoon of liquid soap or washing-up liquid
- 2 tablespoons of white vinegar
- 1–2 tablespoons of hydrogen peroxide (3%) or lemon juice
Start by placing the bicarbonate of soda and soap in the bowl, then mix them until no lumps remain. Gradually add the vinegar and the hydrogen peroxide or lemon juice until the result is a spreadable paste. If it becomes too runny, simply add a little more bicarbonate of soda.
Application: noticeably brighter grout in 15 minutes
The result depends heavily on using the mixture correctly. Spending a few minutes on the job will often produce a clearly more visible improvement.
Preparing the area
Before applying the paste to the grout, clean the area briefly:
- Dampen the grout with warm water.
- Wipe away any heavy soap residue using a sponge.
- Allow the surface to dry slightly so the paste adheres properly.
Applying the paste and leaving it to work
An old toothbrush, a small paintbrush or a grout brush is suitable for application. Work the paste directly into the grout rather than spreading it across the entire tiled surface. A thin coating is enough, depending on how dirty it is.
This is when the bicarbonate of soda, vinegar and the other ingredients begin to work: the mixture loosens greasy deposits, softens black build-up and brightens surface discolouration.
“After around 15 minutes, many grout lines look noticeably cleaner - for heavily soiled areas, a second application is worthwhile.”
Once the waiting time has passed, scrub the grout firmly with the brush and rinse thoroughly with plenty of warm water. A window squeegee or microfibre cloth will help prevent fresh streaks.
Why this grout-cleaning mixture works so well
Each of the four ingredients has a specific role. Together, they produce a cleaning effect that comes surprisingly close to that of many specialist products.
| Ingredient | Effect |
|---|---|
| Bicarbonate of soda / baking powder | Mildly abrasive, absorbs odours and loosens greasy layers |
| Vinegar | Removes limescale, softens deposits and has a mild disinfecting effect |
| Liquid soap / washing-up liquid | Lifts grease and dirt, and stabilises the paste |
| Hydrogen peroxide / lemon | Gentle bleaching action, tackles discolouration and odours |
Compared with conventional chlorine-based products, the smell disappears much faster and there is less risk of discolouring clothes or towels. Many bathroom owners now use this mixture regularly to keep their grout looking fresh.
Benefits over harsh chemical cleaners
The four-ingredient method stands out in three main areas: cost, compatibility and environmental impact.
- Cost: All of the ingredients are inexpensive and are often already available at home.
- Surface protection: Grout and silicone are exposed to far less damage.
- Indoor air: There is no biting smell and less irritation to the eyes and airways.
- Environmental aspect: Many of the ingredients are more readily biodegradable than chlorine compounds.
Families with children or pets in particular appreciate not having to air out the entire room for hours every time.
When you should take care
Despite the milder ingredients, some situations still require caution. Highly sensitive natural stones such as marble or limestone react badly to vinegar and acidic components. Never use the mixture extensively on these surfaces.
If in doubt:
- Always test it first in an inconspicuous area.
- Wear rubber gloves, as hydrogen peroxide can dry out the skin.
- Air the bathroom briefly, particularly if it is small and poorly ventilated.
Anyone with significant pre-existing health conditions or mould allergies should always call in professionals for large areas of mould - a homemade paste is no substitute for professional remediation.
How to prevent black grout from returning
Even the best cleaning will not achieve much if the grout becomes mildew-stained again shortly afterwards. A few habits can delay this considerably.
- Use a window squeegee on tiles and grout after showering.
- Ventilate the bathroom well by opening the window or leaving the extractor fan running for longer.
- Wipe over the grout briefly with a mild cleaner once a week.
- Do not leave damp curtains or towels pressed directly against the grout for long periods.
In many homes, using the four-ingredient mixture every few months is enough if routine care is maintained. Regular ventilation and removing water from the walls helps prevent mould from spreading so quickly again.
Why this method is still underestimated
Despite its many advantages, homemade grout cleaner remains a niche option. Many consumers place more trust in products with bright labels and “Ultra-Power” claims than in vinegar and bicarbonate of soda. In addition, supermarket bottles give clear dosage instructions, whereas household remedies require a small degree of experimentation.
Those who try it often quickly discover how substantial the effect can be after only a quarter of an hour. Particularly in rented homes, where tiles may be older and harsh experiments are best avoided, this gentle mixture is a useful compromise: the grout looks fresher, the bathroom appears better cared for - and the cleaning cupboard remains free of unnecessary chemicals.



Comments
No comments yet. Be the first to comment!
Leave a Comment