
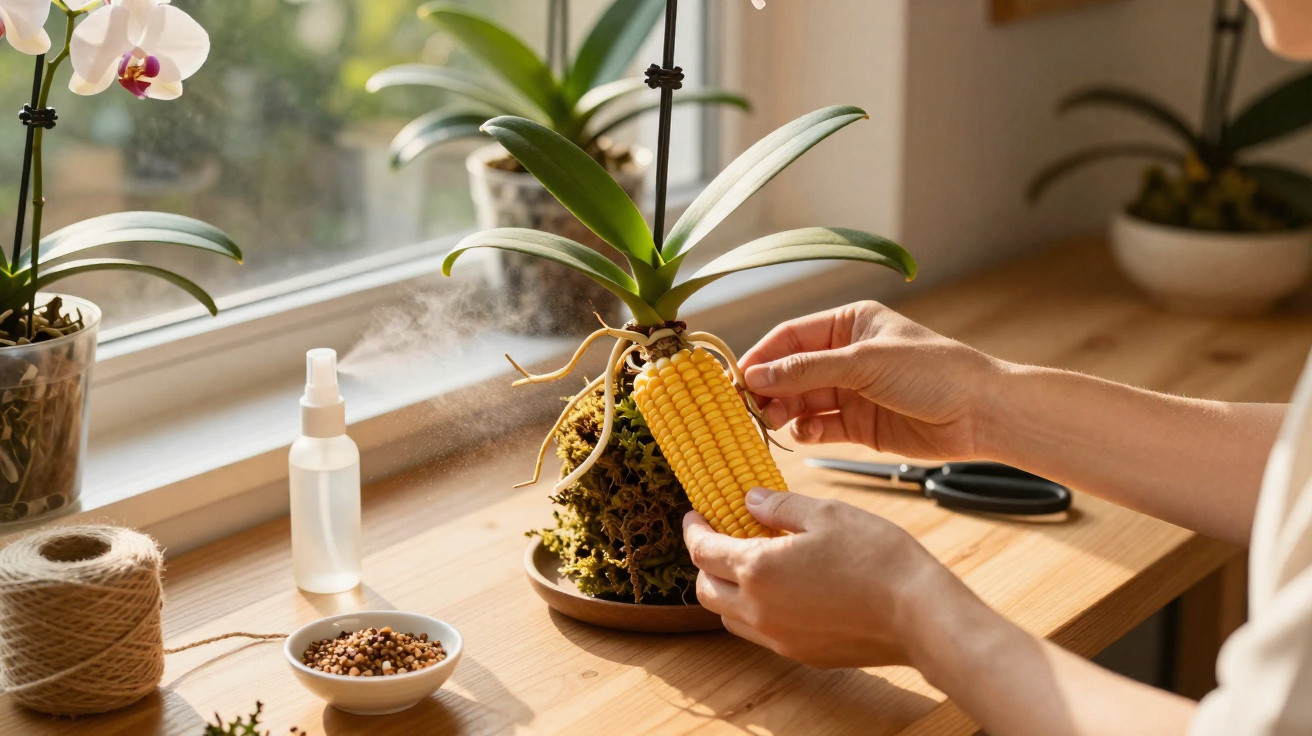
Creative growing makes it possible to turn discarded organic materials into effective supports for the garden. Using a plant’s fibrous structure creates an airy setting that encourages healthy rooting in small botanical species, without the need for heavy or costly plastic pots.
Why does a corn cob work for orchids?
Many epiphytic species naturally live attached to tree trunks in nature, where constant airflow around their structures is essential. The dried core of a corn cob has the ideal roughness for secure attachment and prevents the excess liquid build-up that often causes sensitive foliage to rot.
This biological option replaces enclosed artificial containers with considerable rustic elegance. With appropriate watering, its porous base releases moisture gradually, promoting strong new growth while recreating conditions similar to the tropical forests where these small jewels bloom freely.
Which plants need little maintenance in the home?
Some ornamental species grow very well even without daily watering or constant fertilising… Read more
Which orchid types are ideal for this structure?
Not every plant specimen can tolerate the same hanging growing method. Larger varieties require weighty pots, whereas micro-orchids adapt perfectly to the cylindrical shape, producing new nodes without placing unnecessary weight on the support.
Delicate genera such as Acianthera gain stability by gripping the outer grooves. The coarse surface holds beneficial particles and provides the secure support that newly formed shoots need throughout their first months of growth and environmental acclimatisation.
Below is a video from the Spagnhol Plantas YouTube channel that explores guidance on this growing method in greater depth:
How do you prepare the mount step by step?
The first stage requires choosing pieces that are completely dry to prevent harmful contamination. Drilling a firm hole across the cob makes it possible to thread through sturdy wire, creating the hook needed to hang the arrangement in a cool place protected from the sun.
Next, add a moderate layer of hydrated sphagnum moss to provide a temporary water reserve. This moist nest holds the exposed roots before they are carefully tied with fine nylon thread, preventing sudden movement that could break their tips.
Essential materials
Basic elements for the support
Gather the components needed for the handmade assembly:
- Clean, dry corn cob;
- A portion of hydrated sphagnum moss;
- Fine wire and nylon line.
What care keeps the roots healthy?
Maintaining consistent moisture is the key factor in the success of this distinctive growing method. Because the substrate dries quickly when exposed to constant airflow, frequently misting it with water prevents the developing green tips from drying out over time.
A plentiful supply of indirect light supports photosynthesis without scorching the smaller leaves. Sheltered spaces with partial shade provide the ideal microclimate for balanced absorption of water and mineral compounds that are essential for sustained plant vigour.
Follow these recommended daily measures to keep the cultivation hydrated and protected:
- Mist with clean water every day during dry weather.
- Place the piece in a ventilated area with diffused light.
- Apply water-diluted foliar fertiliser every thirty days.
When should fertilising and maintenance be carried out?
After the initial adaptation period, which lasts around one month, the plant begins to produce new roots. This indicates the right time to introduce well-diluted foliar fertilisers, feeding the specimen without overloading its young structures.
Monthly nutrient replacement ensures abundant flowering and firm leaves in every season. This straightforward maintenance shows how ecological reuse enhances natural beauty, turning organic waste into long-lasting supports for charming home botanical collections.


Comments
No comments yet. Be the first to comment!
Leave a Comment