
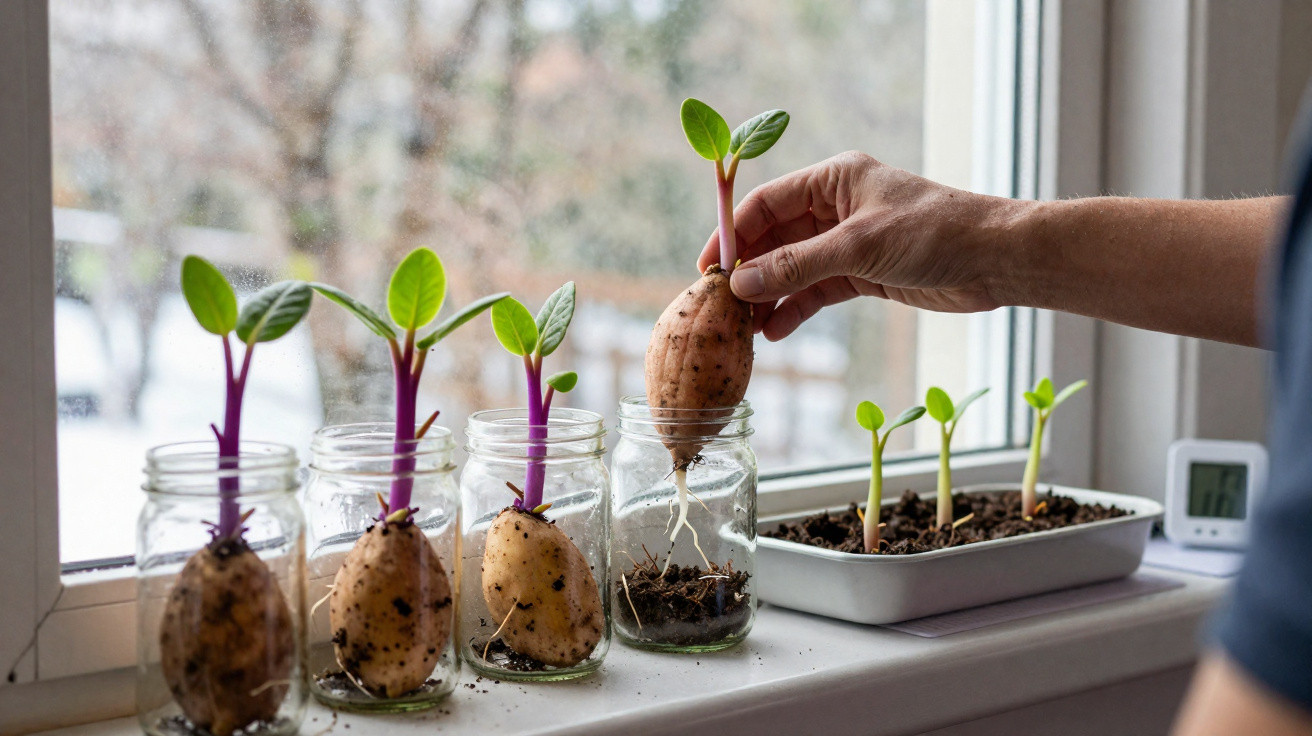
While the garden lies dormant in winter, a quiet race towards next spring’s harvest is already under way indoors.
More and more home growers are using the colder months to get sweet potatoes ready. Encouraging tubers to produce shoots now means they will have sturdy young plants prepared to go into warm ground as soon as the danger of frost has gone.
Why winter is the key season for sweet potatoes
Sweet potatoes are tropical crops, needing both warmth and time to grow well. Across many temperate areas, the outdoor season is limited, which is why winter sprouting can make such a difference.
By starting “slips” indoors in January or February, you can gain several vital weeks of growth before planting time.
Rather than planting the tuber directly, sweet potatoes are generally raised from slips. These leafy shoots grow from the tuber before being removed and rooted to make separate plants. The more robust the slips are, the greater the likelihood of a worthwhile harvest in summer.
Starting this task during the calmer winter period also distributes the workload. There is no need to squeeze it into April, when the kitchen table is already crowded with seeds, compost bags and seed trays.
Selecting sweet potatoes for sprouting
Everything begins with the tuber, and not all supermarket sweet potatoes will sprout in the same way.
Choose sound, untreated tubers
For dependable results, select sweet potatoes that are firm and clean, without mould, soft patches or serious cuts. Once warmth and moisture are present, any rot can spread rapidly.
Organic sweet potatoes are often the best bet, as they are less likely to have been treated with anti-sprouting chemicals.
Small dark specks or eyes on the skin are a positive sign, as these can become the points from which slips emerge. Take care when washing the tubers: rubbing these points away may reduce the number of shoots produced.
Named varieties including ‘Georgia Jet’ and ‘Beauregard’-type strains have a reputation for sprouting reliably and cropping generously in cooler climates. Where a local garden centre sells sweet potato tubers specifically for planting, they may justify the modest additional expense over random shop-bought ones.
The traditional jar-and-toothpick approach
Using water and toothpicks to start slips is one of the easiest methods.
- Push three or four toothpicks into the middle section of the sweet potato.
- Balance the toothpicks on the edge of a jar, leaving the tuber partially suspended.
- Put the pointed end into the water and keep the rounded end above the waterline.
- Try to have roughly 70% of the tuber beneath the water.
Keep the jar in a bright, warm room at around 20–25°C. A sunny windowsill over a radiator is often suitable, provided the atmosphere is not excessively dry. Replace the water regularly to keep it clear and well oxygenated.
The warm base encourages roots to form in the water, while the upper part of the tuber pushes out leafy shoots.
After two to four weeks, roots should begin to fill the jar, while pale green shoots emerge through the skin. When the slips are 10–15 cm long, they can be cut or snapped away and rooted on their own.
Producing more plants by cutting the tuber
Gardeners short on room or money often want to get the highest possible number of plants from every tuber. Dividing a sweet potato into sections is an effective way to achieve this.
Growing in compost rather than water
Instead of suspending an entire tuber in water, cut it into substantial pieces and place them in seed trays or shallow boxes filled with compost.
- Slice the sweet potato into several sections, ensuring every piece has at least a couple of eyes.
- Position the pieces on fine, damp compost, with the cut side touching the compost and the skin uppermost.
- Press them down lightly so they are secure, without covering them fully.
- Maintain moist compost at all times, but never let it become waterlogged.
A transparent cover, such as a propagator lid or a makeshift plastic dome, retains heat and humidity. Provide small openings or ventilate daily to prevent stagnant air and heavy condensation from encouraging mould and fungal problems.
From a single tuber, many gardeners manage six to eight vigorous slips, each becoming a future plant.
Over the following weeks, groups of shoots will develop from the skin side. Once each shoot has a reasonable stem and several leaves, gently twist or cut it from the tuber section and pot it on.
Maintaining the right humidity and temperature
Central heating can make indoor winter air unexpectedly dry. Sweet potato slips, particularly those started in compost, require dependable moisture as they develop roots and foliage.
Aim for conditions that remain evenly and gently moist rather than saturated. Waterlogged compost deprives roots of air and promotes rotting. Lift the tray from time to time to assess its weight, watering only once it feels clearly lighter.
A useful guide is the condensation on the cover. A few droplets in the morning that disappear later in the day suggest that conditions are suitable. Water streaming down the inside indicates excessive wetness, so open the vents or remove the cover for a longer period.
Separating sweet potato slips: timing and method
Slips are ready to grow independently when they are approximately the length of your hand.
| Stage | What to do |
|---|---|
| 10–15 cm tall, several leaves | Cut or twist the slip away from the tuber near its base. |
| Freshly removed slips | Place in a glass of water or moist compost to root. |
| Slips with visible roots | Pot individually in small containers with free-draining compost. |
| Last frosts passed | Harden off gradually, then plant outside in warm soil. |
Water-rooted slips provide an obvious sign of progress: a mass of white roots means they can be moved into pots. For slips rooted in compost, give them a light tug after roughly a week; resistance shows that roots are developing.
What “slips” are and why they matter
For new gardeners, the word “slip” can be unclear. It refers simply to the small shoot produced by a sweet potato tuber. Every slip is genetically identical to its parent tuber.
Growing from slips rather than seeds keeps the variety true and gives you a head start on the season.
Since sweet potatoes cannot tolerate frost, each additional week spent in a protected setting can result in more substantial vines and larger roots by autumn.
Practical options for different homes
In a compact flat with one bright windowsill, there may only be space for one or two jars. Even so, this can supply several slips for a balcony container or fabric grow bag. By late summer, that can still produce a surprisingly useful number of roots for several meals.
For homes with a conservatory or porch, larger trays holding compost-covered tuber pieces are more practical. A small production line can be arranged, with one tray for newly cut pieces, a second for sprouting sections and a third for slips that have already been potted on.
Gardeners with unheated greenhouses can transfer potted slips there as night temperatures begin to rise. This gradually acclimatises the plants, helping them cope better when they are eventually planted outdoors.
Risks, rewards and improving your chances
There are some potential problems to watch for. Too much moisture combined with insufficient ventilation can cause mould on tubers or white fluff across the compost. Leaving the cover off for longer normally resolves this. Discard any tuber section that smells unpleasant or collapses, before it can affect the others.
The benefit is that slips grown with this level of care are often more resilient than plants bought at the last minute. You decide the variety, timing and growing conditions. For families, it can also be a gentle winter activity: inspecting roots in jars, counting fresh leaves and marking the diary for planting day.
By turning winter into a preparation phase, you transform sweet potatoes from a risky experiment into a reliable annual crop.
Once the method becomes familiar, the idea can be applied to other crops. Tomatoes, chillies and basil also benefit from an early start indoors, although each needs a different technique. The underlying principle is unchanged: while the outdoor garden appears quiet and lifeless, the coming season may already be developing on a sunny indoor sill.



Comments
No comments yet. Be the first to comment!
Leave a Comment