
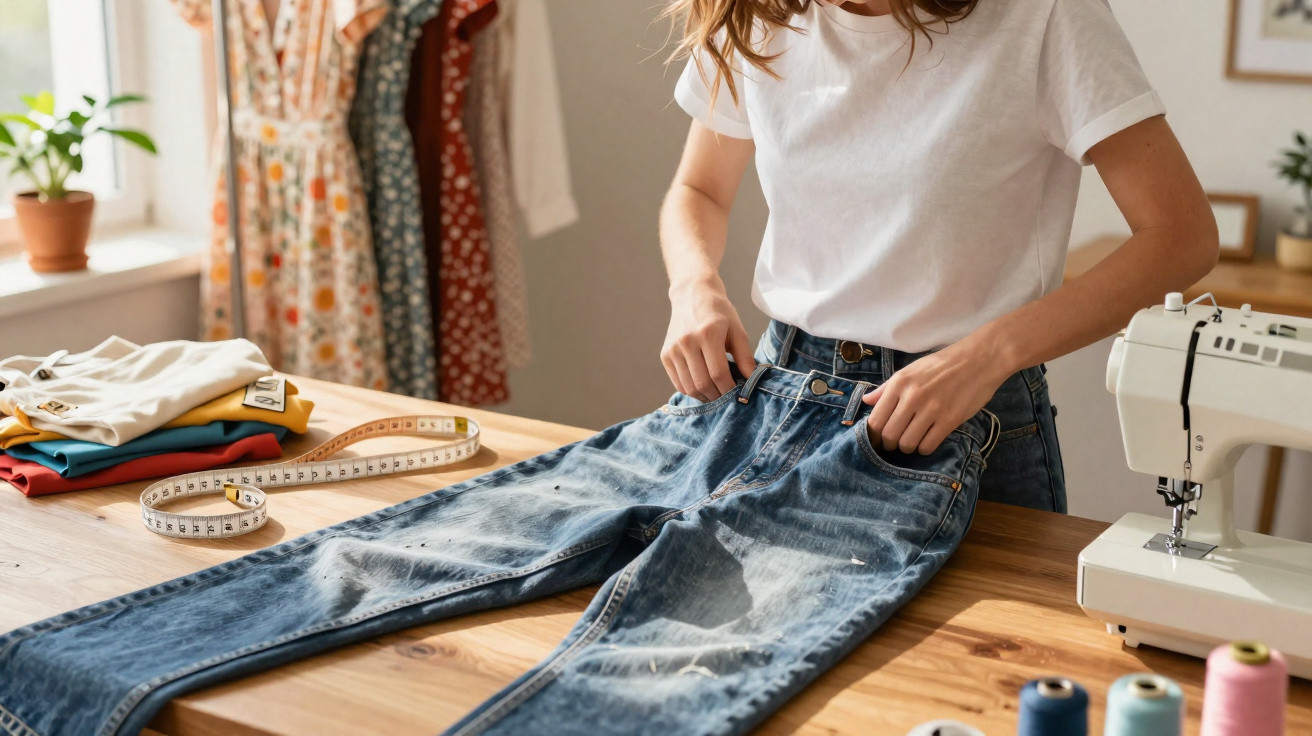
Many fashion enthusiasts will recognise the situation: a real gem is waiting at a flea market or in Grandma’s wardrobe, but it is far too tight at the waist or hips. Rather than reluctantly putting it back or paying for costly alterations, it is worth considering simple ways to gently add room to older garments. A quick five-minute technique works particularly well with denim.
Why vintage fashion can suddenly seem so small today
Anyone who wears vintage soon notices that sizing from the 1960s or 1970s has little in common with today’s size charts. A dress size that appears harmless on the label can now feel as though it is two sizes smaller.
Specialist archives within the textile industry show that, across many decades, what was once considered a ‘middle’ size was more in line with today’s smaller sizes. Body ideals were different, cuts were narrower, and comfort was given far less consideration than it is now.
Freedom of movement is another factor. Pencil skirts, blazers and jeans were once designed to fit closely to the body, often with a strongly defined waist. Tension was concentrated on just a few seams, usually at the sides. When only a few centimetres are missing, the fibres are put under strain, become distorted and, in the worst case, may tear.
A tight fit is often down to outdated size charts and deliberately narrow cuts, rather than you.
The positive news is that many of these pieces can be adjusted so they can be worn again without ruining their original character.
What gaining ‘one size’ actually means in practice
In everyday wardrobe terms, ‘one size bigger’ may sound like a broad guideline. Tailors calculate it more precisely: it generally means around four centimetres of extra circumference at the key point, such as the waist, hips or bust.
Because a garment has a front and back, this adjustment is usually divided between both sides. Put simply, this works out at roughly two centimetres for each ‘half’. It helps to set realistic expectations: a tight skirt will not suddenly become loose and baggy. The aim is noticeably more room, not a complete refit.
When fibre-and-moisture techniques are no longer enough, practical alterations such as side inserts can provide the answer. This becomes especially useful with the classic fabric, denim.
Five-minute method: gently make vintage jeans roomier
With jeans made from pure cotton, it is possible to coax a little extra give from the natural fibre. Cotton responds strongly to water, warmth and tension. This is exactly what the quick technique uses, and it is most effective on rigid, non-stretch vintage jeans.
Step by step: expanding jeans at the waist
This method works best on 100% cotton denim with no stretch content. Proceed as follows:
- Lay the jeans flat and thoroughly dampen the top section - the waistband and upper hip area - with lukewarm water, ideally using a spray bottle.
- The fabric should be clearly damp, but not dripping wet.
- Put the jeans on while they are damp and fasten them as far as is still comfortable.
- Keep moving for three to five minutes: do squats, gentle lunges and upper-body twists.
- Focus the stretching where the jeans feel tight, usually at the waistband and side hip area.
The combination of moisture, body heat and tension allows the cotton to give and mould itself to the body. Many users report gaining up to three centimetres around the waist without the fabric becoming baggy or losing its shape.
Water, warmth and movement: this three-part combination can deliver a whole size of comfort in rigid vintage jeans.
An alternative to wearing damp jeans
Anyone who dislikes wearing damp denim can also use a clothes hanger to increase the waistband measurement. Pull the moistened waistband over an especially wide wooden hanger or sturdy trouser hanger, then gently stretch it outwards. As the fabric air-dries, the hanger maintains the tension and expands the waistband slightly.
Always allow the jeans to dry naturally rather than using a tumble dryer. Hot air is more likely to set the fabric back into its smaller shape. Once dry, measure with a tape measure: comparing the measurements before and after will clearly show whether the method has worked or whether a conventional alteration is needed.
When jeans are not enough: clever inserts for skirts and dresses
Stretching is often no longer effective for narrow pencil skirts or vintage dresses, particularly when they are made from delicate fabrics. This is where a reliable tailoring technique comes in: small side inserts that add extra width almost invisibly.
How to position side inserts correctly
First, identify where the garment feels tightest - usually at the side of the waist or hips. Open the side seam at precisely that point, normally for five to seven centimetres. A small insert is then placed in the opening, ideally in a triangular shape.
In practical terms, this is how it works:
- Choose a piece of fabric that is as similar as possible in quality and colour; those feeling bold can deliberately choose a contrast instead.
- Cut out an elongated diamond shape measuring around six by eight centimetres.
- Fold the piece lengthways to create a triangle.
- Position the point of the triangle facing downwards in the opened side seam, with the long sides pointing upwards.
- Sew both edges of the triangle into the seams using close stitching, securing the ends neatly.
Working on both sides of a skirt or dress spreads the tension evenly. Together, two inserts often provide exactly the four centimetres of additional freedom of movement needed to make an old favourite suitable for everyday wear again.
Triangular side inserts barely alter the silhouette, yet restore those missing centimetres for the body.
When elastic helps: discreet waistband solutions
For skirts with a zip, it is especially worth inspecting the waistband. If the opening almost fastens but still lacks a few centimetres, small elastic inserts may solve the problem. Short sections of firm elastic can be sewn in on both the right and left sides of the zip.
The advantage is that the garment’s original character remains largely unchanged from the outside, while the waistband gains a degree of flexibility. The skirt can then fit comfortably again without significantly altering its silhouette.
What to consider with valuable vintage pieces
Anyone altering rare or expensive items should work cautiously. Begin by testing the fabric on an inside area to see how it reacts to water or strong stretching. Some older materials are prone to discolouration or may break at overstressed points.
It is also worth checking the seams. If the threads have already become brittle, strong tension may cause more damage than improvement. In such cases, professional assistance from an alterations studio is often the safer option.
How to avoid future buying mistakes
Anyone shopping for vintage can avoid disappointment by looking more closely at measurements before buying. Carrying a tape measure makes a considerable difference. Key points include:
- Measure the garment’s waist width while it is laid flat, then compare it with your own body measurement.
- Check the hip circumference at its widest point, especially with pencil skirts and slim dresses.
- Look for existing seam allowances - if there is still spare fabric in the sides, it may be possible to gain one to two centimetres on each side.
For online purchases in particular, asking for exact measurements can prevent frustration. The dress-size label alone says very little about the actual fit of older pieces.
Why the effort is worthwhile
Adjusting vintage fashion rather than discarding it protects both your budget and resources. A well-fitting individual piece can last for decades, pass from one generation to another and remain fashionably interesting because it stands apart from mass-produced clothing.
Many people only discover through these adjustments what clothing can truly feel like when it fits their own shape. With rigid fabrics such as denim or tightly woven cotton, the wearing experience can be completely different once those missing centimetres have been gained.
Sometimes, all it takes is a spray of lukewarm water, a few squats and a little patience to turn an apparent buying mistake into a new favourite piece.




Comments
No comments yet. Be the first to comment!
Leave a Comment