
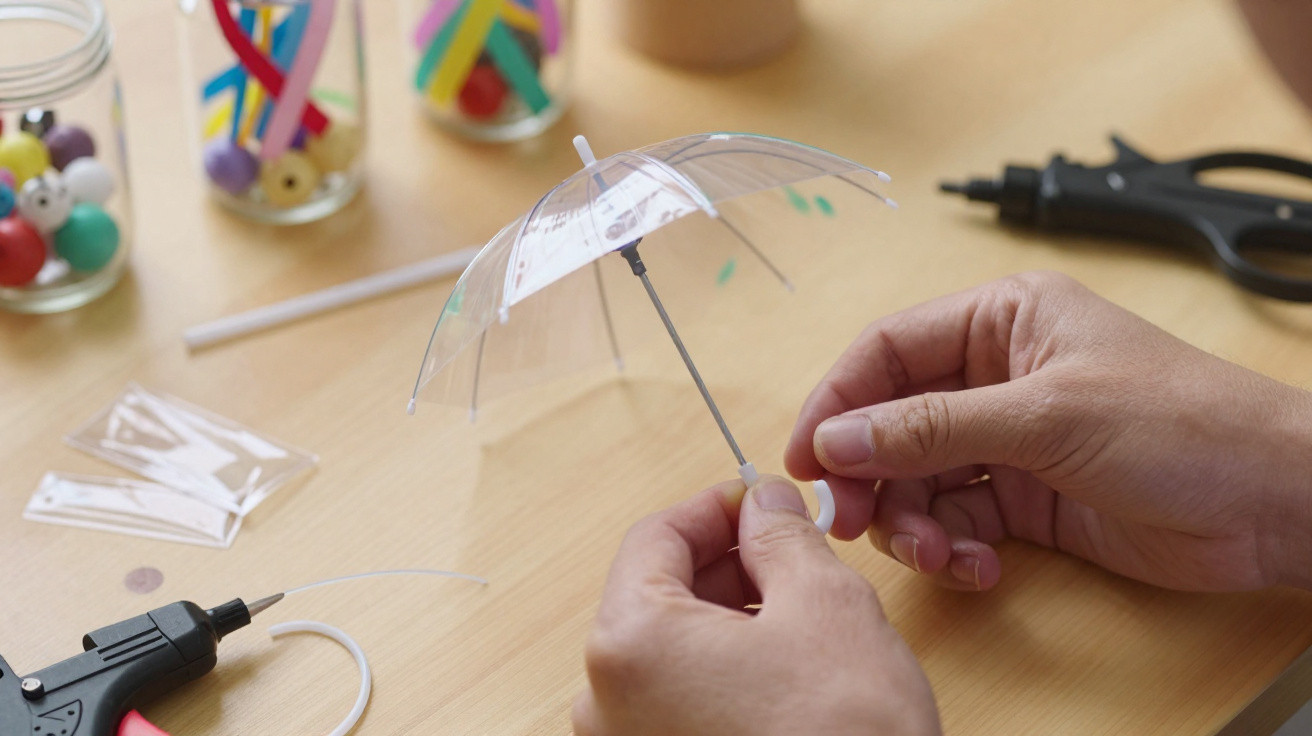
That plastic bottle destined for the bin can become a charming decorative item before it is recycled. Using scissors, paint and a little wire, the curved section of a PET bottle can be turned into a miniature umbrella full of character, ideal for decorating tables, shelves or children’s school projects.
Which bottle is best for this project
Water and soft-drink bottles made from clear PET are the best choice: they are lightweight, easy to cut and retain the transparency that gives the umbrella a realistic appearance. The upper section near the neck naturally forms a curved canopy, so no additional shaping is needed. On many bottles, the base has clearly defined sections that reproduce the umbrella panels even more convincingly.
Small bottles (350 ml or 500 ml) make delicate pieces that are well suited to decorating desks. A 1.5-litre bottle, meanwhile, can be used to make larger umbrellas for a centrepiece and children’s party decorations. Before you begin, make sure the bottle is empty, thoroughly washed and fully dry, with no liquid residue or label left attached.
- Sturdy scissors and a craft knife: for making the first cut and shaping the umbrella panels accurately.
- Acrylic or stained-glass paint: stained-glass paint preserves the PET’s transparency and produces a lovely coloured effect when light shines through it.
- Craft wire or a pipe cleaner: to create the curved handle that supports the decorative canopy.
- Hot glue or plastic adhesive: to secure the wire to the canopy and prevent the piece from coming apart while on display.
- Beads, glitter or dimensional glue: optional details for decorating the tips of the panels and giving the piece a more polished finish.
Cutting the canopy: shaping the main section
The umbrella canopy is made from the bottle’s curved area near its neck. Use a permanent marker to draw a line around the bottle, leaving a section approximately 7 to 10 centimetres high. Make the initial opening with a craft knife, then use sturdy scissors to continue around the line. Work slowly so that the edge remains even.
Once the canopy has been removed, use the marker to divide its surface into six or eight equal sections. Next, cut the lower edge of each section into a gentle curve to recreate the rounded panels of a real umbrella. For a neat and safe edge, lightly sand it with fine sandpaper or cover it with narrow adhesive tape or fabric tape.
The detail that gives a professional finish: transparency and colour
The greatest appeal of this project comes from making use of the plastic’s natural transparency. Stained-glass paint, available from craft shops, adds colour without making the surface entirely opaque. It creates a stained-glass effect that looks particularly attractive in natural light. Apply the paint to the inside of the canopy so that the outer face stays smooth and glossy.
Complete step-by-step guide from start to finish
Follow this order to achieve an attractive and safe result.
Wash the bottle and dry it completely. Mark and cut the canopy from the curved section. Even out the edge. Split the surface into six or eight panels. Paint the piece and allow it to dry fully. Pierce the centre using a heated thick needle (always done by an adult). Insert the wire, then bend its lower end to create the curved handle. Secure it from the inside with hot glue. Draw the ribs with a marker or glitter dimensional glue. Glue beads onto the ends of the panels for the final finish.
If children are taking part, adults should carry out all cutting, piercing and hot-glue work. Once the structure is finished and secure, children can paint it, add glitter and attach the beads.
Another appealing option is to leave the canopy entirely clear and define the panel divisions only with coloured nail varnish, glitter glue or a fine painted line. This minimalist finish works well with neutral décor and can easily be customised in any colour.
Making the miniature umbrella handle and ribs
Create the umbrella handle with thick craft wire, available from craft shops. Cut a length slightly longer than the desired finished height, then bend one end into the characteristic hook shape. Insert the straight end through a hole in the centre of the canopy, made with a heated thick needle, and secure it inside with hot glue or an adhesive designed for plastic. Placing a large bead over the hole conceals the join and finishes the centre neatly.
The ribs running from the centre to the edges can be drawn with a marker, dimensional paint or glitter glue. Actual wire is not necessary to achieve the visual effect. A small bead glued to the tip of each panel hides the line and creates a delicate finish resembling the metal details of real umbrellas.
Uses beyond simple decoration
PET bottle umbrellas offer plenty of uses beyond being a shelf ornament. For June festivals and themed events, a colourful group of them can decorate tables at very little cost. In environmental education school projects, the whole process teaches children about creative recycling, plastic materials and the impact of conscious consumption in a playful, practical way. For models, the scale can be altered simply by choosing bottles in different sizes.
The best part of this idea is that a discarded material becomes art while costing almost nothing. Before reaching the recycling point, the bottle is given a second life that can last for as long as you choose.
Think it is worth trying? Share it with anyone who enjoys creative crafts or is always looking for beautiful, sustainable ways to reuse what would otherwise become rubbish.

Comments
No comments yet. Be the first to comment!
Leave a Comment