
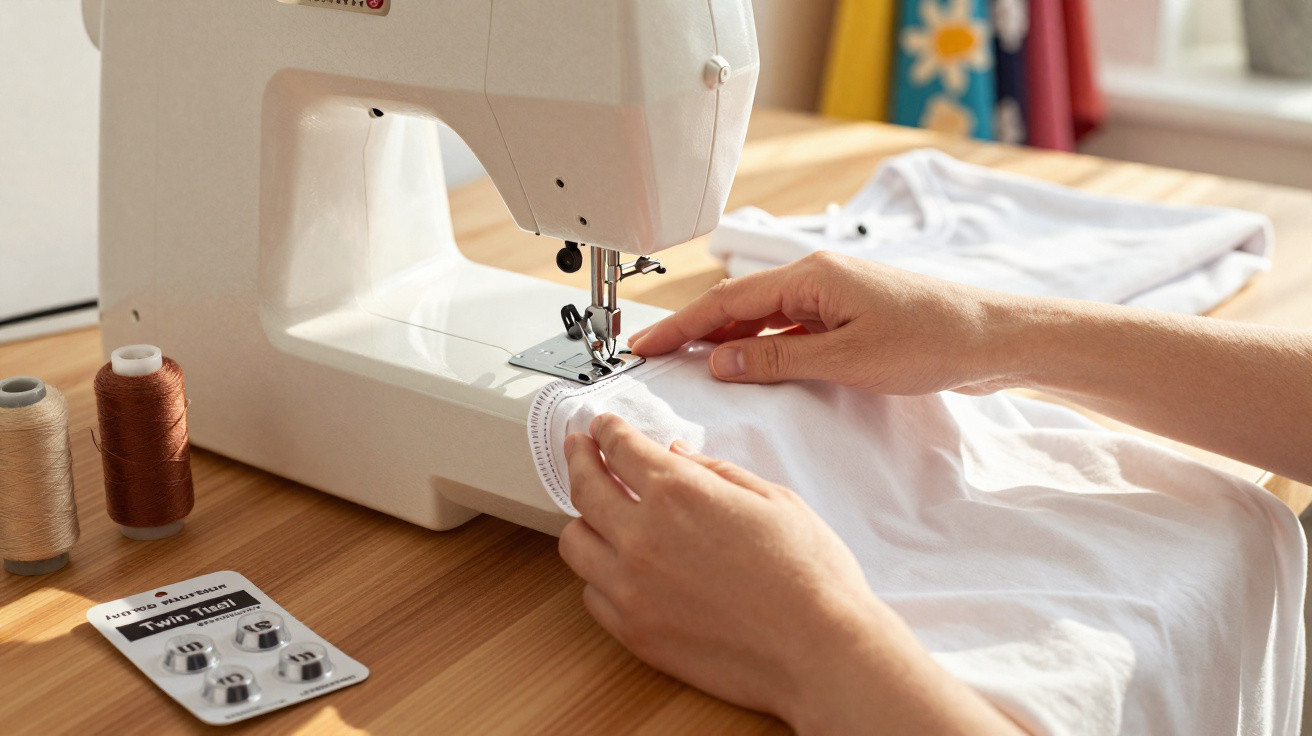
Many home sewers become frustrated by wavy, broken T-shirt hems – yet the answer is often already sitting unused in their own sewing machine.
Anyone who sews jersey will recognise the problem: the hem looks neat after pressing, but starts to ripple when the garment is tried on, or the thread snaps. It is easy to blame the fabric, the machine or your own ability. Usually, though, all that is missing is one small technique – plus an accessory that is tucked away in the cover of many domestic sewing machines.
Why T-shirt hems so often go wrong at home
Shop-bought T-shirts tend to look flawless: two tidy, parallel lines at the bottom, flexible fabric, no pulling and no puckering. At home, the result is often quite different. The issue is rarely a lack of skill; it is usually the method.
- Standard domestic machines generally sew with one needle and a straight stitch.
- While this stitch is secure on stable fabrics, it offers only limited stretch on elastic materials such as jersey.
- When the T-shirt stretches as it is pulled on or worn, the seam can quickly reach its limit and the thread breaks.
- Pulling the fabric to make it feed through “smoothly” also distorts the edge, causing the hem to ripple.
For T-shirts, manufacturers often use specialist industrial machines known as coverstitch machines. These automatically produce two parallel rows on top and an elastic stitch pattern underneath. Many home sewers assume that getting anywhere near this finish is impossible without professional equipment. That is exactly where they are mistaken.
The overlooked game changer: the twin needle function
For years, many popular machines from brands such as Singer, Brother and Pfaff have offered a way to recreate the look of a coverstitch machine, at least in part: the twin needle. It is seldom promoted, yet is already hiding in the accessory compartment of an astonishing number of homes.
“The twin needle turns an ordinary straight stitch into an elastic, visually ‘industrial’ hemming solution – perfect for T-shirts.”
The principle is straightforward:
- Two top threads pass through two needles.
- As usual, a single bobbin thread works underneath.
- On top, this creates two parallel straight-stitch lines spaced 2–4 millimetres apart.
- Underneath, the bobbin thread forms a zigzag pattern between the two rows.
It is this zigzag that provides the stretch. The hem can extend without the thread snapping. On stretch cotton fabrics, the technique offers considerably more flexibility than a standard straight stitch and comes remarkably close to the ready-to-wear coverstitch finish.
How to find the forgotten accessory on your sewing machine
Your first stop should be the machine rather than the fabric. If you sew jersey, check whether your machine can use a twin needle. The key question is whether there is room for two thread spools.
On many domestic machines, you will find either:
- a second, small spool holder in the accessory compartment; or
- an extra spool pin in the top cover, often made of plastic, which can be pulled out and fitted in place.
If your machine has such a holder, it will usually be able to use the twin-needle technique. A twin needle is often included among the accessories too, frequently still in its original packaging.
Setting up a twin needle on jersey: step by step
Choosing the right needle
For T-shirt hems, twin needles in size 80 or 90 are suitable. The spacing between the two needles is usually 2.5 or 4 millimetres.
- 2.5 mm: a subtle, narrow double row with a restrained, classic appearance.
- 4 mm: a more pronounced result that looks closer to many shop-bought T-shirts.
Important: use a twin needle designed for jersey, such as a jersey or stretch needle, so that the knit loops are not damaged.
Threading it correctly
Fit the machine with two thread spools. Both threads initially follow the same tension path, then separate only at the very end:
- Place two spools on the machine: one on the usual holder and one on the additional holder.
- Thread both threads as normal until just before the needle.
- Pass one thread through the left needle eye and the other through the right needle eye.
The bobbin underneath remains unchanged. Many machines automatically recognise the twin needle. With fully mechanical models, simply make sure that you do not select a zigzag stitch, as the needle could strike the needle plate.
The right settings for smooth hems
The stitch itself remains a basic straight stitch. Two things matter most: upper-thread tension and a test stitch.
- Reduce the upper-thread tension slightly, for example from 4 to around 3.
- Test on a scrap of the same jersey, without pulling the fabric.
- If a “tunnel” forms between the two rows, lower the tension a little further or reduce the sewing speed.
The finished seam should show two flat, parallel lines on the top and an even zigzag underneath. This keeps the hem stretchy when the T-shirt is pulled over the head.
When the blind hem has the advantage
Not every hem benefits from a twin needle. Many machines also include a blind-hem stitch, normally indicated by a letter or symbol. It combines straight stitches with a small zigzag that catches only a few threads from the outer fabric.
“For stretchy tops, the twin needle is ideal; for smart trousers and skirts, the blind hem comes into its own.”
Typical uses include:
- Twin needle: T-shirts, sweatshirts, children’s clothing, sportswear and all stretch fabrics.
- Blind hem: suit trousers, pencil skirts, curtains and all finer, non-stretch fabrics.
For a blind hem, a special foot with a central guide is advisable. Stitch length is often between 1.5 and 2.5, while the zigzag catches the outer fabric only minimally. From the outside, you will see at most tiny dots, and often nothing at all.
Fine-tuning for delicate fabrics and sportswear
Those working with very thin or extremely stretchy jersey can sometimes find that ordinary bobbin thread reaches its limits. After washing, the hem may draw up or feel scratchy against the skin. Special thread in the bobbin can help here.
An elastic, slightly fluffy specialist thread, often called mousse thread or textured thread, fills out the zigzag beneath the twin-needle seam. This makes the underside softer, allows the hem to lie flatter and reduces its tendency to ripple.
- Ideal for sports tops, leggings and children’s clothing.
- More comfortable against the skin than standard, firm polyester thread.
- Durable even with frequent movement and many wash cycles.
Common mistakes and how to avoid them
Many people abandon the twin needle after their first attempt because the outcome does not immediately look factory-made. In many cases, a small operating error is responsible:
- Problem: rippling.
Cause: upper-thread tension is too high, the fabric is being pulled, or thin jersey has no support.
Solution: reduce the tension, do not pull the fabric, and if necessary use spray starch or lightly reinforce the hem first. - Problem: thread breaks.
Cause: excessive tension, a blunt or unsuitable needle, or the wrong stitch setting.
Solution: fit a new twin needle, make sure a straight stitch is selected, and sew more slowly. - Problem: a tunnel between the rows.
Cause: thread tension is too tight or the fabric is being held too firmly between the feed dogs.
Solution: loosen the tension, increase the stitch length very slightly, and check the presser-foot pressure.
Why the twin needle is genuinely worth using
Once you have held a well-made twin-needle hem on a self-sewn T-shirt, the difference soon becomes clear: the garment looks more premium, more professional and withstands everyday wear better. The extra effort pays off particularly for children’s clothing, sports tops and favourite T-shirts that go through the wash constantly.
There is also a psychological benefit. When seams hold up and a garment feels comfortable to wear, it is more likely to become part of everyday life rather than hanging in the wardrobe only “for special occasions”. Self-sewn clothing is then genuinely worn instead of becoming a forgotten wardrobe item.
A practical tip for your next sewing session
If you have only sewn with a single needle so far, make a deliberate start on your next project by shortening an old T-shirt or preparing a jersey test piece. Trying the twin needle calmly on a fabric scrap removes the hesitation and quickly reveals which settings suit your own machine.
Keeping a note beside the machine with the needle size, stitch length and thread tension for your “favourite jersey” saves time and frustration later. That turns a frequently overlooked function into a standard tool for neat, durable T-shirt hems – without an expensive specialist machine.




Comments
No comments yet. Be the first to comment!
Leave a Comment