
When the days begin to lengthen, many amateur gardeners feel the urge to get growing. Then they look at the rock-hard lawn and their enthusiasm quickly fades. After all, who wants to spend hours battling with a garden fork, only to end up with a sore back rather than radishes? A smart technique from “no-dig gardening” puts an end to that struggle, using a material that would otherwise go into the recycling bin.
Why cardboard replaces the spade
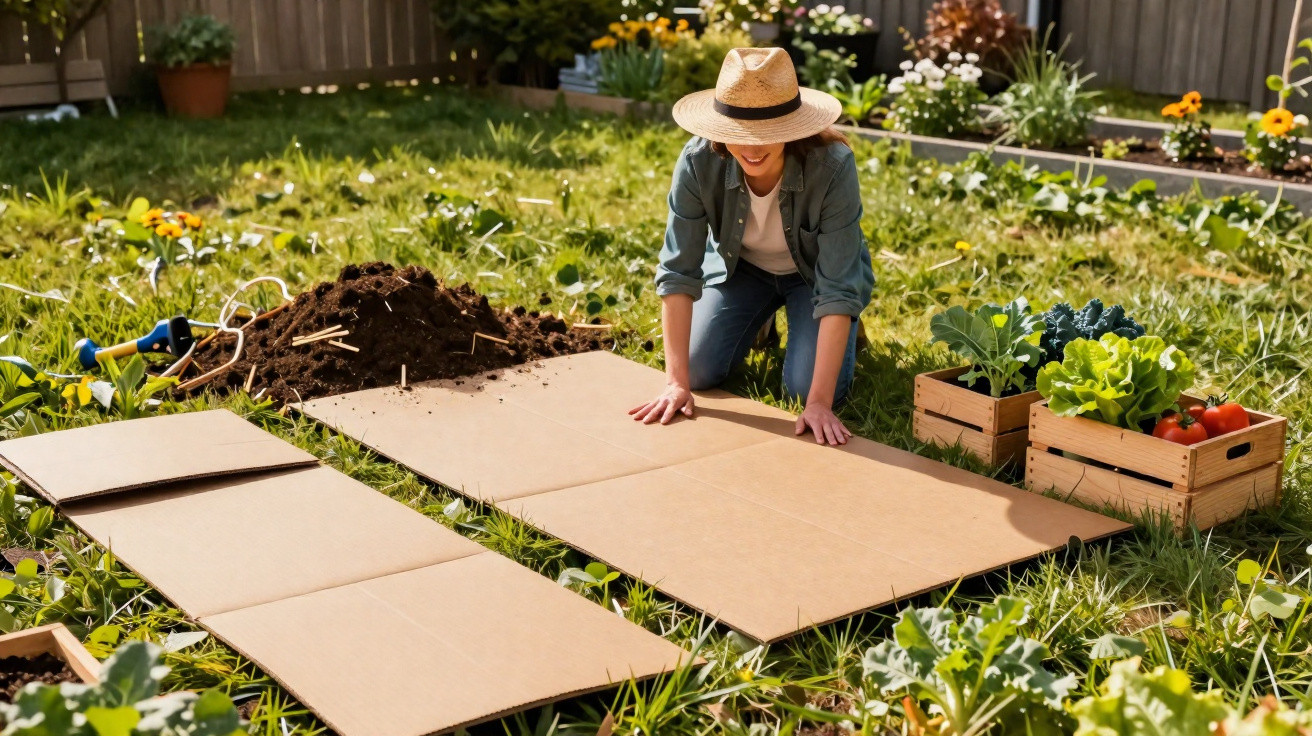
The principle is remarkably straightforward: rather than laboriously cutting away the turf, you simply cover it. Brown corrugated cardboard acts like a lid over the ground. It deprives the lawn of light, weakens the grass roots and, at the same time, lets soil life continue its work undisturbed.
“Beneath a multi-layer covering of brown cardboard and organic material, a new bed forms within a few weeks – without a single thrust of a spade.”
Ideally, the sheets of cardboard should overlap by 15 to 20 centimetres. This prevents even the smallest amount of light from getting through. After around three to six weeks, the existing grass and weeds will simply have too little light. The plants exhaust themselves trying to reach the surface, fail to penetrate the barrier and eventually die off.
Meanwhile, the cardboard itself starts playing its part. Rain or watering softens it, allowing it to settle closely against the soil before gradually breaking down. Earthworms and other soil organisms consume the cellulose and mix the dead grass, cardboard and soil together. As a result, the ground loosens naturally, becomes more permeable and gains nutrients.
Horticultural trials show that covering an entire area with cardboard can suppress almost all weeds. The soil stays protected, retains moisture more effectively and does not form a surface crust – all without herbicides.
Which cardboard to use – and what to avoid
Not every box from the pile of deliveries outside the front door is suitable for this method. What matters is what the cardboard contains and what has been printed on it.
- Use only plain brown corrugated cardboard.
- Avoid plastic coatings and glossy finishes.
- Do not use cardboard with large colour prints; choose pieces with as little printing as possible.
- Thoroughly remove tape, labels and metal staples first.
The covering should consist of two to three layers of cardboard, with a combined thickness of roughly five to eight millimetres. This creates a reliable light barrier while still allowing water through. Before laying it down, mow the area very short so that long blades of grass cannot push up beneath the cardboard.
Creating a no-dig vegetable bed step by step
In practice, this approach is surprisingly easy and far less physically demanding than conventional digging. Many gardeners with sensitive backs use it specifically to expand their growing space.
Preparing the area
- Choose the site and clear away obstacles such as large stones, thick branches or rubbish.
- Mow the lawn as short as possible; leave the clippings where they are or spread them thinly.
- Tear or cut the cardboard into manageable pieces so the ground can be covered properly.
Laying the cardboard cover
- Place the cardboard pieces tightly together, overlapping every join by at least 20 centimetres.
- Water generously until the cardboard is visibly saturated and lying flat.
- Spread five to ten centimetres of mature compost, well-rotted manure or plant mulch over the top.
Suitable mulching materials include:
- mature garden compost
- well-aged farmyard manure
- hay or straw
- leaves from trees, preferably mixed
- dried grass clippings applied in thin layers
This upper layer performs two jobs at once: it protects the cardboard from drying out too quickly and from sun damage, while also supplying the nutrients that will later feed vegetables and berries.
When the cardboard bed is ready for planting
If you begin at the end of March or the start of April, planting can usually begin between late April and mid-May. Weather conditions also matter: in cool, wet springs, the soil may need a little longer to get “working”.
A simple finger test reveals whether the area is ready:
- The cardboard tears or crumbles when pressed with a finger or dibber.
- The grass underneath is yellowish to brown and no longer actively growing.
- The compost layer on top remains loose and slightly moist.
Once these signs are present, planting can start. For young plants, make a small planting hole in the compost layer, cut a cross-shaped opening in the cardboard below and push the root ball through it into the loosened soil beneath.
Vegetables especially suited to a cardboard bed
For the first season, sturdy plants raised in pots or trays work best. Fine direct-sown seeds can struggle with leftover cardboard and are better introduced later.
“Tomatoes, courgettes and squashes are among the stars of the ‘lazy’ cardboard bed – they love the nutrient-rich, loose soil.”
Particularly suitable choices include:
- tomatoes
- courgettes and other squashes
- brassicas such as broccoli or white cabbage
- all types of lettuce
- strawberries
- potatoes, simply placed in the upper layer and covered again
Fine-seeded crops such as carrots, parsnips or parsley root are best left until the cardboard has almost completely disappeared. At that point, a shallow seed drill can be drawn in the top layer, allowing the small seeds to germinate without obstruction.
Benefits for your back, soil and the environment
The clearest advantage is that heavy tools are largely unnecessary. Anyone with disc or joint problems can garden much more comfortably this way.
Soil life benefits too. Earthworms remain undisturbed, while fungal networks and bacterial communities are not repeatedly disrupted. The result is stable, humus-rich soil that can hold water and is less likely to dry out quickly during hot weather.
There is another benefit: the area requires less weeding. Because the ground stays continuously covered, far fewer weeds germinate, while those that do emerge are usually loose enough to pull out by hand.
Common mistakes and how to prevent them
The method is forgiving, but there are a few pitfalls to watch out for:
- Cardboard that is too thin: if light gets through, grass and roots will simply grow through it.
- Cheap packaging waste containing plastic: film residues do not rot down and contaminate the soil.
- Too little organic material on top: the soil dries out more quickly and lacks nutrients.
- Impatience: planting too soon means hitting tough cardboard with the dibber and putting the roots under strain.
If these points are kept in mind, the same system can be maintained on the plot for several years. New mulching material is added each year, remnants from the previous season rot down, and the bed becomes progressively looser and more fertile.
Combining the cardboard bed with other methods
The technique becomes particularly interesting when it is paired with other permaculture ideas. Companion planting – the deliberate growing of different vegetables alongside one another – works exceptionally well because the soil remains covered and active at all times. Deep-rooting plants such as parsnips or salsify provide additional loosening once the cardboard has nearly disappeared.
Anyone planning a raised bed can also begin with a cardboard layer. Laid over the lawn at the bottom, it stops grass and roots growing up into the raised bed, then gradually decomposes as part of the system. Even on heavy clay soils, this can create a workable structure without spending an entire spring digging.
For many amateur gardeners, the unassuming delivery box can therefore become the key to a more relaxed start to spring: less sweat, fewer aches and still plenty of home-grown vegetables – directly on the former lawn.




Comments
No comments yet. Be the first to comment!
Leave a Comment