
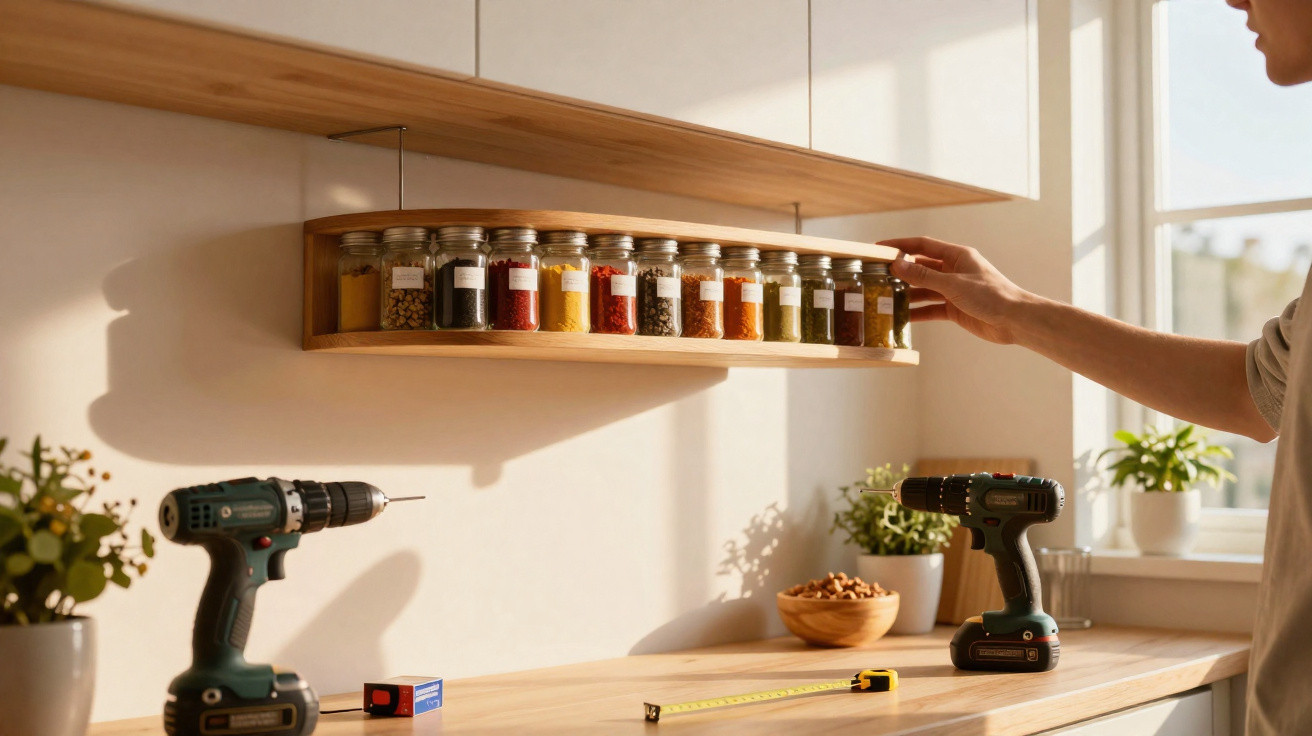
A straightforward trick using recycled glass can transform clutter.
Anyone living with a compact kitchen, student flat or home office will recognise the issue: spice packets split, elastic bands vanish, and screws only reappear after replacements have already been bought. Yet there is storage space above the worktop, desk or workbench that almost everyone overlooks: the underside of cupboards and shelves. A smart DIY project using recycled mini jars makes use of precisely this area.
How a swinging jar shelf puts an end to spice clutter
The principle is remarkably uncomplicated: small screw-top jars – such as old jam jars – hang upside down from a wooden block held between two side pieces of timber. The block rotates like a small axle, so a single movement brings every jar into view.
The clever part lies in its construction. Jar lids are screwed to the underside of the wooden block, while the block itself is set between two slightly longer side pieces. A bolt or substantial screws form the pivot. The finished unit can be fitted beneath a wall cupboard, under a wall shelf, inside a shelving compartment or directly onto a wall.
“At first glance, it looks like a decorative wooden board – turn it and it reveals a perfectly organised row of floating jars.”
As well as freeing up drawer and shelf space, this prevents small items from getting lost at the very back. Each jar has a designated position and can be quickly reached from below.
Materials: what you need for the rotating block with mini jars
This project only calls for basic DIY tools. Perfect workmanship is less important than a well-planned design and secure installation.
Basic equipment for the floating jar block
- one rectangular block of wood, such as spruce or beech
- two longer wooden battens for the side supports
- small glass screw-top jars with metal lids
- screws for the lids and installation
- two sturdy bolts or anchor screws to act as the pivot
- a drill or cordless screwdriver, plus wood drill bits
- sandpaper, and optionally wood stain or varnish
The number of jars depends on the length of the wooden block. Sets of 12, 16 or 20 jars are practical options. The block should be just slightly wider than the lids so that they are firmly supported, while still leaving enough finger room to grip and unscrew each jar comfortably.
Step by step: making the rotating spice rack
1. Prepare and protect the wood
Start by sanding every wooden surface until there are no splinters left to feel. If preferred, stain or varnish the block and side pieces to suit the kitchen or workshop. This finish offers protection from moisture and grease, which is especially useful above a hob. Leave everything to dry thoroughly afterwards.
2. Mark out the lid positions
Next, measure the underside of the wooden block carefully. The lids need to be evenly spaced and must not touch one another. Mark their centre points with a pencil. Leave at least a finger-width gap between two lids, otherwise unscrewing the jars becomes awkward.
3. Screw on the lids securely
Position each lid centrally over its marking, then secure it using two or three small screws. The screws must not be so long that they protrude through the top of the wood. It is worth doing a quick check: screw a jar in and remove it again; if nothing is loose, continue to the next stage.
4. Drill and fit the pivot
For the block to swing, it requires an axle. Drill one hole into each side piece and one into the block itself. The holes in the side pieces should be a little wider than the bolt, whereas the bolt needs to fit tightly in the block. This allows the wooden assembly to rotate inside the side pieces without wobbling.
Push the bolt through the side pieces and block, then tighten it. For extra reassurance, test the movement before fitting any jars: does everything turn smoothly without rubbing, and is there sufficient clearance from the surface where it will be mounted?
5. Secure it beneath a cupboard or shelf
Finally, install the complete block and its side supports in the chosen location – beneath a wall cupboard, on the underside of a shelf or on a sturdy wall batten. Use only reliable screws capable of safely carrying the weight of the filled jars.
“A trial run with empty jars saves frustration: only fill them with spices and small items once the block swings freely.”
Once everything is in place, fill the jars, screw them in and the new organising system is ready.
Where the trick ends jar clutter: everyday uses
In the kitchen: an instant spice bar
In the cooking area, each jar can hold one type of spice or dried food: paprika, turmeric, herb blends, nuts or seeds. Turn the wooden block and every label is visible at once. Small labels can also be attached to the sides or bottoms of the jars.
In the craft room: beads, buttons and sequins
Creative households can benefit from this shelving solution too. Instead of repeatedly searching for beads, buttons or sequins, all materials can be kept neatly sorted in the jars. This not only saves time but also gives the workspace a calmer appearance.
In the home office: small office essentials close at hand
In a study, the floating jars become miniature archives for odds and ends:
- paper clips and staples
- elastic bands, drawing pins and small magnets
- USB sticks, memory cards and replacement pen refills
- key rings and spare keys
Everything hangs neatly sorted above the desk, leaving the desktop clear for a laptop, notes and a mug of coffee.
In the workshop and garage: order for screws and wall plugs
In a garage or hobby workshop, the system shows its more hard-wearing side. Each jar can hold screws, wall plugs, washers, small spare parts or fuses, ideally sorted by length, thickness or purpose. One look along the row of jars is then enough to locate the right type.
Usage tips, safety considerations and variations
A brief safety check is worthwhile, depending on where the unit is used. Above a hob, jars should not be installed too close to naked flames or intensely heated surfaces. In homes with children, choose a mounting height where small hands cannot easily reach every jar – particularly where they contain hot spices, medicines or small screwable items.
Those who prefer a splash of colour can paint the lids in different shades to match their contents. Another option is to combine jars of varying sizes. Larger jars work well for rice, lentils or coffee, while smaller ones suit spices or screws. In that case, the block and pivot must be sized robustly enough to keep the weight properly distributed.
Cleaning requires little effort: jars can be washed as normal, while the wooden block only needs an occasional wipe with a lightly damp cloth. Metal lids with small rust spots can simply be replaced, helping the system remain functional for a long time.
The project is also suitable for people with limited DIY experience. Anyone without a drill can have pre-drilled battens cut to size at a DIY shop. Many stores will also help, on request, by making the pivot holes. A few recycled glass containers and leftover timber can therefore become an exceptionally useful storage system that noticeably eases the pressure on even the tightest kitchen or messiest desk.





Comments
No comments yet. Be the first to comment!
Leave a Comment