
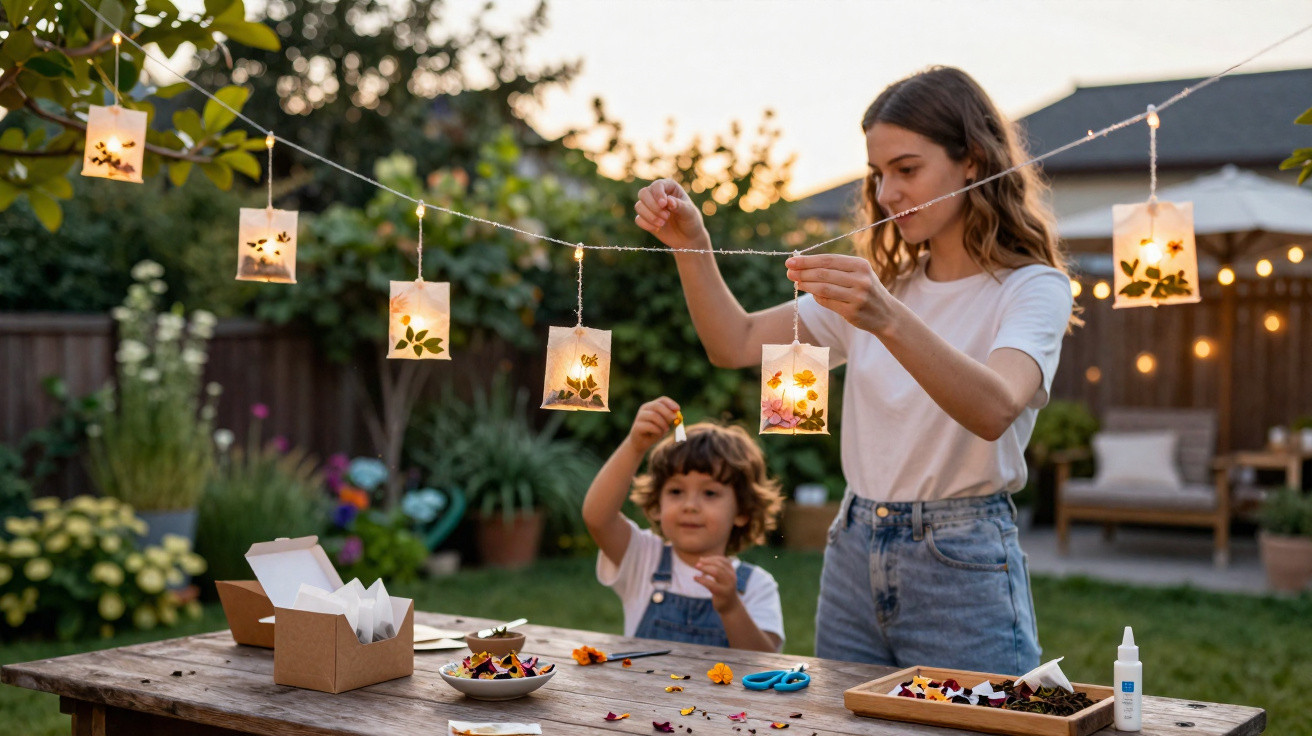
The answer is surprisingly often already sitting in the food-waste bin.
Anyone hoping to turn their balcony or garden into a small sea of lights in the evening soon discovers that stylish solar fairy lights and designer lanterns can make a sizeable dent in the budget. At the same time, countless used tea bags are thrown away every day. These unassuming leftovers are currently demonstrating their decorative potential across social media: transformed into delicate, golden garden lanterns.
Why used tea bags have suddenly become a lighting trend
The idea originated in the UK DIY community. Crafter Sibia Torres Padilla, known online as @Sibster, made small illuminated columns from ordinary tea bag wrappers. Her video went viral, attracting millions of views, thousands of comments and plenty of people recreating the project.
“A simple used tea bag becomes a small light box with a warm, amber glow – virtually free of charge.”
There is a straightforward reason for this: paper tea bags already provide exactly the right material:
- a standardised, manageable size
- slight transparency, making them ideal lampshades
- a natural, subtly brown tint that diffuses light softly
Rather than throwing them away, many tea drinkers are now turning the bags into decorations. Some say they keep a jar beside the kettle specifically to collect, rinse and dry used tea bags. Their supplies for the next craft evening gradually build up this way.
How to make an inexpensive garden lantern from tea bags
The basic principle is simple: four prepared tea bag papers create a small glowing column that conceals an LED light source. The process is manageable, while the finished result looks remarkably professional.
Materials that most people already have at home
For a small version, you need only a few basic items:
- at least eight used paper tea bags
- white craft glue or wood glue, diluted with a little water
- pressed flowers or flat leaves, or paper confetti and thin stickers
- slim wooden sticks, kebab skewers or lolly sticks
- LED tealights or a small battery-powered string of lights
That is all that is needed to make the first mini lantern. There is no need for costly specialist supplies.
Step 1: Prepare the tea bags
Preparation is crucial if the lanterns are to be sturdy and mould-free:
- Carefully cut the tea bags open along one side.
- Empty out all the tea leaves, even if they are still damp.
- Briefly rinse the paper under running water so that no residue remains.
- Lay the damp wrappers out flat, ideally on kitchen roll or a tea towel.
- Allow them to dry completely until the paper is firm and no longer clammy.
You will end up with small squares marked by irregular brown patches – the future walls of your lights.
Step 2: Add flowers and designs
This is the creative stage. Gently brush the tea bags with the diluted glue-and-water mixture, then place on them:
- thin, dried flower petals
- small fern fronds or other flat leaves
- fine paper confetti or punched-out motifs
The designs really must be flat, otherwise the paper could tear later. Apply one more thin coating of glue over the top and leave it to dry; the decorated panel is then ready. Each piece becomes a miniature canvas.
“When the LED comes on in the dark, the glued-in flowers glow like tiny paintings held up to the light.”
Step 3: Build the frame and assemble the lantern
The flat sheets need a frame to become a three-dimensional object. Wooden sticks are the easiest option:
- Cut the wooden sticks to match the edge length of the tea bags.
- Arrange four sticks into a rectangle at a time.
- Glue the tea bags onto the frames and allow them to dry thoroughly.
- Join four of these panels into a small column; a hot glue gun or strong all-purpose adhesive will help here.
- Leave an opening at the bottom for the LED light to be placed inside.
Most importantly, use LEDs only for illumination. Open flames, such as real tealights or taper candles, must never be used inside a paper lantern because of the fire risk.
Where tea bag garden lanterns work best outdoors
Once the light has been fitted, the small column can be positioned almost anywhere, provided it does not get soaked. Tea bag lanterns are made of paper and are not weatherproof.
- as table decorations on a balcony or garden table
- on windowsills or low walls
- on steps to create a small trail of light
- hung beneath a pergola or from sheltered hooks
A spot protected from direct rain is ideal. Many people simply bring the lanterns indoors again after a gathering. For a summer party or a relaxed evening, three or four are enough to create a surprisingly warm atmosphere.
Creative variations: more than flowers, more than the garden
The DIY community rarely stops at one concept. The tea bag technique works for many different versions:
- Autumn edition: with small dried maple leaves or grasses
- Winter look: with white paper stars or metallic confetti
- Children’s birthday party: with flat stickers that appear when backlit
- Living-room decoration: as a string of lights on a sideboard rather than in the garden
Those who wish can combine several columns in different heights. Eight tea bags, for example, make a small version, while twelve or sixteen create a taller one. Varied heights add movement to the overall lighting effect.
A perfect family craft activity – with clear safety rules
In many homes, what began as a viral idea has now become a regular craft activity that works particularly well on a rainy afternoon. Children can arrange the motifs or scatter confetti, while adults take care of the glue, frames and LED components.
“Every cup of tea becomes the starting point for a new lantern – a small cycle of enjoyment, recycling and creativity.”
Despite its playful nature, there are several clear rules to follow:
- Use LED lights only, never real flames.
- Let tea bags dry completely before crafting, otherwise there is a risk of mould.
- Do not leave children alone with hot glue or sharp cutting tools.
- Bring the lanterns indoors promptly in strong wind or rain.
Sustainable impact: less waste, more atmosphere
Strictly speaking, this is upcycling: a disposable item is given a second life as a decoration. Anyone who drinks tea daily, or several times a week, will soon collect enough material. It is particularly worthwhile in homes with several tea drinkers or when preparing for parties.
It also raises awareness of how much useful material would otherwise end up in the bin. The activity is equally suitable for schools, craft groups and neighbourhood projects. Especially practical is the fact that the lanterns can be stored flat and brought out again whenever needed, such as for the next garden party.
Anyone wishing to explore the idea further can experiment with different types of tea. Some bags stain the paper more intensely, while others remain almost white. Combined with various flowers, this creates surprisingly versatile lighting effects. An everyday leftover is turned into a small design object that makes balmy summer evenings considerably cosier – without an expensive solar fairy-light set from a DIY shop.






Comments
No comments yet. Be the first to comment!
Leave a Comment