
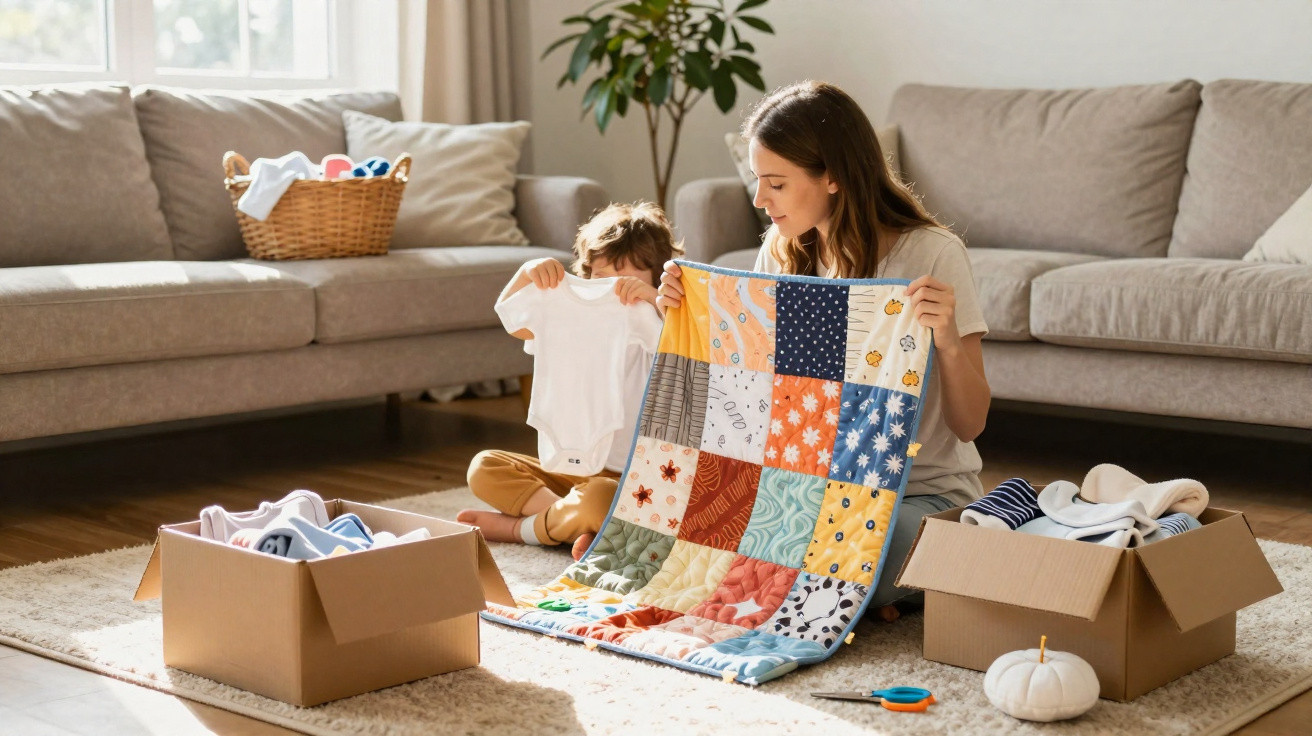
Many parents will recognise the situation: boxes filled with tiny bodysuits, babygrows and miniature pyjamas, far too emotionally significant to throw away but long since forgotten. Rather than gathering dust in a box, these garments can become a personal keepsake blanket that sits in the middle of the living room and tells stories every day.
Why baby clothes in a box are never really ‘dealt with’
During a child’s first few months, five to seven bodysuits can easily end up in the wash each day. Within a year, these clothes can effortlessly fill several moving boxes. Every item represents a particular moment: the tiny outfit worn for the journey home from hospital, the Christmas-print bodysuit, the present from a godmother.
At car boot sales, these pieces are unlikely to fetch much money. Emotionally, however, they are priceless. That is precisely why sorting them out feels so difficult. Pass them on? Keep them? Donate them? The boxes often end up securely closed in the cellar or loft, and therefore out of sight.
The emotional significance of those first baby clothes remains; it is simply their location that is often wrong: instead of being tucked away at the back of a storage room, they can become a fabric album in the living room.
The idea is not to save every garment separately, but to bring together the most meaningful pieces in a new object with an everyday purpose: a snuggly blanket, sofa throw or bedspread for a child’s bed.
Keepsake blanket from baby clothes: how the principle works
The term “Memory Quilt” is common in English-speaking countries, while here it is usually called a keepsake blanket or keepsake throw. Both describe the same thing: old textiles are turned into a patchwork that tells a story.
For parents, outgrown bodysuits and pyjamas are especially well suited to this purpose. Usually made from cotton jersey, they are soft, kind to the skin and often feature bold prints or slogans. This variety is exactly what gives the finished blanket its appeal.
Choosing garments: less chance, more biography
Anyone sewing or commissioning this kind of blanket should select the clothes thoughtfully. Rather than emptying the box at random, it is worth having a small sorting session at the kitchen table. Typical must-keep items include:
- the outfit worn on the first day at home
- the bodysuit from a first birthday or first holiday celebration
- favourite babygrows that were constantly worn
- garments given by grandparents or close friends
- pieces with in-jokes or distinctive designs
The blanket then becomes a kind of fabric diary. Alongside a photo album or memory book, it forms a collection of ‘anchor points’ through which a child’s first years can be retold.
The jersey challenge: why the right method matters
Many parents are put off by the thought: “Patchwork - I could never do that in a million years.” Some of that concern comes down to the material. Bodysuits and babygrows are rarely made from firmly woven fabric; instead, they are made from stretchy jersey, which can be temperamental under a sewing machine.
Jersey is knitted rather than woven. While sewing, it stretches, shifts and ripples around the edges. Anyone who simply cuts out squares and stitches them together may quickly become frustrated: seams distort, corners go crooked and the blanket will not lie flat.
The key trick is stabilisation: only with interfacing on the reverse does a floppy bodysuit become a neat square that can be sewn properly.
Step by step: making a throw from around 25 bodysuits
For a medium-sized snuggle blanket, the contents of two to three boxes will often be enough. As a rough guide:
- Set aside around 25 to 30 garments, washed and free from stains.
- Cut a cardboard square, for example 15 x 15 centimetres, to use as a template.
- Reinforce the reverse of the chosen sections with iron-on interfacing.
- Use the template to cut out squares, positioning designs and slogans in the centre.
- Arrange the squares in rows until the overall layout looks balanced.
- Stitch the rows together one at a time, right sides facing, allowing around 1 centimetre for the seam allowance.
- Finally, add a backing, such as fleece or Minky, to make the blanket cosy and opaque.
There is also a practical benefit: popper strips or labels can be cut out separately and stitched on as details. Some parents use the popper strips to attach the finished blanket to a cot or pram hood.
Sewing it yourself or having it made: which option suits whom?
Whether to use a sewing machine yourself or hire a professional depends on available time, sewing skills and personal enthusiasm. Each approach has its own appeal.
Benefits of a DIY project
For people who sew their own blanket, the sorting and sewing stages can become an especially intense look back. Every piece passes through their hands once more, bringing back memories of nights, holidays and little dramas. Many say that they pause repeatedly while cutting, smile or blink away a few tears.
Doing the work yourself also saves money. The essentials are:
- a basic sewing machine with straight and zigzag stitches
- iron-on interfacing for stabilisation
- scissors or a rotary cutter and ruler
- fabric for the backing, such as fleece, Minky or cotton with light wadding
Choosing a calm period is important: this is not a project that can be completed in an hour, but is more likely to take several afternoons.
When professionals take over
Those who have no interest in sewing techniques can commission specialist studios. They offer blankets in a range of standard sizes, including:
| Size (cm) | Approximate number of garments |
|---|---|
| 75 x 75 | approx. 20–25 |
| 90 x 90 | approx. 30–40 |
| 75 x 120 | approx. 40–50 |
| 90 x 150 | approx. 60–80 |
| 135 x 180 | up to 100 or more |
Studios generally ask for freshly washed, dry garments and place great importance on knowing about stains or holes in advance. The usual waiting period is between one and three months. The result is a professionally made blanket, often with a padded core and a cosy backing fabric.
How the blanket becomes part of everyday life - and grows with the child
A keepsake blanket is not a museum piece. It is meant to lie on the sofa, move into the child’s bedroom and cover legs during story time. Many parents turn it into a ritual: in the evening, the child points to a square and asks, “When did I wear that?” The stories then emerge naturally.
Later, the blanket can move into a teenager’s bedroom, then a first home and perhaps one day to their own children. Even if it eventually shows signs of use, that is exactly where its value lies: it shows that it was part of everyday life.
In place of a heavy box that is never opened, there is a textile photo album that can be passed down from generation to generation.
Practical advice, care and useful combinations
A few details can help the blanket last for years. Use heavily faded or brittle fabrics sparingly, preferably as small appliqué details. Very thin material benefits from a second layer of interfacing. Anyone with pets is better off choosing a hard-wearing backing fabric that can withstand frequent washing.
In many cases, a gentle 30-degree wash with mild detergent is sufficient for care. Avoid tumble drying, as the different fabrics may shrink at different rates. It is better to lay the blanket flat or hang it over a washing line until it has dried thoroughly.
A small memory box can be a useful addition. Items that are difficult to sew in - a hospital wristband, dummy or tiny woollen hat - can be stored there. This creates a combination of a tactile keepsake (the blanket) and a small archive for particularly delicate objects.
Those who begin the project later can expand the idea beyond baby clothes. T-shirts from nursery years, shirts from a first sports club or favourite pyjamas can also be included in such a blanket. With every square, the textile archive of family life grows, while the pile of boxes in the cellar is reduced at the same time.
Comments
No comments yet. Be the first to comment!
Leave a Comment