
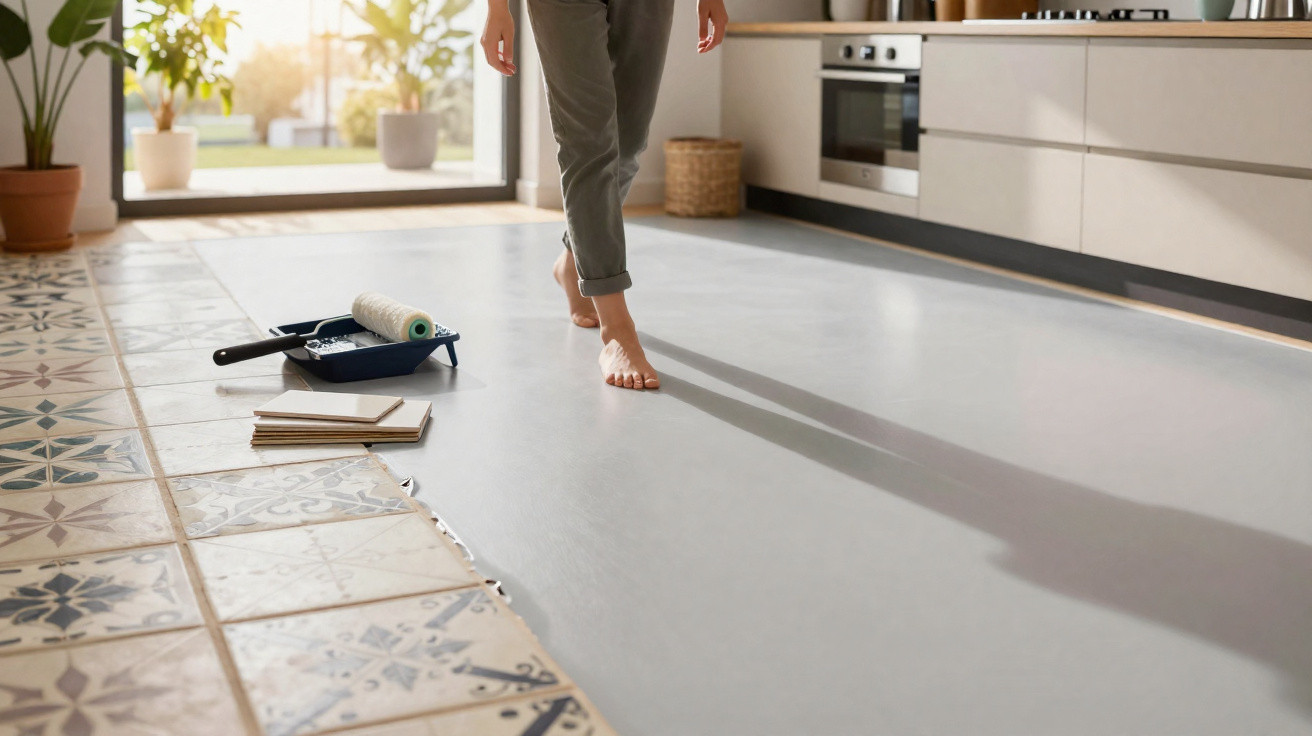
There is an unexpectedly simple way out.
Many flats and houses look dated solely because of their flooring. Small-format beige tiles may be impeccably clean, yet still look as though they belong in the 1990s. When people picture demolition hammers, piles of rubble and days of building-site disruption, they keep postponing the refurbishment. This is exactly where a solution comes in that makes tiles disappear visually without having to remove them.
Why a new covering over old tiles makes such a difference
The traditional way of replacing tiles always follows the same pattern: break up the old tiles, dispose of the debris, repair the screed and install a new covering. It costs money, time and patience, while turning the home into a building site for days. For many homeowners and tenants, that simply is not an option, particularly just after moving in.
A far less stressful alternative is a floor covering applied directly over the existing tiled floor. The old surface remains in place and merely serves as a base. A new, continuous finish is then created over it, with no visible grout lines. The room feels calmer and more contemporary, and cleaning becomes easier.
“A modern coated floor transforms old tiles into a seamless surface – without demolition and without a skip outside the door.”
This type of flooring is generally a specialist resin coating, usually based on epoxy resin or polyurethane. The material is applied in liquid form, then cures into a durable, sealed surface. Its benefits are that it is waterproof, scratch-resistant and suitable for kitchens, hallways, bathrooms and even living areas.
Resin as a designer floor: turning a tiled eyesore into a loft look
Decorative floor resin is supplied as a thick liquid that is spread across the existing tiled floor. It covers both tiles and grout joints, creating one uninterrupted surface once cured. Depending on the product, the finished appearance can resemble concrete, a poured industrial floor or a particularly calm, modern designer floor.
Almost any colour is possible: cool stone greys, warm greige, near-white finishes for minimalist interiors, or bold shades that make a statement. This makes the coating equally at home in a family kitchen, a compact bathroom or an open-plan living and dining room.
In heavily used spaces especially, this floor stands out for its uniform, hard-wearing character. There are no grout lines where dirt can collect and no chipped corners that need attention after several years.
Requirements: when coating tiles is worthwhile
Before opening a bucket of resin, take an honest look at the existing floor. The substrate must be sound. Loose tiles or tiles that sound hollow when tapped rule out this approach. Simply coating over these areas risks entire sections coming loose or cracks appearing later.
The tiled surface must be:
- stable, with no loose or hollow-sounding tiles
- clean and free from grease
- dry, particularly in bathrooms
- as level as possible; larger depressions must be filled beforehand
Grout joints need to be cleaned and, where necessary, lightly filled and smoothed. Very smooth, glossy tiles should be treated with a specialist bonding primer. This ensures the new covering does not peel away like a film, but instead bonds firmly with the existing base.
“The new floor is only as good as the preparation beneath it – cutting corners here will cause problems later.”
Typical advantages of a resin floor over old tiles
Anyone choosing to have a tiled floor coated benefits in several ways at once.
- Seamless surface: Nothing can gather in grooves, and the floor looks visually larger.
- Easy cleaning: Damp mopping is usually enough, even in bathrooms and kitchens.
- Numerous finishes: From matt and minimalist to high-gloss, depending on the style of the home.
- Quicker than a full refurbishment: One to two days are often sufficient.
- Long-lasting: With sound preparation and proper care, the floor remains attractive for many years.
Different sealants can be used to tailor the surface. A matt, lightly textured finish has more of a concrete look, while a glossy version recalls a stylish loft-style floor. In wet rooms, a slip-resistant option is advisable; in living areas, a smoother, gently satin finish works well.
Step by step: refurbishment without demolition
Most systems are built up in a similar way. Manufacturers’ instructions differ in detail, but the fundamental process remains the same.
- Cleaning: Vacuum the tiles thoroughly, degrease them and lightly sand them if needed.
- Repairing damage: Fill cracks, holes and crumbling grout with filler.
- Priming: Apply a bonding primer, especially on very smooth surfaces.
- Mixing the resin: Combine the components precisely as specified and observe the working time.
- Coating: Spread the resin and level it evenly with a roller or squeegee.
- Sealing: Depending on the system, apply a protective coat against scratches and UV light.
On small, straightforward areas, such as a guest WC or a small hallway, experienced DIY enthusiasts can manage the work using ready-made kits from DIY shops or specialist suppliers. Prices for basic systems start at roughly €18 per square metre. The crucial point is to follow the instructions exactly and allow the stated drying times.
When it is worth hiring a professional
The larger and more awkwardly shaped the area, the more sense it makes to use a specialist contractor. A professional is recommended for a large kitchen-diner, a fully tiled bathroom with a shower, recesses and falls, or wherever expectations for the finish are particularly high.
Tradespeople specialising in floor coatings generally use higher-quality systems and understand the usual sources of error. Depending on the material, colour choice and amount of work involved, costs commonly fall between €100 and €150 per square metre. This includes preparation, coating and sealing.
That experience is especially valuable for slip-resistant finishes in shower areas, transitions to other floors and sensitive details such as floor drains. Variations in coating thickness or visible lap marks are very difficult to correct later.
Where the new covering works well – and where it does not
The coating shows its strengths in the following rooms:
- Bathroom: A low-grout, waterproof floor that looks more modern than old small-format tiles.
- Kitchen: Easy to clean, with no grease or sauce splashes settling into grout lines.
- Hallway and entrance area: Robust enough for street dirt and moisture brought in from outside.
- Living and dining room: A calm, expansive look that allows furniture to stand out.
The floor is less suitable for substrates that move significantly, such as timber floorboards with noticeable spring. Cracking may occur there. Likewise, substantial moisture damage beneath the tiles or mould problems must have their cause remedied before a coating is considered.
Tips for everyday use, care and long-term planning
Once the new floor has fully cured, it is usually easier to maintain than a conventional tiled surface. Neutral cleaners are sufficient; harsh abrasive products are unnecessary and can even damage the sealant. Furniture should be fitted with felt pads, while soft protective pads help beneath heavy cupboards.
Anyone who likes rearranging furniture or regularly moves heavy objects should ask a professional for a hard-wearing sealant with good scratch resistance. In homes with dogs or children, a system that tolerates minor signs of use and can be touched up locally if required is worthwhile.
In terms of property value, this flooring offers two advantages: it avoids costly demolition work and gives older flats a noticeably more contemporary appearance in one step. If another covering is wanted many years later, the coating will still provide a sound base for click vinyl, parquet or carpet.
Anyone uncertain can obtain sample boards or visit a showroom. Resin floors often look different in person than they do in photographs: lighter, calmer and less “industrial” than many people initially expect. They can make small bathrooms appear larger in particular, because the familiar grout pattern disappears and the eye no longer catches on every individual square.


Comments
No comments yet. Be the first to comment!
Leave a Comment