
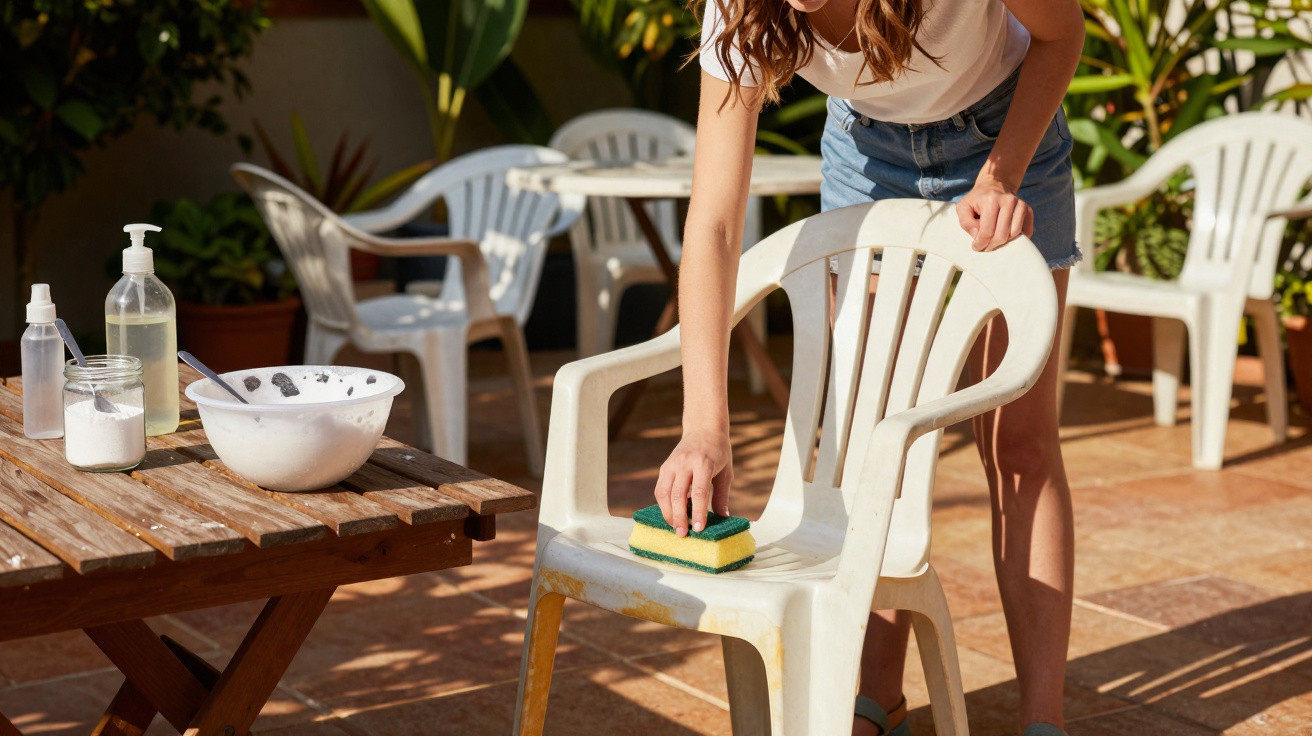
Many households will recognise the situation: you haul an old plastic patio table up from the cellar, give it a quick wipe, and the set suddenly looks ten years older. Sun, rain and dirt have all left their mark. Before taking the furniture to the recycling centre, however, it is worth inspecting it closely: a straightforward homemade mixture can restore many plastic sets remarkably well.
Why your plastic patio set quickly turns yellow and grey
Plastic garden furniture usually spends months outdoors. UV radiation, damp and fine dust all attack its surface. As a result, the plastic becomes more porous, loses its sheen and picks up dirt more readily. White chairs and tables in particular can easily develop a yellowish cast.
The explanation lies in the material's composition. UV light breaks down chemical bonds in plastic, leaving the surface rougher and creating tiny cracks. Dust, pollen and airborne soot settle into these imperfections. Once this layer combines with moisture, it produces the familiar grey film.
At the same time, the colour fades. On inexpensive furniture, the pigment is often contained in only a thin outer layer. Without UV protection, that layer is quickly damaged. White becomes yellowish, while coloured furniture can look dull and unevenly faded.
“The dull, yellowish film on plastic furniture is usually not a final verdict – it is often simply a damaged, dirty surface that can be refreshed surprisingly well with the right mixture.”
Even so, plastic remains relatively easy to maintain compared with wood, metal or poly rattan. Wood needs oiling and occasional sanding, metal may rust, and poly rattan does not cope well with constant wetness. If its structure is still sound, plastic can often be visually ‘reset’ with a little effort.
The homemade mix that makes yellowed plastic furniture shine again
Before using the main cleaning mixture, start with a thorough basic clean. Remove cobwebs, sand and coarse dirt first; otherwise, you will simply spread grime around.
Step 1: a thorough basic clean
- Brush off loose dirt with a soft brush or hand brush.
- Fill a bucket with warm water and a little washing-up liquid.
- Wipe every surface thoroughly using a soft cloth or sponge.
- Rinse briefly with clean water and allow the furniture to dry roughly.
Many pieces of furniture will already look noticeably better after this stage. The real ‘before and after’ effect, however, comes with a second pass using a simple household mixture.
Step 2: the vinegar, bicarbonate and washing-up liquid mix
You need just four ingredients for this homemade cleaner, most of which are likely to be in the cupboard already:
- 500 ml lukewarm water
- 1 tablespoon white household vinegar
- 2 tablespoons bicarbonate of soda
- a small squirt of washing-up liquid
Put all the ingredients into a spray bottle and shake it briefly: the specialist cleaner is ready. The mixture combines three effects: vinegar loosens limescale and dirt deposits, bicarbonate provides a mild abrasive action and neutralises odours, while washing-up liquid breaks down grease and boosts the cleaning power.
Use the mix as follows:
- Spray the furniture generously, including undersides and grooves.
- Work it in with a soft sponge or microfibre cloth, using circular movements.
- Leave the foam for a few minutes, but do not let it dry in strong sunshine.
- Rinse thoroughly with plenty of clean water, removing every trace of residue.
- Dry with a clean cloth or leave it to air-dry.
“Many stains disappear after just one treatment with the vinegar-bicarbonate mixture – especially grey film and slight yellowing on white surfaces.”
What to do about especially stubborn stains?
Some marks are more deeply ingrained, including old rust stains, dark scuff marks or dirt lines that have dried on for a long time. In these cases, a mineral cleaning stone can help; it is often sold as a ‘cleaning stone’ or ‘cleaning paste’. It consists of finely ground mineral clay, soap and a little glycerine.
Use it selectively as follows:
- Lightly dampen a sponge and rub it over the cleaning stone.
- Test it on an inconspicuous area first, especially on coloured furniture.
- Apply only gentle pressure to prevent scratches.
- Rinse thoroughly with water afterwards.
This type of stone can work impressively on white plastic surfaces. Take care with strong colours, as it may leave behind a dull, lighter patch.
When plastic patio set repairs are worthwhile – and when recycling is the better option
Carry out a quick safety check before starting any cleaning work. A chair may look excellent on the surface but still be unsafe if the material has already weakened.
| Problem | What you can do | When is disposal the better choice? |
|---|---|---|
| Fine hairline cracks in the seat | Monitor them closely and place only a light load on the chair | Stop using it if the cracks become larger |
| Obvious cracks in legs or armrests | Secure temporarily with tape, only as a short-term measure | Replace it immediately because of the risk of breakage |
| Heavy discolouration but no cracks | Clean it and, if necessary, sand lightly and paint it | Dispose of it only if the result remains unsatisfactory |
| Brittle, crumbly edges | Carefully smooth small areas | Do not continue using it if brittleness is widespread |
Where the structure is intact, light sanding and suitable plastic paints can disguise visual flaws. Fine sandpaper, around 120 grit, is usually enough to smooth areas that have become rough. A paint specifically approved for plastic can then give the furniture a more even appearance.
How to protect your garden patio set from yellowing for the long term
If you do not want to start from scratch every spring, a few simple habits can make a substantial difference. Most issues occur because the furniture is left outdoors without protection throughout the year.
Make a smart purchase rather than a rushed bargain buy
How long a plastic patio set remains presentable is decided partly at the point of purchase. Look for descriptions such as ‘UV-stabilised’ or ‘colour-through plastic’. In these products, colour pigments are distributed throughout the material rather than being confined to a thin surface layer.
Spending a few pounds more initially pays off over the years, as there is less yellowing and less risk of breakage. Chairs with thicker walls also withstand temperature changes and regular use better than very lightweight budget models.
Everyday protection: small habits, major results
- During winter, store the furniture in a cellar, garage or under cover where possible.
- Use protective covers that allow air to circulate and do not trap condensation.
- Wipe it down once a month with lukewarm soapy water.
- Do not use oil treatments on plastic – over time, they make the surface porous and more prone to dirt.
- Avoid stacking chairs in exactly the same position all the time, to prevent pressure marks.
“Regular, light maintenance beats an annual deep clean: anyone who prevents dirt from becoming baked on will enjoy their plastic patio set for much longer.”
What vinegar, bicarbonate and the rest actually do
Many people wonder why this particular simple mixture works so well. A brief look at the chemistry behind it helps put it into context, without requiring specialist knowledge.
Vinegar contains acetic acid, which dissolves limescale marks, light rust traces and old soap residue. Bicarbonate is a weak base with a mildly abrasive effect. It reacts with grease and neutralises acids. Together with washing-up liquid, it creates a mixture that tackles grease, organic dirt and light mineral deposits at the same time.
The key difference from aggressive specialist cleaners is that this mixture remains comparatively gentle, provided you do not scrub with a hard brush or excessive force. This reduces the risk of scratches and permanently dull patches on the plastic.
Risks, limitations – and when the effort is no longer worthwhile
Despite all these tips, even the best household mixture has its limits. If yellowing has penetrated deeply into the material structure, it can only be reduced to a certain extent. Very old furniture left unprotected for a long time often has permanent colour changes.
An overly stiff brush or abrasive scouring pad can scratch plastic permanently. The surface may look ‘cleaner’ in the short term, but it will collect even more dirt afterwards and become dull again more quickly. If you are unsure, always test the cleaning method on an inconspicuous corner first.
It is worth weighing the work against the benefit. A major restoration job is not always worthwhile for a very cheap, 15-year-old set. On the other hand, a more expensive, sturdy ensemble may provide many more seasons of use after a few hours of work.
This is also relevant for anyone focused on sustainability: every patio set saved reduces the material, energy and transport needed for a replacement. If you do eventually dispose of the furniture, ask your local recycling service whether the plastic can be recycled as a material. That at least helps keep its environmental footprint limited.




Comments
No comments yet. Be the first to comment!
Leave a Comment