
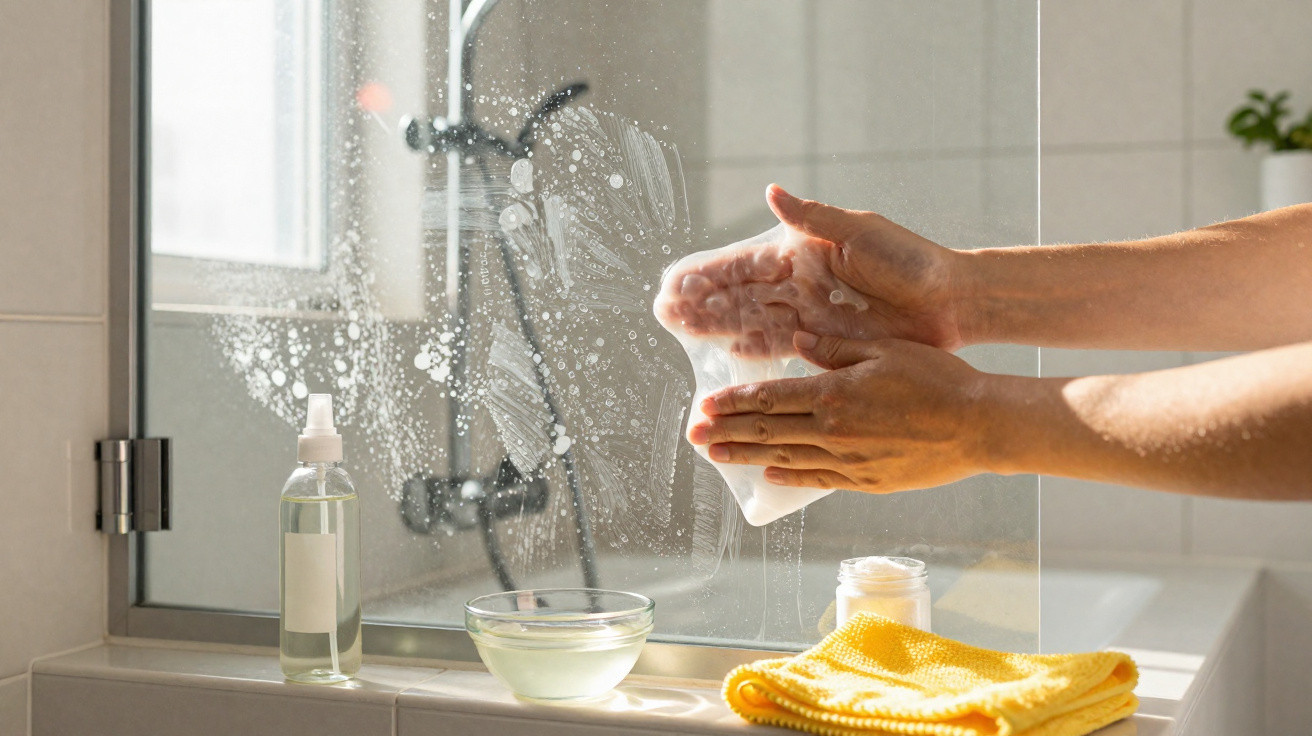
Many households know the same sight: white marks, dull glass, an ever-growing collection of sprays from the chemist – yet the shower screen still looks greyed over. A simple DIY method is now circulating on social media to tackle precisely this issue: a homemade gel cleaner made from three ingredients that most people already keep in the kitchen cupboard.
Why shower glass becomes cloudy so quickly
Anyone living in a hard-water area will eventually notice it in the shower. Minerals dissolved in warm water, including calcium and magnesium carbonates, settle on the glass while you shower. Once the water dries, it leaves behind the familiar white spots and a dull film.
Over time, this layer can build into a proper crust. More soap, shampoo and shower gel then stick to it. Eventually, the glass looks not only cloudy but genuinely worn: tiny specks, yellowish patches and a texture that no longer feels smooth.
“The longer limescale is left in place, the more firmly it bonds to the glass surface – and even powerful cleaners can then only achieve limited results.”
Out of frustration, many people reach for cream cleaner, abrasive sponges or steel wool. Although these may seem effective at first, they leave fine scratches behind. Limescale settles back into these tiny grooves even more quickly, and the glass permanently loses its shine.
Mild acids rather than scrubbing: the idea behind the gel
Rather than relying on scrubbing, this DIY method uses a different approach: mild acids and plenty of contact time. Limescale is chemically sensitive to acids. Given enough time to work, they dissolve deposits without damaging the glass.
Liquid cleaners quickly run down vertical surfaces. That is where the gel concept comes in: a thickened cleaner clings to the shower screen, stays on the problem areas and can work there undisturbed.
The 3 ingredients almost everyone has at home
This homemade anti-limescale gel cleaner requires only three items:
- Clear household vinegar, around 8% acidity – dissolves mineral deposits
- Citric acid powder – boosts the effect and targets limescale deposits
- Cornflour – creates the gel-like texture
Vinegar and citric acid are considered weak household acids. They are not harmless in concentrated form, but they are considerably less aggressive than many industrial products containing strong acids or chlorine. The cornflour turns the mixture into a gel that performs like an expensive specialist cleaner – but at a far lower cost.
How to make the anti-limescale gel cleaner
Preparation is rather like a brief cooking process and takes around ten minutes:
- Have a glass jar or heatproof measuring jug ready.
- Stir one tablespoon of cornflour into 300 millilitres of cold water until no lumps remain.
- Transfer the mixture to a small saucepan and heat it gently while stirring, until it thickens into a slightly viscous, translucent gel.
- Remove the pan from the heat and allow it to cool briefly.
- Mix in one tablespoon of citric acid.
- Add around 100 millilitres of clear household vinegar and stir thoroughly.
- Leave the mixture to cool, then pour it into an empty, clean bottle or an old dispenser.
The cost is roughly 50p and, depending on the brands chosen, is often significantly lower. One batch will usually last for several cleaning sessions.
“With 50p worth of ingredients, you can replace several bottles of specialist cleaner from the supermarket shelf.”
Using the anti-limescale gel cleaner to restore a clear shower screen
For the gel to deliver its full benefit, the order of the steps matters. Taking a few minutes usually produces a noticeable before-and-after result.
Step 1: Remove loose dirt
First, rinse the glass surface briefly with warm water. Shampoo, soap and dust residues should be removed so that the gel can sit directly on the limescale. A soft cloth is sufficient at this stage – do not use a brush.
Step 2: Apply the gel
Put on gloves. Use a spoon, brush or the bottle itself to apply the gel to dry or only slightly damp glass. Coat heavily affected areas generously, particularly those within the spray zone of the shower head.
Important: do not rub hard. Instead, “lay” the gel onto the surface as a layer. It should cling in place rather than immediately running downwards.
Step 3: Allow time for it to work
Leave the gel on for 15 to 30 minutes, depending on how heavy the deposits are. For especially stubborn crusts, leaving it for an hour may be worthwhile.
“The real ‘magic’ happens while the cleaner is working – not during the scrubbing.”
During this time, the acid reacts with the limescale, loosening and softening it. If necessary, check occasionally whether any dry areas need another application.
Step 4: Clean gently afterwards
Once the contact time has passed, wipe the surface carefully with a soft, non-scratch sponge or microfibre cloth. The deposits will usually now lift away without much effort.
Then rinse everything thoroughly with plenty of water until no gel residue remains visible. Finally, use a lint-free cloth or a shower squeegee to dry the glass, preventing fresh water from drying onto the newly cleaned surface.
What to consider for different materials
Not every shower screen is made from standard toughened glass. Depending on the material, a few adjustments may be sensible.
- Standard glass: Usually unproblematic. The gel can generally be used undiluted.
- Coated glass with anti-limescale protection: Test it first in an inconspicuous corner and dilute with a little water if needed. Follow the manufacturer’s instructions.
- Plastic or acrylic: These surfaces are more sensitive. Make the gel runnier and use soft cloths.
- Tile grout: Short-term use is possible, but do not leave it on for too long so the grout material is not affected.
- Stone such as marble or granite: Do not use acids, as they can leave the surface dull.
How to keep the shower screen clear for longer
Once the time-consuming deep clean is complete, two simple habits can save a great deal of work.
Everyday routine
After showering, use a squeegee to remove water from the glass and tiles. This rarely takes more than a minute, yet it substantially reduces limescale build-up. Alternatively, quickly wipe the surfaces with a microfibre cloth.
You can then schedule a gel “treatment” every few weeks. In very hard-water areas, once a month is entirely reasonable, while in soft-water regions a longer interval is enough.
Common mistakes people make without realising
Typical errors that make shower glass look permanently older than necessary include:
- Using cream cleaner on glass
- Using pan scourers or the abrasive side of a washing-up sponge
- Cleaning only “when it gets really bad” instead of following a regular care routine
- Mixing strong chemicals, for example vinegar and chlorine-containing products
Combining different cleaning products can create toxic fumes. Always use only one cleaner at a time and ventilate the room thoroughly afterwards.
How limescale, vinegar and citric acid work together
This household trick is based on simple chemistry. Limescale consists mainly of calcium carbonate. When it comes into contact with acid, soluble salts, water and carbon dioxide are produced. This applies to both vinegar and citric acid.
Citric acid has the advantage of being a crystalline powder that stores well and is easy to measure. Vinegar also adds a distinctly recognisable “cleaning” character to the smell, which many people associate with cleanliness – although not everyone likes the scent.
When a DIY gel reaches its limits
If glass has gone without care for years, deposits may have penetrated the surface so deeply that even acidic gels cannot remove them completely. In that case, the glass may look etched rather than merely affected by limescale.
In such cases, the method will often at least remove the heaviest film. However, it will no longer become 100% clear. If you are unsure whether a coating is damaged or toughened glass has cracks, seek professional advice when in doubt – particularly for expensive shower enclosures, where a professional assessment is worthwhile.
Despite these limitations, this gel cleaner shows how much can be achieved with simple household ingredients. With three cupboard staples, a little patience and the right technique, a shower screen can often look surprisingly fresh again – without an aggressive chemical smell in the bathroom.


Comments
No comments yet. Be the first to comment!
Leave a Comment