
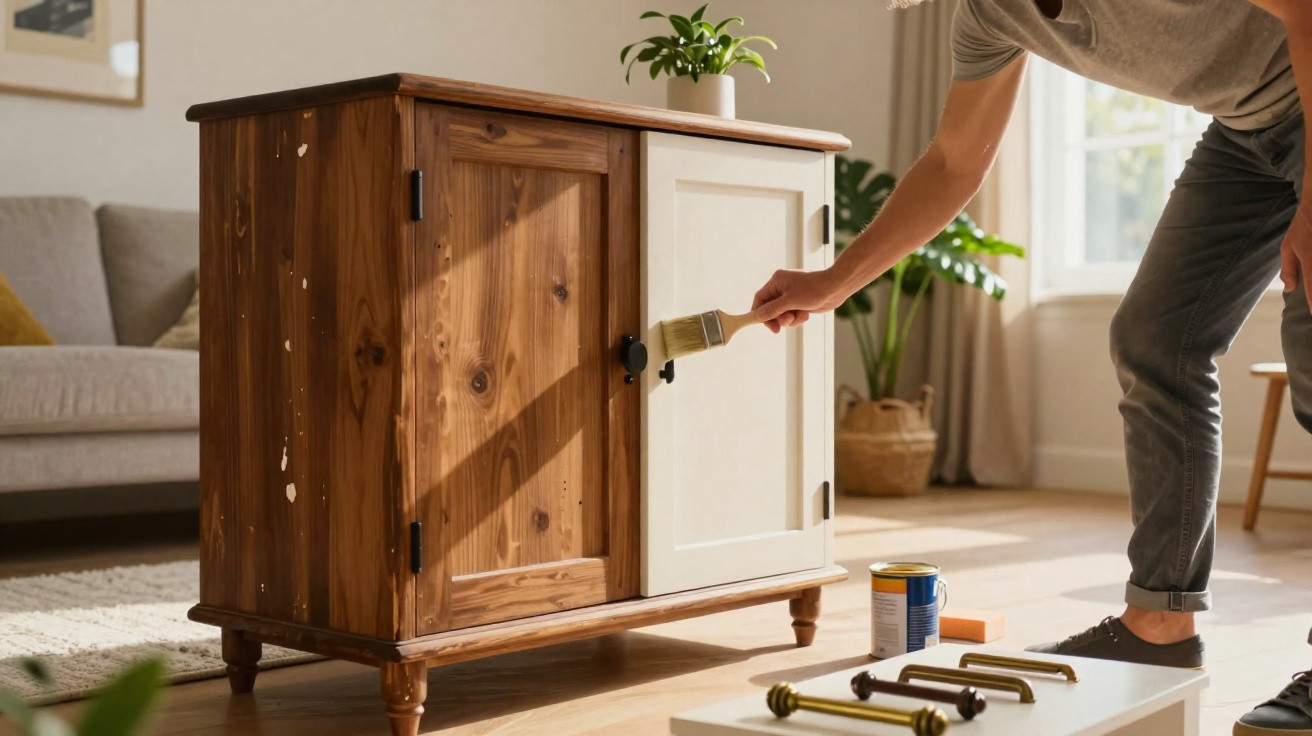
Many people are attached to old family furniture, yet feel frustrated every day by how heavy and dated it looks in the room. Rather than throwing away a substantial buffet cabinet or replacing it with cheaply made furniture, there is a straightforward way to turn these pieces into real focal points with modest effort and little expense.
Why old furniture should not be sent to the tip
A large dark solid-wood wardrobe, an ornate chest of drawers or the hefty buffet cabinet from the dining room: countless homes contain precisely these kinds of pieces. They are sturdy and full of history, but often no longer suit pale parquet flooring, understated sofas and minimalist décor.
“Anyone who modernises an old piece of furniture saves money, protects resources and keeps a piece of family history – simply with a new look.”
Instead of buying new, an increasing number of interiors enthusiasts are choosing to transform what they already have. The principle is simple:
- The characterful carcass is retained.
- The colour and hardware are completely reimagined.
- Afterwards, the furniture fits into the interior like a contemporary designer piece.
The financial benefit is significant. Primer, paint, a sanding sponge, protective covering and new handles will generally cost between €30 and €100, depending on the piece’s size and condition. A comparable new item of solid-wood furniture can easily cost five to ten times as much.
There is also the sentimental value. Many wardrobes and chests of drawers once belonged to grandparents or were bought as wedding furniture. Rather than giving away those memories, a fresh coat of paint and new handles allow them to become a natural part of a modern home scheme.
Essential preparation before the first brushstroke
The real secret is not the paint but the preparation. Cutting corners at this stage can lead to peeling patches or visible imperfections later on.
Clean thoroughly rather than painting straight away
The first job is cleaning. Old polish residue, grease marks from hands and a thick layer of dust are often invisible on the surface. All of these prevent primer and paint from adhering properly.
- Open every door and remove the drawers.
- Wipe all surfaces carefully with a mild cleaner or dedicated degreaser.
- Pay particular attention to edges, handle areas and moulded details.
- Dry everything with a cloth, then allow it to dry fully.
It is then worth protecting the surrounding floor with sheeting or decorators’ fleece. Cover a section of the wall and the skirting boards with masking tape too, so that stray paint splashes do not become a nuisance.
Remove the hardware and inspect weak points
Unscrew all handles, knobs and key escutcheons before painting. This makes every corner accessible and prevents unattractive paint edges. It is also the ideal opportunity to check whether drawers stick, hinges are loose or the wood has cracks.
Small areas of damage can be filled with wood filler before priming. Once it has dried, use a sanding sponge to create smooth transitions. Spending this extra quarter of an hour produces a much more refined finish later.
Primer: the unsung star of the whole project
Many DIY enthusiasts would prefer to start immediately with the coloured coat. This is exactly where a professional-looking result differs from a frustrating one. The right primer is crucial, particularly on old dark wood or previously lacquered surfaces.
“A good primer saves time, covers old colours and turns a patchy cabinet into a perfect canvas.”
Apply the primer thinly but evenly with a roller and brush. Make sure every visible surface is covered, including the inside edges of doors and drawer fronts. It then needs sufficient drying time. Applying colour too soon risks a tacky finish and weaker adhesion.
Turning dark, heavy furniture into a light modern feature
Choosing the right colour
Rather than bold shades, many DIY experts favour light, calm tones for inherited furniture. Creamy white, warm beige or soft grey instantly make a room feel lighter. They visually reduce the size of imposing dark cabinets and work with almost any flooring or sofa.
A water-based satin-finish paint is well suited to the job. It has less odour, dries relatively quickly and is easy to control with a roller and brush.
Work in thin coats
Two or three fine coats are more effective than one thick layer of paint. In practice, follow this order:
- Apply the first thin coat to large areas with a foam roller.
- Use a small paintbrush to finish edges, mouldings and corners.
- Allow the paint to dry completely.
- Apply the second coat and leave it to dry again.
- Add a third, very thin coat if the wood is particularly dark.
Small drips can be corrected while painting with a lightly dampened cloth and a little thinner. Ideally, leave doors slightly open as they are painted so they do not stick together afterwards.
Handles, details and care: how furniture truly looks new
Paint changes the character of a piece, while the hardware defines its style. This is what determines whether the cabinet feels Scandinavian, elegant or industrial.
Define the design with new handles
Gold-coloured knobs add a refined touch to a pale carcass, black bar handles complement modern loft interiors, and leather pulls create a warm, handcrafted feel. Anyone wishing to keep their existing fittings can refresh them with matt gold or black spray paint.
| Handle type | Effect | Suitable style |
|---|---|---|
| Matt gold knobs | Elegant, subtly glamorous | Modern Classic, Boho |
| Black bar handles | Clean, graphic | Industrial, Minimal |
| Leather handles | Warm, homely | Scandi, country house |
After the final coat of paint, apply a protective layer of clear varnish or wax, depending on the preferred level of sheen. This guards against scratches, stains and moisture. A soft cloth and mild cleaner will keep the surface looking good for a long time.
Common mistakes that are easy to avoid
Those refurbishing a large piece of furniture for the first time often make similar mistakes. Three are especially common:
- Insufficient cleaning: grease and dust cause patches to peel.
- Paint coats that are too thick: drips form and doors stick shut.
- No drying time: impatience leaves fingerprints and dents.
Patience pays off: it is better to allow an extra day than to shake your head every time you walk past the cabinet afterwards.
How this trend can be combined with other interior ideas
This method is not limited to one large inherited piece. Smaller side tables, bedside cabinets and old chairs can all be updated using the same steps. Choosing one colour throughout creates a consistent thread in the home without having to buy everything new.
There is another effect too: once you have seen how dramatically old furniture can be transformed, you will look very differently at yellowed chests of drawers and small cabinets on your next visit to a car boot sale. With a little imagination, the future pale statement piece in your own hallway is already visible beneath the dark lacquer.
Over time, this creates an interior that does not look as though it came from a catalogue, but instead reflects personality. Every piece tells a story while remaining modern and practical for everyday life. This blend of emotion, sustainability and style is exactly what makes furniture reloving so appealing – and finally brings Grandma’s cabinet out of its dusty corner.





Comments
No comments yet. Be the first to comment!
Leave a Comment