
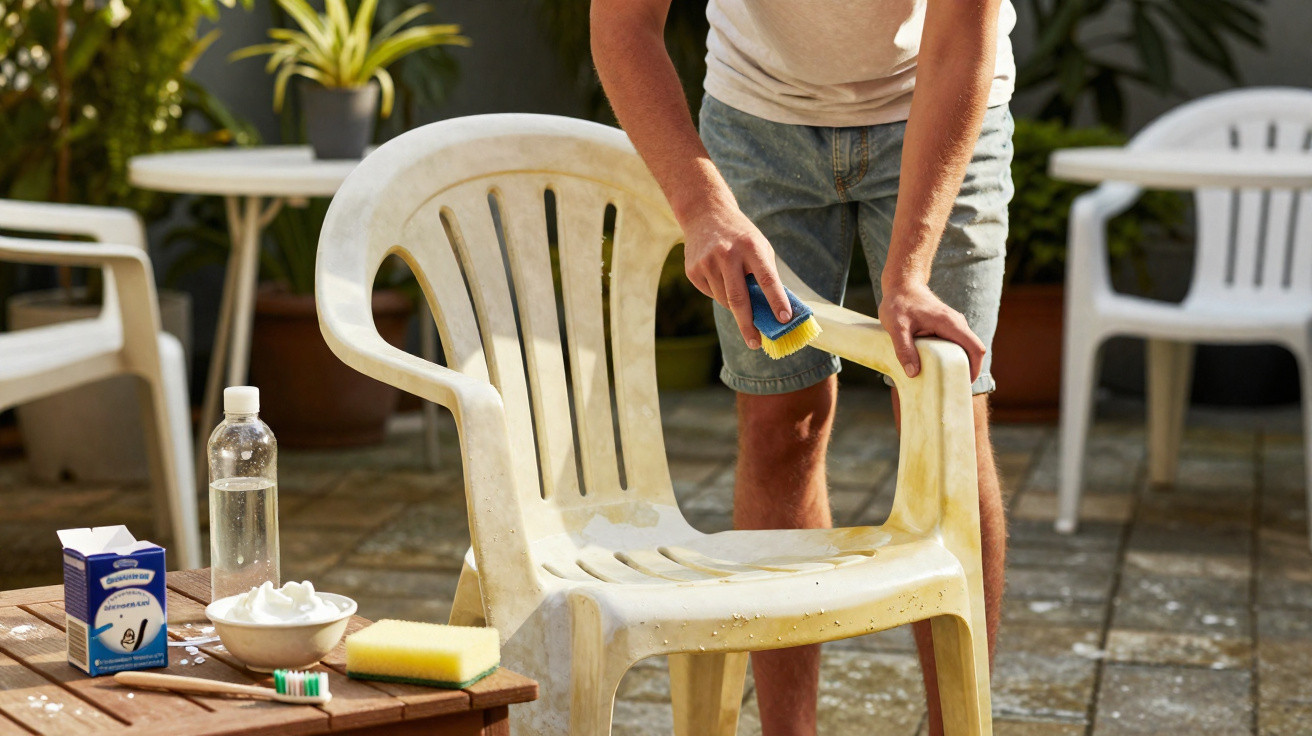
There is no need to take them straight to the tip.
Many people only notice how battered the garden really looks during the first warm weekend: the table is stained, the stackable chairs are dull and yellowed, and the whole set appears older than it actually is. Rather than buying costly replacements, plastic furniture can often be restored remarkably well with a straightforward blend of cleaning products from the kitchen cupboard.
Why outdoor plastic furniture quickly looks shabby
Plastic is considered durable, easy to maintain and weather-resistant. Rain, hail and damp air are usually no problem for a plastic garden set. The trouble comes from elsewhere: sunlight, changes in temperature and dirt all affect its surface.
Over time, UV radiation makes the plastic microscopically rougher. It loses its sheen, turns dull and becomes slightly porous. Those tiny pores then trap everything drifting around outdoors: dust, pollen, soot, algae and mould spores. These deposits are especially noticeable on pale or white plastic, which can soon look grey, beige or yellowish.
It is important to distinguish between two conditions:
- Simply dirty: The plastic is dull, stained, slightly greyish or greenish, but still feels smooth and sturdy.
- Already damaged: The surface looks chalky, rubs off when touched, or the chair has small cracks or breaks.
In the first case, thorough cleaning with the right product is enough. In the second, the material has genuinely aged. The only options then are to disguise it, for example with specialist plastic paint, or dispose of it properly.
Before reaching for a brush, carry out a safety check: a cracked plastic chair can suddenly buckle under weight.
The simple kitchen-cupboard mix for plastic garden furniture
For most yellowed or dull plastic garden furniture, a combination of three household staples is sufficient: soapy water, white vinegar cleaner and bicarbonate of soda.
Ingredients that tackle grey and yellow discolouration
- warm water
- standard white vinegar cleaner or distilled white vinegar
- bicarbonate of soda; for extreme cases, a small amount of washing soda as well
- liquid soft soap, household soap or a little washing-up liquid
- optional: a cleaning stone for heavily soiled white surfaces
For a bucket containing around three litres of warm water, the following proportions work well:
- about 250 millilitres of white vinegar cleaner
- 3 tablespoons of bicarbonate of soda
- a generous amount of soap or washing-up liquid
The mixture will begin to foam gently, which is intentional. Use it immediately while the reaction is still active.
Step-by-step method for brighter garden furniture
- Remove loose debris: First brush away cobwebs, leaves and dry dust with a hand brush or soft brush.
- Wet the surfaces: Briefly rinse the furniture with clean water so that the cleaner adheres more effectively.
- Apply the mixture: Dip a sponge or soft cloth into the bucket and work the solution generously over the surfaces.
- Allow time to work: Leave it for 10 to 15 minutes on visible stains, grey film or yellowed areas.
- Scrub gently: Go over the furniture with a soft brush or the rough, non-scratching side of a sponge.
- Rinse thoroughly: Use a garden hose or watering can to wash everything off until no foam remains.
- Leave to dry: Wipe it dry with a microfibre cloth to prevent water marks.
On yellowed white plastic, extra bicarbonate of soda boosts the effect; use it more sparingly on coloured plastic to avoid making the colour dull.
What changes for heavily yellowed or coloured furniture
Snow-white plastic furniture that has spent several summers in full sun often develops a stubborn yellow tinge. In this case, a more targeted treatment can be used.
White furniture: dealing with extreme cases
To treat badly discoloured areas, work more locally:
- mix bicarbonate of soda or a small amount of washing soda with water to make a thick paste
- apply the paste directly to the yellow areas
- leave it for 10 to 20 minutes, without allowing it to dry out
- massage it in with a soft brush, then rinse thoroughly
A cleaning stone can help lift embedded road grime and deposits. Always test first on an inconspicuous area to see how the plastic reacts.
Coloured and anthracite garden sets
For grey, green or other coloured seating sets, focus mainly on soapy water and vinegar. Too much bicarbonate of soda or washing soda can bleach the surface and leave the colour looking duller. Make the mixture milder instead, but allow it to work for slightly longer.
These mistakes can permanently ruin plastic furniture
Many people routinely use products that work well in the bathroom or kitchen but can damage outdoor plastic furniture.
- Chlorine cleaners and strong bleach: They may initially remove stains, but they attack the plastic, making it brittle and patchy.
- Harsh solvents: Products designed for limescale or ovens dissolve not only dirt but also the surface itself.
- Steel wool and abrasive scouring pads: These leave fine scratches where dirt can collect again, so the chair soon looks dirty once more.
- Pressure washers: On plastic that has already aged, the powerful jet can cause pieces of material to flake away.
- Oil or cooking oil for “polishing”: It sounds clever, but it does not work. The furniture becomes greasy, attracts dust and soon looks worse than before.
Scratching, bleaching or roughening plastic may give a brief sense of success, but its condition will deteriorate significantly in the long term.
Enjoy your garden set for longer with minimal effort
A small routine prevents the furniture from looking every spring as though it came from the shed of an abandoned campsite. It takes hardly any time, yet stops stubborn deposits from building up.
Cleaning routine during the season
In the months when you regularly sit outside, a few simple measures are enough:
- wipe the furniture down with warm soapy water every two weeks
- do not leave pollen and bird droppings sitting for weeks
- avoid leaving glasses and pots permanently without coasters, as they can leave rings
Stacking the chairs when they are not in use and placing them under a parasol or canopy significantly reduces direct UV exposure. This visibly prolongs their shine.
Proper storage in the colder months
At the end of the season, it is worth taking a slightly more thorough approach:
- give the garden furniture one intensive clean
- allow it to dry completely so moisture is not left in crevices
- if possible, store it in a shed, garage or dry cellar
- alternatively, use sturdy protective covers that allow air to circulate
Although plastic does not rust or rot, constant dampness, frost and winter sun cause the material to age more quickly. Protecting it from these stresses means the garden set will last longer and need replacing far less often.
When repair is no longer worthwhile
Even the best cleaning tricks have one limit: safety. A chair with cracks in its legs, or a seat that creaks when pressed, no longer belongs on the patio and should be disposed of. Paint cannot restore structural strength.
Anyone wishing to improve the appearance of old furniture can use specialist paints for plastic after cleaning. They conceal faded colours and minor visual defects. The surfaces must first be completely grease-free and dry, otherwise the paint will not adhere.
For many households, the combination makes sense: clean thoroughly once using household remedies, discard any critical pieces and continue using the rest with proper care. This saves money, reduces waste and makes summer more enjoyable on chairs that no longer bring the last trip to the tip to mind.




Comments
No comments yet. Be the first to comment!
Leave a Comment