
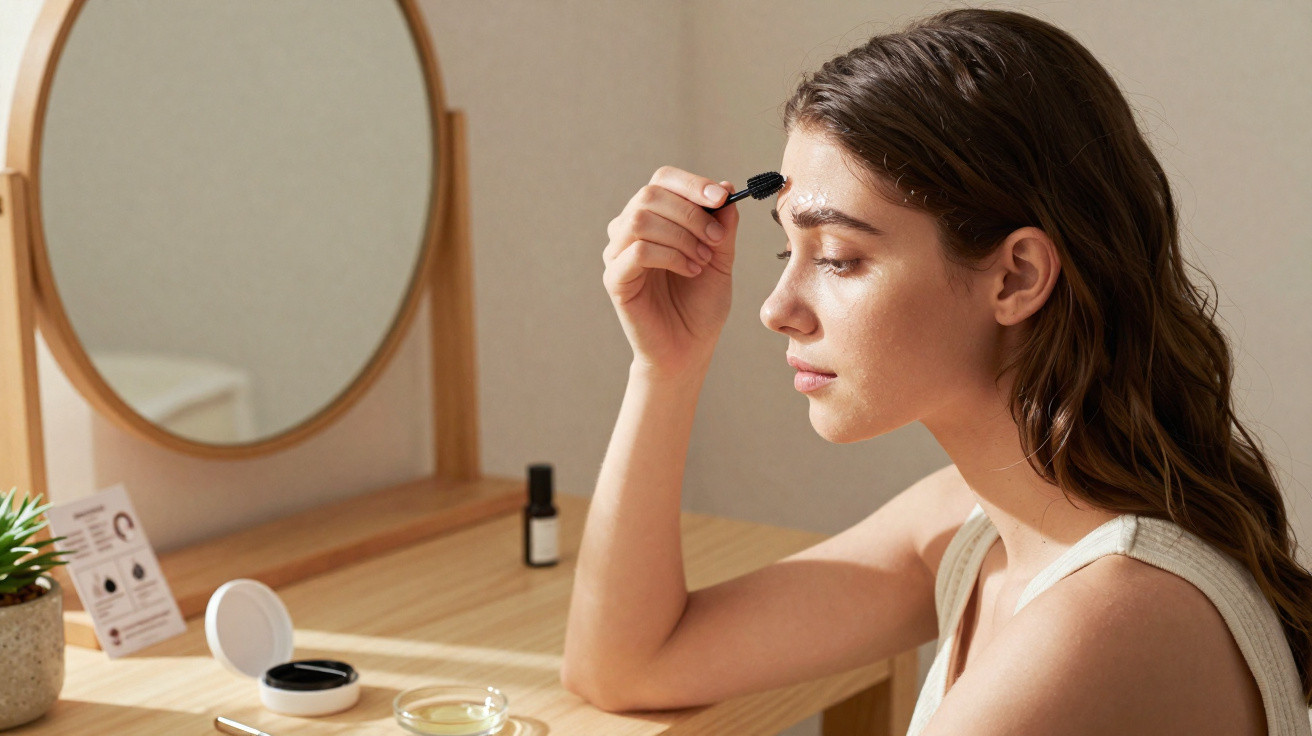
The first time you spot brow lamination in real life, it is often on somebody else. Perhaps it is a colleague in the lift or someone waiting for a coffee. Their brows rise like delicately brushed feathers, making their entire face appear more lifted, polished and alert. You look a little too long, trying to work out whether it is microblading, a filter or simply genetics you missed out on. Then they casually tell you: “Oh, it’s just lamination, I had it done.” Immediately, you think of the price listed online, the sharp salon chemical scent and the slightly awkward 45 minutes spent staring at your reflection beneath fluorescent lights.
Later, you are scrolling through brow videos at midnight: partly certain that it is too technical to attempt yourself, partly drawn in by the promise of fuller, thicker brows. Between those two thoughts, one quieter idea starts to form.
What if the “salon” was your bathroom mirror?
Why brow lamination feels like a quiet revolution
Something changed when brows stopped being finely pencilled lines and began to occupy more space. Full, brushed-up, slightly untamed brows altered the way faces appeared in selfies, Zoom calls and even unflattering bathroom light. Rather than shouting “I spent an hour doing my makeup”, they seemed to say, “This is my face, only better.”
Brow lamination appeared in the middle of that change. Rather than tattooing the skin or filling brows in, it rearranges the hairs already there, one strand at a time. There are no needles and no pigment: just hairs gently encouraged into a different direction.
For something so subtle, that is what makes it feel unexpectedly radical.
A scroll through TikTok or Instagram Reels reveals the familiar sequence: a “before” clip of low, uneven brows followed by a satisfying “after” of fluffy, upright strokes fit for a campaign. Creators usually move close to the lens and wiggle their brows as though proving that they are genuine. Many of these videos are made at home, in bedrooms with unmade beds and slightly off-centre ring lights.
One creator from London even recorded a comparison: salon lamination on one brow and a DIY kit on the other. Viewers were asked to decide which side appeared more professionally done. The comments were chaotic, yet the outcome was obvious: most people chose incorrectly.
That small experiment raised an awkward question: if a £60 treatment can be mistaken for a £15 kit, what are we actually paying for?
The principle behind brow lamination is simple. Brow hairs have a “memory” that can be gently reset. Lamination lotions soften the hair bonds before fixing them in a new position, rather like a perm but flatter and more precise. Once hairs are combed up and out, every strand creates more visible volume.
Areas that look sparse seem less bare because neighbouring hairs are lifted and cover more skin. Even short hairs you had hardly noticed become part of the effect. This is why lamination creates the appearance of thicker, fuller brows without one additional pencil stroke.
Once you understand it as changing hair direction rather than unexplained “magic”, it no longer feels like a secret reserved for salons.
A simple at-home brow lamination routine with professional-looking results
The basic process is more manageable than it sounds. First, select a gentle brow lamination kit clearly designed for home use. Read the instructions fully before starting, simply so you can picture each stage. Cleanse your brows with a mild, oil-free cleanser, then dry them thoroughly. Any oily residue will reduce how long the result lasts.
Use a small brush to apply the first lotion only to the brow hairs, avoiding the skin. Take your time and comb the hairs upwards and slightly outwards with a spoolie, creating a fan-like shape. This is what gives the brows their lifted, fluffy finish without making them resemble antennae.
Keep the product on for precisely the duration stated by the kit, remove it gently, then continue with the second solution while repeating the same brushing pattern. Your technique matters more than the brand name printed on the bottle.
This stage worries many people: the timing, matching both brows and the risk of “overdoing it”. In reality, the usual problem is not applying too much strength but working too quickly. When the brushing stage is rushed, brows can look uneven or sharply spiked rather than soft and full. Spend an extra 30 seconds smoothing the arch, guiding the tail and pressing down loose hairs with the flat side of the spoolie.
We have all watched a beauty tutorial at 1.5x speed, then wondered why our attempt looked like an early draft. Let your own routine take longer than the video.
If your skin is sensitive, perform a small patch test at the side of your face the previous day. Mild tingling around the brow area may be normal; burning is not. If you are unsure, remove the product, pause, and use a shorter processing time next time.
“At first I was scared of ruining my brows,” says Léa, 29, who now laminates every six weeks at home. “Then I realized they’re just hairs. They grow back. Once I relaxed, the results got better.”
- Pick a gentle, reliable kit formulated specifically for brows rather than a general hair-perm product.
- Apply very small amounts and ensure the formula stays on the hairs instead of spreading across the skin.
- Divide brushing into three sections: inner brow (straight upwards), middle (upwards and slightly outwards), and tail (more outwards than upwards).
- Follow the stated timings, even when you are tempted to “just add two more minutes” for stronger hold.
- For a few nights afterwards, use a nourishing oil or serum to keep brows supple rather than crispy.
Living with laminated brows: small changes, noticeable impact
After lamination, the unexpected part is how little maintenance brows require each day. Brush them quickly in the morning, add a little clear gel if you prefer firmer hold, and they remain in position as though you had spent fifteen careful minutes filling, shaping and tidying the edges. Your makeup routine becomes quietly shorter.
There is a small psychological benefit too. Seeing structured brows in the mirror can make you feel more polished, even on days when everything else has been improvised. Brows are like coat hangers for the rest of the face: when they’re in place, everything else looks less chaotic.
Honestly, when it is only makeup, hardly anyone manages this every day with complete patience and precision.
| Key point | Detail | Value for the reader |
|---|---|---|
| Gentle DIY lamination works | At-home kits with clear processing times and brow-specific formulas can match salon results | Access to fuller, thicker brows without repeated salon costs |
| Technique beats products | Brushing direction, timing and a light-handed application determine the finished look more than branding does | Confidence to create professional-looking brows with affordable tools |
| Care keeps brows healthy | Nourishing oils, breaks between sessions and paying attention to your skin help prevent damage | Long-term, natural-looking results that still feel like “your” brows |
FAQ:
- Question 1 How long does DIY brow lamination usually last?
- Question 2 Can I laminate my brows if they’re naturally very thin or sparse?
- Question 3 Is brow lamination safe for sensitive skin?
- Question 4 What’s the ideal gap between two lamination sessions?
- Question 5 Do I still need brow makeup after lamination?



Comments
No comments yet. Be the first to comment!
Leave a Comment