
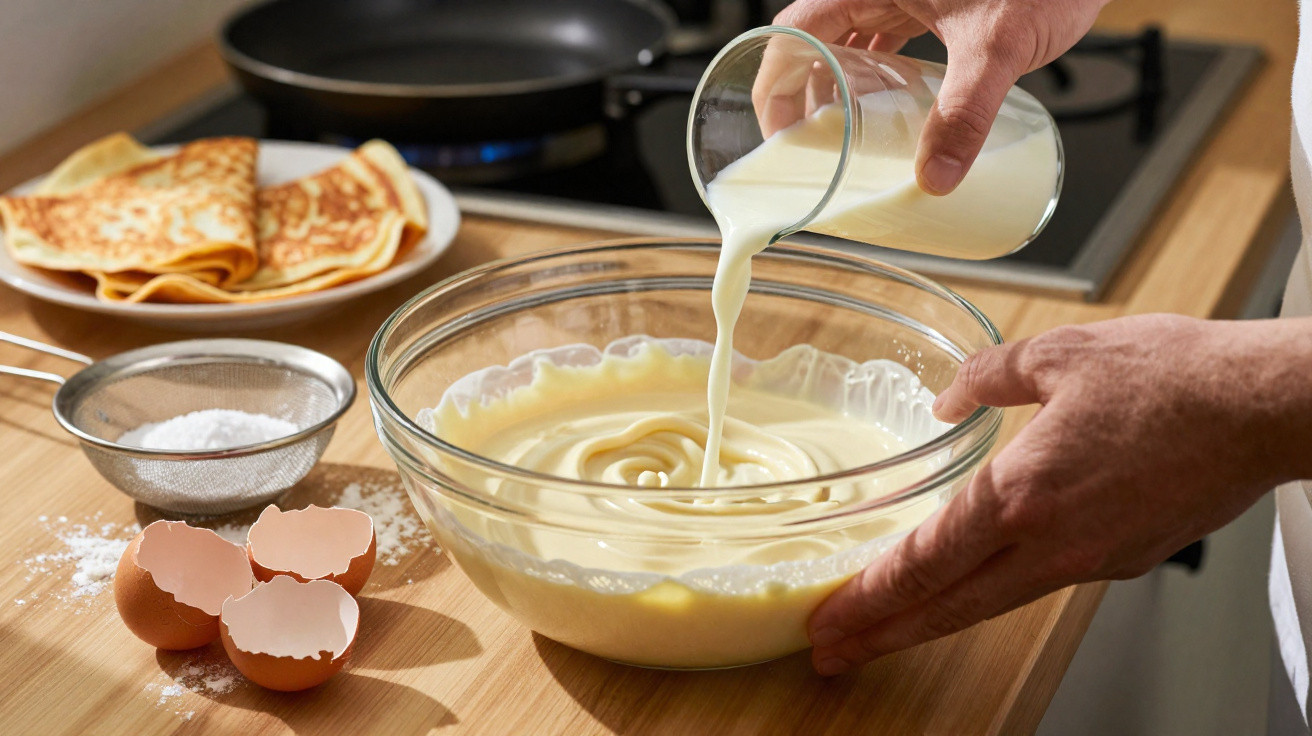
Every home cook knows the problem: a bowl of crêpe batter may appear beautifully silky at the surface while stubborn, sticky lumps are lurking below.
Whether in Parisian crêperies or during brunch at home, experienced cooks rely on one understated technique. This almost imperceptible change to the ingredient order stops lumps from forming in the first place.
The hidden culprit behind lumpy crêpe batter
Lumps in crêpe batter are about more than an unpleasant texture. They can make crêpes more difficult to digest and spoil the delicate, paper-thin, melt-in-the-mouth finish that people expect.
Catherine Merdy-Goasdoué, a professional trainer recognised in Brittany’s crêpe-making circles, says that lumps are rarely accidental. They are small clusters in which egg, uncooked flour and, at times, sugar have bound together.
Those little balls in your batter are often “hearts” of egg and flour that never had a chance to blend properly.
After these clumps have developed, whisking will seldom remove them fully. Many home cooks turn to a sieve or blender as a last-minute solution. Although this can help, it may overwork the batter, alter its consistency and still leave a slightly grainy texture.
The one simple move pros use every time
Despite the method recommended in many cookbooks - making a well in the flour, adding eggs to the centre and then incorporating the milk - seasoned crêpe makers generally prefer another approach.
They begin with the eggs rather than the flour.
Step one: beat the eggs like an omelette
Rather than breaking eggs directly over flour, Merdy-Goasdoué whisks them separately first, in the same way as she would for an omelette.
Whisking the eggs on their own first breaks down the yolks and whites evenly, making them far less likely to trap flour into lumps.
She also highlights an important point: when sugar and egg yolk come together too soon under unsuitable conditions, they can cause trouble. Sugar has a tendency to create tiny “crystals” with the yolk, which become the centre of many lumps that later appear in the batter.
Whisking the eggs until they are entirely fluid before adding anything else almost completely removes this risk.
Step two: dissolve sugar and salt first
After the eggs have been thoroughly beaten, she incorporates the sugar and salt directly into them, continuing to whisk until both have dissolved.
This serves two purposes:
- It spreads the sugar evenly, preventing it from gathering around dry flour.
- It seasons the mixture from the outset, avoiding isolated pockets that are too salty or too sweet.
At this point, the mixture should be shiny and even, with no visible grains collecting at the base of the bowl.
Why adding all the milk at once ruins your texture
Although many recipes tell you to add the milk little by little, they often fail to explain the reason. Merdy-Goasdoué is clear: flooding the flour with liquid is how lumps develop.
Her method turns the usual action on its head.
The controlled liquid method
This is the sequence she follows:
| Step | Action | Reason |
|---|---|---|
| 1 | Whisk eggs until smooth | Stops yolk-based clumps from forming |
| 2 | Whisk in sugar and salt | Dissolves crystals before the flour is added |
| 3 | Add about three-quarters of the milk | Produces a fluid base without making it watery |
| 4 | Tip all the flour on top | Helps the flour hydrate uniformly |
| 5 | Whisk until a thick, smooth paste forms | Removes possible lumps at an early stage |
| 6 | Add the remaining milk in 3–4 additions | Gradually loosens the paste to the right consistency |
The goal is to form a thick, lump‑free paste first, then gently relax it with more milk until it becomes a light batter.
When all the milk is added in one go, the flour effectively “swims” in the liquid. The exterior of every particle hydrates and seals while its centre remains dry. These miniature capsules are extremely difficult to break up without forceful mixing.
What a perfect batter should look and feel like
When the process is complete, the batter should have several recognisable qualities. It should flow from a ladle in a smooth ribbon, leaving behind a light coating that quickly disappears back into the mixture without streaking.
Dip a spoon into the batter and its back should be covered with a fine, level film. You should be able to draw through it with a finger; the line will remain, but its edges should not look thick or lumpy.
Professionals commonly leave batter to rest for at least 30 minutes. This gives the flour time to hydrate fully and allows the gluten to relax. With the technique above already preventing lumps, resting improves quality rather than acting as a rescue measure.
Common mistakes that keep causing lumps
Even if the ingredients are added in the right order, certain habits can still prevent a smooth batter. Trainers such as Merdy-Goasdoué regularly encounter the same mistakes in beginner crêpe classes:
- Using milk straight from the refrigerator while it is very cold, which slows down flour hydration.
- Adding flour in scattered small amounts rather than tipping it in at once.
- Repeatedly changing between a whisk and a spoon, interrupting the mixing process.
- Whisking only across the top of the bowl instead of reaching the base and sides.
Milk that is slightly warm or at room temperature is absorbed more easily. Using a good balloon whisk in steady, firm movements - rather than aggressive ones - creates an even consistency without overworking the batter.
From batter to pan: how this affects cooking
A smooth, lump-free crêpe batter offers more than a better-looking bowl. It also performs differently in a hot frying pan or on a billig, the traditional crêpe griddle.
Without clumps, the batter spreads rapidly and evenly. It can be swirled around a pan or drawn out with a wooden rake in one fluid motion. Because the layer is even, it cooks at the same rate throughout, preventing thin sections from burning while thicker patches remain pale and undercooked.
Uniform batter means consistent colour, even browning and that fine lace along the edges people associate with expert crêpe makers.
The texture changes as well. With no concealed pockets of raw flour or compacted egg, the crêpe is lighter and easier to digest. This is particularly useful when serving several crêpes at once or using rich fillings such as cheese and ham.
When things go wrong: realistic rescue options
If you are already halfway through mixing a poorly combined bowl, the professional advice is still to correct the method next time instead of trying to compensate too heavily. However, a few damage-limitation options are available.
A fine sieve will remove the largest lumps. A brief use of a hand blender can also help, although it may develop extra gluten and make the crêpes a little chewier. If you take this approach, blend only very briefly and then give the batter a longer rest so that it can relax.
Some chefs also loosen a troublesome batter with a small extra splash of milk or water before whisking more firmly. This relaxes the structure around the clumps and can sometimes break them apart. It is less effective than using the correct technique from the beginning, but it may save a batch when guests are about to arrive.
Extra tips: flours, intolerance and flavour twists
Many people now test buckwheat flour, gluten-free blends and plant-based milks. The same essential process applies: whisk the eggs first, manage the liquid carefully and make a smooth paste before thinning it.
Buckwheat batter, commonly used for savoury Breton galettes, may thicken as it rests, meaning that a little extra water might be required immediately before cooking. With gluten-free flours, gentle but complete whisking is particularly important because they do not form networks in the same way as wheat flour and settle more quickly at the bottom of the bowl.
This technique also works well for plant-based versions. If eggs are omitted entirely, recreate the “omelette step” by thoroughly mixing the liquid base with the sugar and salt before adding flour to it. The principle is unchanged: avoid allowing dry ingredients to clump in an excessive quantity of liquid.
For families, this organised approach can soon become part of a weekend routine. Children can take responsibility for individual tasks - whisking the eggs, adding the sugar or pouring in the final milk - while adults manage the timing and the heat of the pan. Altering the order may seem insignificant, but after watching perfectly smooth batter flow onto a hot cooking surface, it is difficult to return to previous habits.

Comments
No comments yet. Be the first to comment!
Leave a Comment